How to Read Codes on OBD1: Complete Vehicle Diagnostic Guide
How to read codes on OBD1 depends on the vehicle manufacturer, model, engine, and year. Unlike OBD2, OBD1 was not built around one universal connector or code-reading procedure. Many older vehicles allow you to retrieve codes without a scanner by activating diagnostic mode and counting flashes from the Check Engine Light.
The complete details are explained below. In this article, you will learn how OBD1 diagnostic systems work, how to identify an OBD1 vehicle, how flash codes are displayed, and how code-reading procedures differ across GM, Ford, Toyota, Honda, and Chrysler vehicles. You will also learn which safety precautions to follow and what to do after retrieving a code.
How to Read Codes on OBD1 Vehicles
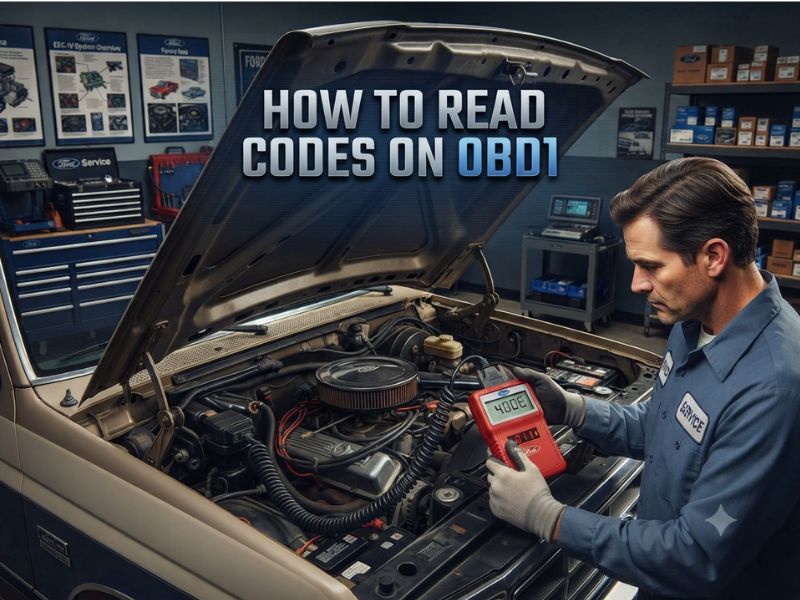
To read codes on an OBD1 vehicle, you normally locate the manufacturer-specific diagnostic connector, activate its self-diagnostic mode, turn the ignition on, and count the Check Engine Light flashes.
A typical OBD1 code-reading process looks like this:
- Confirm that the vehicle uses OBD1.
- Locate the correct diagnostic connector.
- Identify the approved diagnostic terminals.
- Activate diagnostic mode using the manufacturer’s procedure.
- Turn the ignition to the required position.
- Count and record the warning-light flashes.
- Compare the number with a vehicle-specific code chart.
This is only a general overview. The exact terminals and procedure are different for each manufacturer. You should never connect random diagnostic pins based on a generic online diagram.
For example, many older GM vehicles use two terminals in an under-dash ALDL connector. Many Toyota models use labeled terminals inside an under-hood diagnostic box. Honda often uses a two-pin service connector, while Ford uses separate self-test input and output connectors.
What Is an OBD1 Diagnostic System?
OBD1, or first-generation onboard diagnostics, is a general name used for manufacturer-specific electronic diagnostic systems that existed before standardized OBD2 became common.
These systems allowed the engine control computer to monitor sensors, circuits, fuel delivery, ignition operation, and emissions-related components. When the computer detected an abnormal condition, it could store a diagnostic trouble code and illuminate the Check Engine Light or Service Engine Soon light.
OBD1 systems can monitor problems involving components such as oxygen sensors, throttle position sensors, coolant temperature sensors, airflow sensors, ignition signals, fuel injectors, EGR systems, and idle controls.
However, OBD1 was not standardized across the automotive industry. Manufacturers used different connectors, terminal names, code formats, test procedures, and code definitions.
A code number from one manufacturer may mean something completely different on another vehicle. Even vehicles from the same brand can use different definitions depending on the engine and production year.
How to Tell Whether Your Vehicle Uses OBD1
Production year provides a useful clue, but it is not the only way to identify the diagnostic system.
Many vehicles made before the mid-1990s use a manufacturer-specific OBD1 system. Most passenger vehicles sold in the United States from the 1996 model year onward use standardized OBD2, although transitional vehicles can create confusion.
Look at the diagnostic connector. A standard OBD2 vehicle normally has a 16-pin trapezoid-shaped connector under the driver’s side dashboard.
An OBD1 vehicle may instead have a 12-pin rectangular connector, an under-hood diagnostic box, separate test connectors, or a small two-pin service plug.
Some transitional vehicles have an OBD2-shaped connector but still use manufacturer-specific electronics. The connector shape alone may therefore be insufficient.
The safest approach is to check the vehicle’s emissions label, owner’s manual, factory service information, or a reliable year-and-engine application guide.
How OBD1 Flash Codes Work
Many OBD1 vehicles communicate stored codes through flashes of the Malfunction Indicator Lamp, commonly called the Check Engine Light.
The light normally uses groups of flashes to represent numbers. A pause separates digits, and a longer pause separates different codes.
For example, a two-digit code may appear as three flashes, a short pause, and four flashes. That pattern would usually represent code 34.
The control module may repeat each code two or three times before moving to the next one. If multiple codes are stored, they may be displayed from the lowest number to the highest, although this depends on the manufacturer.
Some systems use short and long flashes. A long flash may represent a group of ten, while a short flash represents one. Other systems simply use equal flashes with pauses between digits.
Ford may output two-digit or three-digit self-test codes depending on the system and year. Certain vehicles may also separate active faults from memory codes.
Record the complete sequence at least twice before interpreting it. Miscounting one flash can lead you toward the wrong circuit.
How to Read GM OBD1 Codes
Many older Chevrolet, GMC, Buick, Pontiac, Oldsmobile, and Cadillac vehicles use an ALDL, or Assembly Line Diagnostic Link, under the driver’s side dashboard.
On many common GM applications, diagnostic mode is activated by connecting terminal A, which is ground, to terminal B, which is the diagnostic request terminal. The ignition is then switched to ON without starting the engine.
The Service Engine Soon or Check Engine Light usually begins by flashing code 12. This is displayed as one flash, a pause, and two flashes. It commonly repeats three times to confirm that the control module has entered diagnostic mode.
After code 12, the computer displays any stored fault codes. Each code is normally repeated before the next one appears.
Do not assume every GM OBD1 connector uses the same terminals. Some vehicles use different electronics, communication rates, or diagnostic procedures. Always verify the terminal diagram for the exact model and engine before installing a jumper.
Also avoid starting the engine with the connector bridged unless the service procedure specifically calls for an engine-running test. On some systems, grounding the diagnostic terminal with the engine running activates a different operating mode.
How to Read Ford OBD1 Codes
Many older Ford, Lincoln, and Mercury vehicles use the EEC-IV self-test system.
Instead of a GM-style under-dash connector, Ford commonly uses self-test connectors located under the hood. The system includes a larger Self-Test Output connector and a smaller single-wire Self-Test Input connector.
Ford diagnostics can include several separate tests. The most common are Key On Engine Off, known as KOEO, and Key On Engine Running, known as KOER.
During KOEO testing, the ignition is on but the engine is not running. The computer checks circuits and outputs current or stored codes through the Check Engine Light, a test light, analog meter, or compatible code reader.
KOER testing is performed with the engine running. The computer may instruct the driver to briefly press the throttle, turn the steering wheel, press the brake pedal, or switch the overdrive control depending on the vehicle.
Ford codes may use two or three digits. There may also be a separator pulse between current faults and continuous-memory codes.
Because Ford self-testing can involve several stages, warming the engine first and following the exact service sequence is important. Skipping a required action can create a test code even when the related component is working normally.
How to Read Toyota OBD1 Codes
Many older Toyota and Lexus vehicles use an under-hood diagnostic box marked DIAGNOSIS or a similar label.
Inside the cover, you may see terminal names such as TE1, E1, TE2, +B, FP, and others. On many Toyota OBD1 applications, normal diagnostic mode is activated by connecting TE1 to E1.
With the ignition on, the Check Engine Light flashes stored two-digit codes. The first group represents the first digit, and the second group represents the second digit.
If the light flashes twice, pauses, and then flashes four times, the displayed code is 24.
When no fault is stored, some Toyota systems flash the light continuously at a regular interval. Multiple codes are commonly displayed in numerical order and repeat while the diagnostic terminals remain connected.
The exact connector location and terminal combination can differ by Toyota model. Certain transmission, ABS, airbag, and four-wheel-drive systems may use different terminals or warning lights.
Do not connect TE1, TE2, or other terminals together unless the exact Toyota service procedure requires it. Selecting the wrong test mode can change the output or prevent codes from appearing.
How to Read Honda OBD1 Codes
Many early-1990s Honda and Acura vehicles use a small two-pin service-check connector inside the passenger compartment.
It may be located under the passenger-side dashboard, near the ECU, behind the center console, or close to the passenger kick panel.
The two terminals are bridged using the approved service connector or a suitable jumper. The ignition is then turned on without starting the engine.
The Check Engine Light flashes the stored code. On many Honda systems, codes 1 through 9 are represented by short flashes. Higher codes may use long flashes for tens and short flashes for ones.
For example, two long flashes followed by three short flashes generally represent code 23.
If several codes are stored, the ECU displays them in sequence and repeats the pattern.
Some earlier Honda vehicles display codes through a small LED on the ECU rather than the dashboard Check Engine Light. The ECU may be located beneath the passenger-side carpet or seat area, depending on the model.
Always confirm whether your Honda uses a dashboard light, ECU LED, or service-check connector procedure.
How to Read Chrysler OBD1 Codes
Many older Chrysler, Dodge, Plymouth, and Jeep vehicles support an ignition-key method, although the exact sequence varies.
A common procedure involves cycling the ignition between OFF and ON several times without starting the engine, ending in the ON position. The Check Engine Light may then flash stored trouble codes.
On some vehicles with a digital odometer, the code may appear as a number in the display instead of a flash sequence.
Code 55 commonly indicates the end of the stored-code sequence on certain Chrysler systems, but definitions and procedures are not universal across every model or year.
Do not repeatedly cycle the key without confirming the procedure. Different vehicles may use the ignition switch for instrument-cluster tests, immobilizer functions, or maintenance resets.
Use the exact sequence listed for the vehicle’s year, engine, and control system.
Can You Read OBD1 Codes Without a Scanner?
Yes, many OBD1 vehicles allow manual code retrieval without a dedicated scan tool.
Depending on the manufacturer, you may need only a jumper wire, the correct diagnostic connector diagram, and the ability to count light flashes.
However, a compatible OBD1 scanner can provide more information than flash codes alone. Professional tools may display live sensor values, switch states, engine operating data, and manufacturer-specific test results.
Manual code retrieval tells you what code was stored, but it may not show the operating conditions that caused it. This makes intermittent faults more difficult to diagnose.
A scan tool becomes especially useful when the Check Engine Light does not flash, the vehicle uses a transitional diagnostic system, or you need data from transmission, ABS, airbag, or body-control modules.
Safety Precautions Before Jumping Diagnostic Terminals
The most important rule is to use a diagram for the exact vehicle.
Do not insert a paper clip or wire into a diagnostic connector based only on the connector’s general appearance. Some terminals carry battery voltage, while others connect directly to sensitive computer circuits.
Bridging the wrong terminals can blow a fuse, damage wiring, trigger an unintended test mode, or harm a control module.
Turn the ignition off before installing or removing a jumper unless the service instructions specify otherwise. Keep the jumper away from surrounding metal and make sure it cannot contact another terminal.
Do not force a wire into the connector because spreading or bending the terminals may cause future communication problems.
Keep loose clothing, tools, and wiring away from belts, fans, and pulleys if an engine-running self-test is required.
What to Do After Retrieving an OBD1 Code
Write down every code before disconnecting the jumper or switching the ignition off.
Next, find the code definition for the exact manufacturer, vehicle year, engine, transmission, and control module.
Do not replace a component based only on the code’s name. A diagnostic code identifies the circuit or condition detected by the computer, not always the failed part.
For example, an oxygen-sensor lean code could be caused by a vacuum leak, low fuel pressure, exhaust leak, wiring fault, or sensor problem. A throttle-position code could result from a damaged connector or incorrect reference voltage rather than a failed sensor.
Use a repair manual to test the circuit, wiring, power supply, ground, sensor signal, and mechanical system before purchasing parts.
After repairing the problem, clear the stored code using the approved manufacturer procedure. Then operate the vehicle and repeat the diagnostic test to confirm that the fault does not return.
How to Clear OBD1 Codes
Clearing methods vary by manufacturer.
Many older vehicles erase stored engine codes when battery power is disconnected or the ECM backup fuse is removed for a specified period.
However, disconnecting the battery can also erase radio presets, clock settings, fuel-trim memory, idle learning, and transmission adaptive values.
Certain systems allow memory codes to be cleared during the self-test procedure. Others require a scan tool or specific fuse-removal process.
Do not clear the codes before recording them. Once the memory is erased, important evidence may be lost, especially when the fault is intermittent.
After resetting the computer, the engine may idle differently while it relearns normal operating values.
Why the Code May Not Appear
If the warning light does not flash, first verify that the Check Engine Light illuminates briefly when the ignition is switched on.
A failed warning bulb, blown fuse, low battery voltage, faulty ECU power supply, incorrect connector, or damaged diagnostic wire can prevent code output.
The vehicle may also use a different procedure from the one you attempted. This is common on transitional vehicles and models with different engine options.
A code may not be stored if the problem has not met the computer’s fault-setting conditions. Mechanical problems such as low compression, restricted exhaust, fuel-pressure loss, or internal engine damage may also exist without producing a useful OBD1 code.
When the manual method fails, use vehicle-specific service information or a compatible professional diagnostic tool.
Final Thoughts
So, how to read codes on OBD1 vehicles depends on the manufacturer’s diagnostic system. There is no universal connector, terminal combination, or flash-code procedure that works on every OBD1 car or truck.
GM commonly uses an ALDL connector, Ford uses EEC self-test connectors, Toyota often uses TE1 and E1 terminals, Honda commonly uses a service-check connector, and some Chrysler vehicles support an ignition-key procedure.
Identify the exact vehicle and diagnostic system before connecting any terminals. Record every flash code carefully, verify its definition with model-specific service information, and test the complete circuit before replacing parts. Correct code retrieval gives you a useful starting point, but accurate diagnosis is what leads to the proper repair.