To replace a windshield washer reservoir, drain the washer fluid, gain access to the tank, disconnect its electrical connectors and hoses, remove the mounting fasteners, transfer the pump and level sensor if necessary, install the new reservoir, refill it with appropriate washer fluid, and test the system for leaks and proper spray operation.
For drivers across the United States, a working windshield washer system is more than a convenience. Road salt in northern states, dust and insects during summer highway driving, mud on rural roads, and everyday traffic grime can quickly reduce windshield visibility. If the washer reservoir is cracked or damaged, the vehicle may lose washer fluid faster than you can use it, leaving the windshield cleaning system ineffective when you need it.
Replacing the reservoir is often a manageable DIY repair, but the difficulty varies considerably by vehicle. Some U.S.-market cars and trucks place the washer bottle in plain view under the hood. Others hide most of it behind the front bumper, beneath a battery tray, or inside a front wheel well. This guide explains how to replace a windshield washer reservoir using a general procedure that applies to many passenger cars, SUVs, and pickup trucks, while also showing where vehicle-specific instructions matter.
When Does a Windshield Washer Reservoir Need Replacement?
Replace the windshield washer reservoir when the plastic tank itself is cracked, split, punctured, badly distorted, or has a broken fitting or mounting point that cannot reliably hold fluid. A reservoir that repeatedly empties while the vehicle is parked is a strong reason to inspect the tank and its connections.
Do not assume every washer-fluid leak means the reservoir is damaged. Fluid can escape around the washer pump grommet, fluid-level sensor seal, filler neck, hose connection, or pump housing. Locating the leak before ordering parts prevents replacing a good tank unnecessarily.
A useful test is to add enough washer fluid to observe the system while the vehicle is parked on a level surface. Watch the reservoir and the ground below it. If fluid appears directly along a crack or seam in the plastic tank, replacement is normally the practical repair. If it appears around a removable pump or sensor, the problem may instead be a seal or component.
Source: hitchesguide.com
Visible crack
Fluid can be seen escaping through the reservoir body or a molded seam.
Broken mounting tab
The reservoir moves excessively or cannot be securely attached to the vehicle.
Damaged outlet
A molded connection for a hose, pump, or filler neck has broken away from the tank.
Persistent fluid loss
The reservoir repeatedly becomes empty even when the washers are not being used.
Reservoir Leak Versus Washer Pump Leak
A leaking washer pump or pump grommet can make the reservoir appear defective because the pump is commonly inserted directly into an opening near the bottom of the tank. Since this area remains submerged when fluid is present, a poor seal can drain much of the reservoir.
Dry the area first, add a small amount of fluid, and identify the highest point where fresh moisture appears. Leakage beginning around the pump opening suggests the pump or grommet deserves closer inspection. Leakage coming through the reservoir wall indicates a damaged tank.
What You Need Before Replacing the Washer Reservoir
Gather the replacement reservoir and basic hand tools before taking the vehicle apart. The exact tools depend on the year, make, and model because manufacturers use different fasteners and access methods.
Many reservoirs are secured with small metric bolts, plastic push clips, or both. A ratchet and socket set, screwdrivers, pliers, and a plastic trim-removal tool cover many installations. Vehicles requiring wheel-well access may also require a floor jack, properly rated jack stands, wheel chocks, and a lug-nut socket.
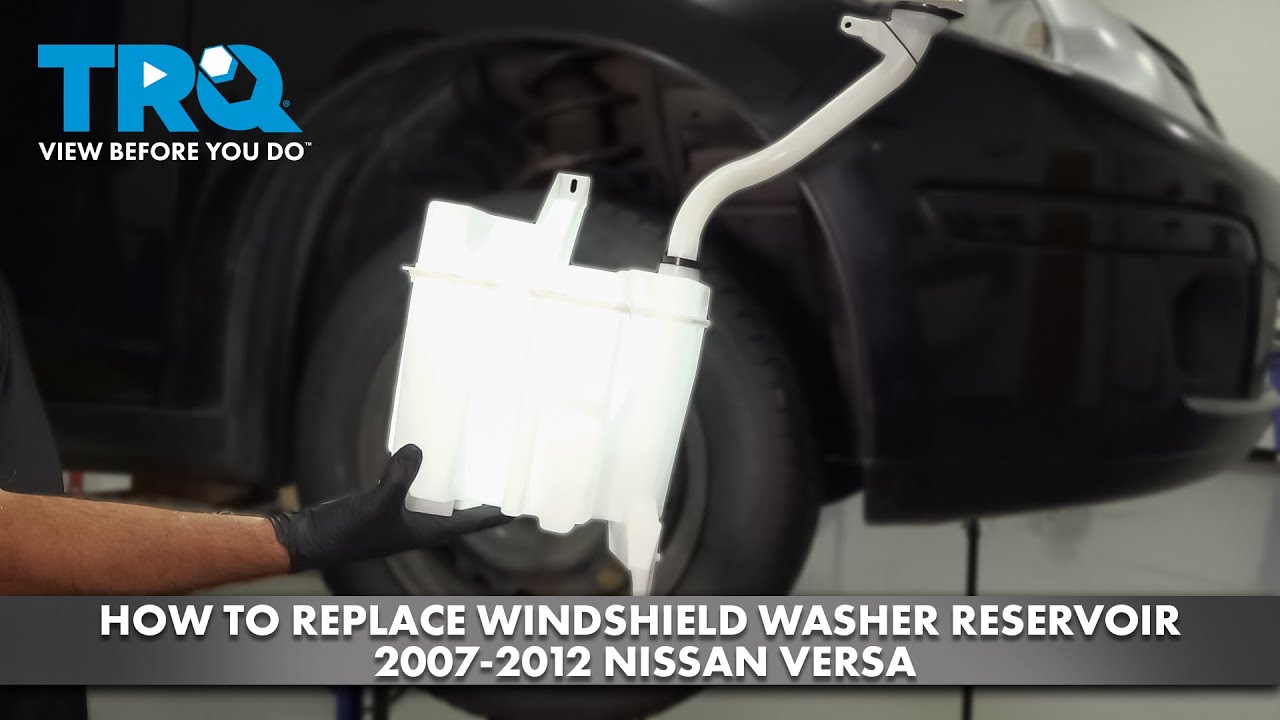
Check the replacement reservoir before installation. Compare its mounting tabs, filler opening, pump holes, sensor openings, and hose locations with the original tank. Small design differences can prevent installation even when the replacement appears similar.
Source: storage.googleapis.com
Replacement reservoir
Verify compatibility with the exact vehicle year, make, model, engine, and equipment where applicable.
Socket and ratchet set
Small metric sockets are commonly needed for reservoir and surrounding-panel fasteners.
Trim removal tool
Helps remove plastic clips without unnecessarily damaging them.
Pliers and screwdrivers
Useful for hose clamps, electrical retainers, clips, and other small connections.
Drain pan
Catches washer fluid released when the pump or hose is disconnected.
Safety glasses and gloves
Protect your eyes and hands while working underneath panels and around washer fluid.
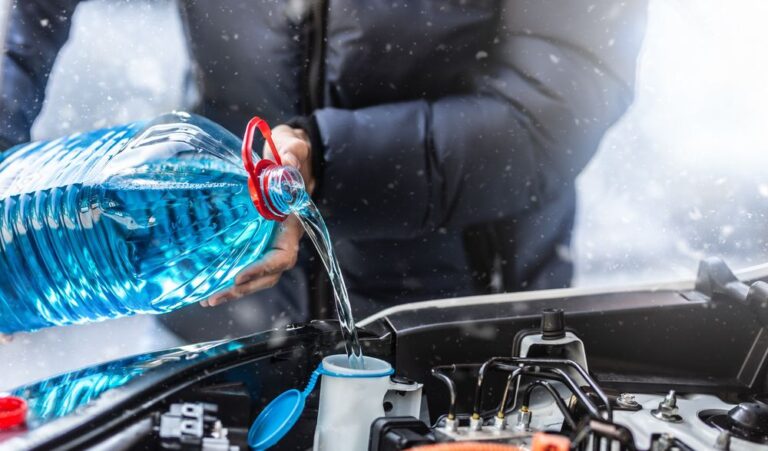
Fresh windshield washer fluid
Use a formula suitable for the temperatures expected where the vehicle is operated.
Do You Need New Pump Grommets?
New seals are worth considering whenever the old rubber grommets are hardened, cracked, swollen, cut, or permanently distorted. Reusing a damaged grommet can turn a successful reservoir replacement into an immediate leak.
Some replacement reservoirs include grommets while others do not. Check the part contents before beginning the repair so that a missing seal does not leave the vehicle disassembled.
How to Replace Windshield Washer Reservoir Step by Step
The basic replacement process is similar across many vehicles, but access is the major variable. Check a repair manual or vehicle-specific service procedure before removing major components. The following sequence provides a practical general method.
Park on a level surface, switch the engine off, apply the parking brake, and allow hot components to cool. Keep the ignition off while electrical connectors are disconnected. If the repair requires lifting the vehicle, use wheel chocks and support the vehicle with correctly positioned jack stands rather than relying on a hydraulic jack alone.
Source: 1aauto.com
Step 1: Locate the reservoir
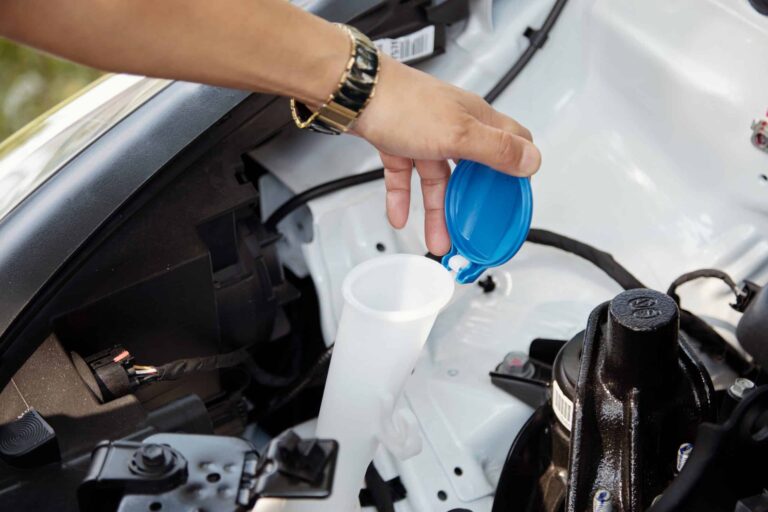
Open the hood and identify the washer-fluid filler cap. Follow the filler neck downward to determine where the main reservoir is mounted.
Step 2: Determine the access route
Inspect whether the tank can be removed from the engine compartment or whether the wheel liner, splash shield, battery tray, or bumper cover blocks access.
Step 3: Remove obstructing components
Carefully remove only the panels or components required for access. Keep bolts and clips organized according to their locations.
Step 4: Drain or capture the washer fluid
Place a suitable drain pan underneath the reservoir before disconnecting a lower hose or removing the pump.
Step 5: Disconnect the electrical connectors
Unplug the washer pump connector and fluid-level sensor connector if equipped. Release locking tabs rather than pulling directly on the wires.
Step 6: Disconnect the washer hose
Release any clamp or retainer and carefully pull the hose from the pump fitting. Avoid twisting aggressively enough to break an old plastic nipple.
Step 7: Remove the pump and sensor if required
Pull removable components from their grommets using controlled pressure. Expect additional washer fluid to drain from openings near the bottom of the tank.
Step 8: Remove the reservoir fasteners
Support the reservoir while removing its bolts, screws, clips, or brackets so the tank does not fall onto nearby wiring or components.
Step 9: Remove the old reservoir
Guide the reservoir out carefully. Some tanks require rotating or angling them around the body structure because they are larger than the visible access opening.
Step 10: Prepare the replacement reservoir
Transfer the filler neck, cap, pump, level sensor, brackets, screens, grommets, and clips that are not included with the new part.
Step 11: Install the new reservoir
Position the tank without forcing it, align the mounting points, and install the original fasteners.
Step 12: Reconnect the washer system
Seat the pump and sensor securely, reconnect the hose, and attach every electrical connector.
Step 13: Add washer fluid and inspect
Add a moderate amount of fluid first and inspect every pump opening, sensor opening, seam, and hose connection for leakage.
Step 14: Test the washers
Operate the windshield washer and verify that the pump runs and fluid reaches the windshield nozzles.
Step 15: Reassemble the vehicle
Once the system works without leaks, reinstall all liners, shields, trays, wheels, bumper components, and fasteners that were removed.
How to Transfer the Washer Pump
Many replacement reservoirs are sold without a pump, so the original pump must be transferred. The pump normally pushes into a rubber grommet installed in the reservoir. Remove the old pump carefully without using its electrical connector as a handle.
Inspect both the pump inlet and rubber seal. Clean away deposits or debris that could prevent the grommet from sealing. Install the grommet squarely in the new reservoir and press the pump into place until it is fully seated. Excessive force should not be necessary.
How to Transfer the Fluid-Level Sensor
If the vehicle has a low-washer-fluid warning, the reservoir may contain a level sensor. Transfer the sensor according to its original orientation because certain designs rely on the position of a float or sensor body.
Examine the sensor grommet at the same time. A deteriorated seal can cause fluid loss around the sensor even when the reservoir is new.
What If the Reservoir Is Behind the Fender Liner or Bumper?
Many vehicles place the washer reservoir low in a front corner of the body, where only the filler neck is visible under the hood. This location makes efficient use of space but can add substantial work to replacement.
If the tank is behind a fender liner, access may require loosening or removing the corresponding front wheel and pulling back the plastic liner. Some models require partial or complete bumper-cover removal. Others position the reservoir underneath a battery tray or another engine-compartment component.
Do not begin removing unrelated parts based only on the apparent position of the filler cap. Find a procedure for your exact vehicle whenever the access route is not obvious. Modern bumper covers can contain parking sensors, cameras, fog-light wiring, radar-related components, air guides, and fragile plastic retainers.
Source: youtube.com
Wheel-well access
Commonly involves plastic clips, small screws or bolts, and sometimes removal of the front wheel.
Bumper access
May involve fasteners along the top, lower splash shield, and both wheel-well edges.
Engine-bay access
May require removal of a battery, battery tray, air intake component, or support bracket depending on the vehicle.
Safe Vehicle Lifting
If wheel removal is necessary, loosen the lug nuts as appropriate before raising the vehicle, use the manufacturer’s designated lifting points, and support the vehicle securely with properly rated jack stands. Never work underneath a vehicle supported only by a floor jack.
After reinstalling a wheel, tighten the lug nuts to the vehicle manufacturer’s specified torque using the correct pattern and procedure.
How to Refill and Test the New Reservoir
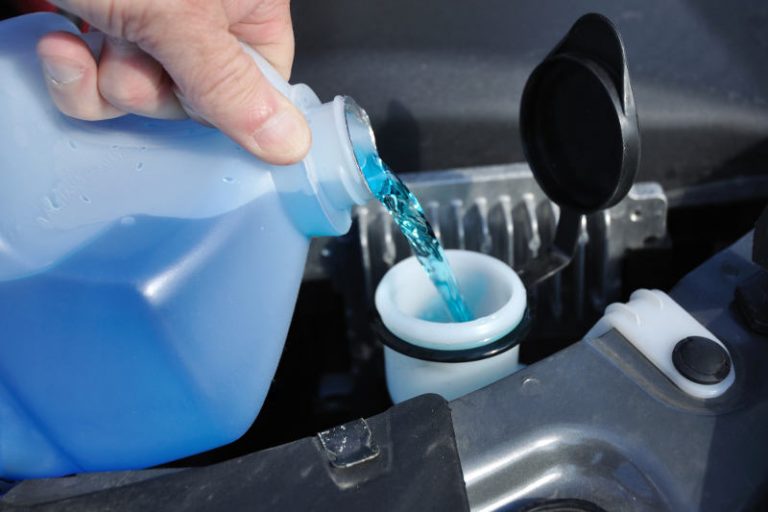
Do not immediately fill the new reservoir to the top. Start with a smaller amount of washer fluid and inspect all low-mounted connections. This makes correcting a leak easier and reduces the amount of fluid that must be drained if something was not seated correctly.
Check underneath the reservoir and around the pump grommet, level sensor, hose outlet, filler-neck connection, and reservoir seams. If the area remains dry, add more fluid and perform another inspection.
Turn the ignition to the appropriate position and activate the windshield washer. The pump should run and fluid should spray through the windshield nozzles. It can take a short period for an emptied hose to refill, but avoid continuously running the pump dry.
Source: youtube.com
No visible leaks
The reservoir and its seals remain dry after washer fluid is added.
Pump operates
The washer pump can be heard running when the washer control is activated.
Strong spray
Fluid reaches the windshield through the intended washer nozzles.
Warning light operates normally
Vehicles with a washer-fluid level sensor no longer indicate low fluid after sufficient fluid is added.
Which Washer Fluid Should You Use?
Use windshield washer fluid intended for automotive use and choose a formulation appropriate for local temperatures. This matters especially in colder parts of the United States, where a fluid without adequate freeze protection can freeze during winter conditions.
Check the product label for its stated temperature range. Do not confuse windshield washer fluid with engine coolant, brake fluid, or other automotive liquids.
What to Do If the Washer System Still Does Not Work
A new reservoir fixes a damaged tank, but it does not automatically correct every washer-system problem. If the reservoir holds fluid but nothing reaches the windshield, troubleshoot the pump, fuse or electrical supply where applicable, hoses, and nozzles.
Listen for the pump while someone operates the washer control. A running pump with no spray often points toward a disconnected, kinked, leaking, frozen, or blocked fluid path. A silent pump can indicate a failed pump, poor electrical connection, blown fuse, wiring problem, control problem, or another vehicle-specific electrical fault.
Source: 1aauto.com
Reservoir still leaks
Recheck the pump grommet, sensor seal, hose connection, filler connection, and reservoir mounting before assuming the new tank is defective.
Pump runs but no fluid sprays
Inspect the washer hose for disconnections, kinks, splits, blockage, or freezing and check the spray nozzles.
Pump does not run
Verify that the pump electrical connector is fully seated and continue with vehicle-specific electrical diagnosis if necessary.
Low-fluid warning stays on
Check the level-sensor connector, sensor installation, orientation where applicable, and the condition of the sensor itself.
When to Get Professional Help
Professional repair may be the better option if reservoir access requires substantial front-end disassembly, if you cannot safely support the vehicle, or if the repair involves components you are not comfortable removing.
Professional diagnosis is also useful when the reservoir remains full but the washer system has an electrical problem, repeated fuse failure, damaged wiring, or a warning that remains after the fluid level and sensor connection have been checked.
Common Windshield Washer Reservoir Replacement Mistakes
Most problems after replacement come from access-panel damage, reused deteriorated seals, incomplete electrical connections, or hoses installed incorrectly. A methodical inspection before reassembly can prevent having to remove the bumper or fender liner twice.
Take a photo of hose routing and electrical connectors before disconnecting them if the arrangement is not obvious. Keep fasteners grouped by location because similar-looking bumper and splash-shield clips may have different lengths or designs.
Source: 1aauto.com
Replacing the tank without finding the leak
The actual problem may be a pump grommet, sensor seal, hose, or pump rather than the reservoir body.
Reusing damaged rubber seals
Old hardened grommets may leak as soon as fluid is added to the new reservoir.
Forcing the reservoir into position
A reservoir may require a particular angle to clear bodywork. Excessive force can crack the new tank or break a mounting tab.
Pulling electrical connectors by their wires
Release connector locks properly to reduce the risk of wiring or terminal damage.
Testing only after complete reassembly
Where practical, leak-test the system before reinstalling difficult bumper or wheel-well panels.
Using the wrong replacement reservoir
Different trims, engines, body styles, or option packages can sometimes use different tank configurations.
Running the washer pump dry
Avoid prolonged operation before the reservoir contains fluid and the pump has a fluid supply.
Frequently Asked Questions
Q
Can I replace a windshield washer reservoir myself?
Yes, many vehicle owners with basic mechanical skills can replace a windshield washer reservoir. The key factor is access. A reservoir located directly under the hood can be relatively straightforward, while one behind a bumper or fender liner requires more disassembly.
Check the procedure for your specific vehicle before starting so you know whether lifting equipment, wheel removal, bumper removal, or special fasteners are involved.
Q
How long does it take to replace a windshield washer reservoir?
There is no single replacement time because reservoir placement differs significantly between vehicles. A readily accessible tank may be replaced relatively quickly, while a reservoir hidden behind a wheel liner or bumper can take considerably longer.
Plan additional time if you have not removed the surrounding panels before or if old plastic clips and fasteners need careful handling.
Q
Do I need to replace the windshield washer pump with the reservoir?
Not necessarily. If the existing pump operates correctly and is undamaged, many replacement procedures simply transfer it to the new reservoir. Replace the pump if testing shows that it has failed or if its housing or inlet is damaged.
Even when reusing the pump, inspect its rubber grommet. A new reservoir cannot prevent a leak caused by a deteriorated pump seal.
Q
Why is my new windshield washer reservoir leaking?
First inspect the pump grommet, level-sensor seal, hose fittings, filler-neck connection, and any plugs installed in unused openings. A seal that is pinched, hardened, incorrectly positioned, or not fully seated can release fluid.
If all connections are dry, inspect the replacement tank itself and confirm that it was not damaged during installation.
Q
Can I drive with a cracked windshield washer reservoir?
The vehicle may still be mechanically driveable, but a cracked reservoir can leave you without windshield washer fluid when visibility becomes poor. That can be especially problematic around road salt, mud, insects, dust, and wet highway grime.
Repair the leak promptly rather than depending solely on the windshield wipers to clean contamination from dry glass.
Q
Why does my washer pump run but no fluid comes out?
If the pump can be heard running, check whether the reservoir contains fluid and inspect the hoses for a disconnected fitting, leak, kink, blockage, or freezing. Also inspect the washer nozzles for obstruction.
If the system was completely drained during reservoir replacement, it may take a short period for fluid to travel through the empty hose after refilling.
✦ Wrapping Up
Conclusion
Learning how to replace windshield washer reservoir components starts with confirming that the tank itself is actually damaged. Once a crack, broken fitting, or failed mounting point has been identified, the repair generally involves gaining access to the reservoir, draining the remaining fluid, disconnecting the pump, sensor and hoses, removing the mounting hardware, and installing the replacement tank.
The biggest difference from one vehicle to another is access. Some reservoirs come out from under the hood, while others require a wheel liner, battery tray, splash shield, or bumper cover to be removed. Follow vehicle-specific removal instructions for those surrounding components, transfer reusable parts carefully, replace questionable seals, and leak-test the system before completing difficult reassembly.
💡 Key Takeaway
Before ordering a reservoir, locate the leak and verify the exact replacement part for your vehicle. During installation, inspect every pump and sensor seal, then add a small amount of washer fluid and test for leaks before fully reassembling the vehicle.
Learn how to install a windshield sun shade correctly in your car. Follow simple steps for folding, roll-up, and umbrella-style shades, plus fit, safety, storage, and troubleshooting tips.