How to Use Ancel Obd2 Scanner: Practical Steps and Helpful Tips
Many drivers assume that diagnosing a car issue requires a costly trip to a mechanic, often involving specialized tools and extensive labor. While professional expertise is invaluable for complex repairs, a surprising number of common vehicle problems can be identified and understood right in your driveway with the right equipment. The truth is, modern cars are equipped with sophisticated onboard diagnostic systems (OBD-II) that communicate a wealth of information, making it accessible to anyone with an affordable scanner. The question “how to use ancel obd2 scanner” becomes clearer once the surrounding conditions and practical details are considered.
The real challenge isn’t the complexity of the car’s system, but rather knowing how to effectively interpret the data it provides. A diagnostic trouble code (DTC) might seem like a cryptic message, but it’s actually a precise indicator of where to begin your investigation. Understanding these codes and the live data streams from your vehicle can empower you to make informed decisions, whether that means tackling a simple fix yourself or confidently discussing a more serious issue with a trusted professional.
This article will demystify the process, guiding you through the practical steps and helpful tips for using an Ancel OBD2 scanner. My goal is to equip you with the knowledge to connect your scanner, retrieve crucial information, and begin to understand what your car is trying to tell you. You’ll learn not just the “how-to” but also the “why” behind each step, transforming a potentially intimidating task into a straightforward diagnostic routine.
By the end of this guide, you will have a clear understanding of how to use an Ancel OBD2 scanner to diagnose common vehicle issues, monitor performance, and even perform basic maintenance functions. I’ll cover everything from the initial setup to interpreting diagnostic trouble codes and leveraging live data, ensuring you feel confident in your ability to interact with your car’s onboard computer.
Understanding Your Ancel OBD2 Scanner
Before diving into the practical steps, it’s helpful to understand what an Ancel OBD2 scanner is and what it can do. An Ancel scanner is a diagnostic tool designed to interface with your vehicle’s On-Board Diagnostics, Second Generation (OBD-II) system. This system has been standard on all cars and light trucks sold in the United States since 1996, and in other regions like Europe and Canada around the same time.
The primary function of an OBD-II system is to monitor your vehicle’s emissions control systems and other critical components. When a problem is detected, the system illuminates the Malfunction Indicator Lamp (MIL), commonly known as the “Check Engine Light,” and stores a Diagnostic Trouble Code (DTC) in the vehicle’s computer. Your Ancel scanner acts as a translator, allowing you to read these codes and access other vital information.
Key Features of Ancel Scanners
While specific features vary by model, most Ancel OBD2 scanners offer a core set of capabilities:
- Read and Clear DTCs: This is the most fundamental function, allowing you to see why your Check Engine Light is on and then clear the code after a repair.
- View Freeze Frame Data: When a DTC is set, the vehicle’s computer records a snapshot of sensor readings at that exact moment. This “freeze frame” data can be invaluable for diagnosing intermittent problems.
- Display Live Data Stream: You can view real-time sensor data, such as engine RPM, vehicle speed, oxygen sensor readings, and coolant temperature. This is crucial for observing how components are performing dynamically.
- I/M Readiness Status: This indicates whether your vehicle’s various emission control systems have completed their self-tests. It’s particularly useful for preparing for emissions inspections.
- O2 Sensor Test: Allows you to retrieve and view O2 sensor monitor test results.
- EVAP System Test: Enables you to initiate a leak test for the vehicle’s evaporative emission system.
- Vehicle Information: Displays the Vehicle Identification Number (VIN), Calibration ID (CID), and Calibration Verification Number (CVN).
Higher-end Ancel models might include advanced features like ABS (Anti-lock Braking System) and SRS (Supplemental Restraint System) diagnostics, battery tests, oil light resets, and even bi-directional control for specific vehicle systems. Always check the specifications of your particular Ancel scanner to understand its full capabilities.
Preparing for Your First Scan
Before you connect your Ancel OBD2 scanner to your vehicle, a little preparation can make the process smoother and more effective. I always recommend taking a few moments to ensure you’re ready.
Locating the OBD-II Port
The first step is to find your vehicle’s OBD-II diagnostic port. This port is almost always located within the passenger compartment, typically on the driver’s side. Common locations include:
- Under the dashboard, to the left of the steering wheel.
- Under the dashboard, directly below the steering wheel.
- In the center console, near the gear shifter or under the armrest.
- Behind an ashtray or a small removable panel.
If you can’t find it immediately, consult your vehicle’s owner’s manual. The manual will provide the exact location, often with a diagram. The port itself is a trapezoidal 16-pin connector.
Ensuring Vehicle Readiness
For an accurate scan, your vehicle needs to be in the correct state. I generally follow these guidelines:
- Engine Off, Ignition On (KOEO): For most basic code reading, the engine should be off, but the ignition should be turned to the “ON” position (the position just before starting the engine). All dashboard lights should be illuminated. This powers the OBD-II system.
- Engine Running (KOER): If you plan to view live data or perform specific tests that require the engine to be operating, then the engine should be running. Ensure the vehicle is in a well-ventilated area if the engine is running.
- Battery Voltage: While most modern scanners draw power from the OBD-II port, a weak car battery can sometimes cause communication issues. Ensure your vehicle’s battery is adequately charged.
Familiarizing Yourself with Your Ancel Scanner
Take a moment to look over your Ancel scanner. Identify the main buttons (e.g., “Enter,” “Exit,” “Scroll Up/Down”), the display screen, and the diagnostic cable. If your scanner has a battery, ensure it’s charged or that you have fresh batteries inserted, though most Ancel scanners are powered directly by the vehicle.
It’s also a good idea to quickly review the user manual that came with your specific Ancel model. While this guide covers general principles, your manual will detail any unique features or operational nuances of your device.
How to Use Ancel OBD2 Scanner: Step-by-Step Guide
Now that you’re prepared, let’s walk through the process of connecting and using your Ancel OBD2 scanner. I’ll break it down into clear, manageable steps.
Step 1: Connect the Scanner to Your Vehicle
- Turn off the vehicle’s ignition: Ensure the engine is off and the key is removed from the ignition, or the start button is off.
- Locate the OBD-II port: As discussed, find the 16-pin diagnostic port in your vehicle.
- Plug in the scanner: Connect the diagnostic cable from your Ancel scanner firmly into the vehicle’s OBD-II port. You should feel a secure connection.
Once connected, the scanner may power on automatically, or you might need to press a power button on the device itself.
Step 2: Turn the Ignition On (Engine Off)
With the scanner connected, turn your vehicle’s ignition to the “ON” position. Do not start the engine unless specifically instructed by a test you are performing. The dashboard lights should illuminate, indicating that the vehicle’s computer system is powered up.
Step 3: Establish Communication
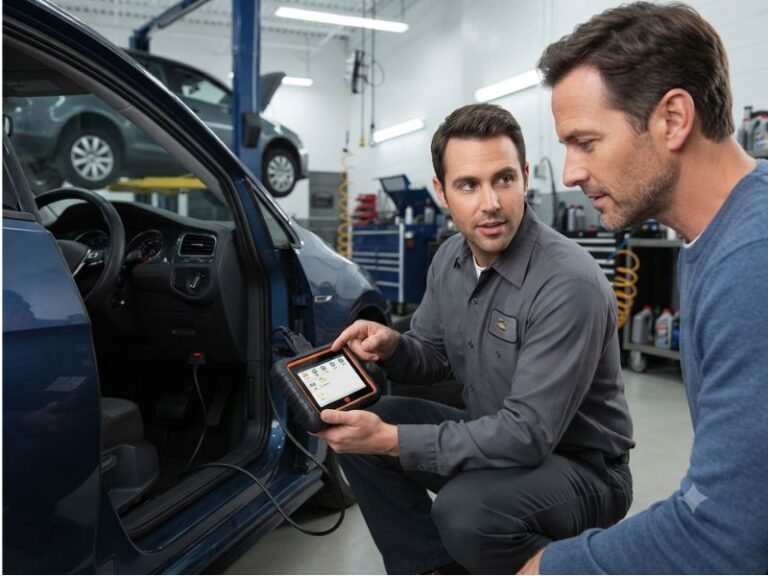
Your Ancel scanner will now attempt to establish communication with your vehicle’s onboard computer. This usually takes a few seconds. The scanner’s screen will typically display messages like “Establishing Link,” “Connecting,” or “Reading VIN.”
If the scanner fails to link, double-check the connection to the OBD-II port and ensure the ignition is in the “ON” position. Sometimes, trying a different OBD-II port if your vehicle has multiple (rare, but possible in some older commercial vehicles) or ensuring the scanner’s firmware is up-to-date can resolve communication issues.
Step 4: Navigate the Main Menu
Once communication is established, your Ancel scanner will display its main menu. The exact layout varies by model, but you’ll typically see options such as:
- “Read Codes” / “DTC Lookup”
- “Erase Codes” / “Clear MIL”
- “Live Data”
- “I/M Readiness”
- “Freeze Frame”
- “Vehicle Info”
Use the up/down arrow buttons to scroll through the options and the “Enter” or “OK” button to select your desired function.
Step 5: Reading Diagnostic Trouble Codes (DTCs)
This is often the first step when your Check Engine Light is on. Select “Read Codes” from the main menu. The scanner will then display any stored DTCs. Codes are typically alphanumeric, such as P0420 or P0301.
- Pending Codes: These are codes that have been detected but haven’t yet met the criteria to illuminate the Check Engine Light. They indicate an intermittent issue or a problem that hasn’t fully developed.
- Confirmed Codes: These are codes that have been detected and confirmed, causing the Check Engine Light to illuminate.
- Permanent Codes: These codes remain in the vehicle’s memory even after they’ve been cleared, until the system verifies the fault is no longer present through its own diagnostic cycles.
Many Ancel scanners will also provide a brief description of the code (e.g., “P0301: Cylinder 1 Misfire Detected”). If your scanner doesn’t, you can use the “DTC Lookup” function (if available) or search online for the specific code. I always recommend writing down the codes before proceeding.
Step 6: Viewing Freeze Frame Data
After reading codes, I often check the “Freeze Frame” data. This snapshot of sensor readings (engine RPM, vehicle speed, coolant temp, fuel trim, etc.) taken at the exact moment the DTC was set can provide crucial context. For example, if a misfire code (P0301) was set when the engine was cold and at high RPM, it points to a different diagnostic path than if it occurred at operating temperature under light load.
Step 7: Interpreting Live Data
Live data is where you can truly see your engine “breathing.” Select “Live Data” from the menu. You’ll typically have options to view all data parameters or select specific ones. Common parameters include:
- Engine RPM: Engine revolutions per minute.
- Vehicle Speed Sensor (VSS): How fast the vehicle is moving.
- Coolant Temperature: Engine operating temperature.
- Short Term Fuel Trim (STFT) & Long Term Fuel Trim (LTFT): These indicate how the engine’s computer is adjusting fuel delivery based on oxygen sensor readings. Deviations from zero can indicate rich or lean conditions.
- Oxygen Sensor Voltage: Shows the activity of your O2 sensors, which are critical for emissions and fuel economy.
- Mass Air Flow (MAF) Sensor: Measures the amount of air entering the engine.
Observing these parameters in real-time, both at idle and during a test drive (if safe to do so), can help confirm suspicions or identify issues that aren’t yet severe enough to set a code. For instance, a MAF sensor reading that doesn’t increase with RPM could indicate a faulty sensor.
Step 8: Checking I/M Readiness
If you’re preparing for an emissions test, the “I/M Readiness” function is essential. It tells you which of your vehicle’s emission monitors have completed their self-tests. All monitors should show “OK” or “Complete” for your vehicle to pass an emissions inspection. If a monitor shows “INC” (Incomplete), you may need to drive the vehicle through a specific “drive cycle” to allow the system to complete its tests.
Step 9: Clearing Diagnostic Trouble Codes (DTCs)
Once you’ve diagnosed the problem and performed the necessary repair, you can clear the DTCs and turn off the Check Engine Light. Select “Erase Codes” or “Clear MIL” from the main menu. The scanner will usually ask for confirmation. Confirm, and the codes will be cleared from the vehicle’s computer. The Check Engine Light should turn off.
Important Note: Never clear codes without addressing the underlying issue. The Check Engine Light will simply return, and you’ll have erased valuable diagnostic information. Clearing codes is for verifying a repair or for preparing for an emissions test after all monitors have run.
Advanced Tips and Common Pitfalls
Knowing how to use an Ancel OBD2 scanner effectively goes beyond just reading codes. Here are some advanced tips and common mistakes to avoid that I’ve learned over time.
Leveraging Your Scanner for Deeper Diagnostics
- Compare Live Data to Specifications: Don’t just look at live data; compare it to what’s considered normal for your specific vehicle. Online forums, repair manuals, or even a quick search for “normal [sensor name] readings [your car make model]” can provide valuable benchmarks.
- Graphing Data: Many Ancel scanners, especially the more advanced ones, allow you to graph live data. This visual representation can make it much easier to spot trends, intermittent drops, or spikes that might be missed in numerical displays. For example, a fluctuating O2 sensor graph is normal, but a flat line indicates a problem.
- Record and Review: Some scanners allow you to record live data sessions. This is incredibly useful for capturing intermittent problems that only occur under specific driving conditions. You can then review the data at your leisure.
- Utilize Bi-directional Control (if available): If your Ancel scanner has bi-directional control, you can command specific components (like solenoids or relays) to activate. This is a powerful diagnostic tool for testing components without having to disassemble parts of your engine.
- Perform Drive Cycles: After clearing codes or making a repair, perform a “drive cycle.” This is a specific sequence of driving conditions (idle, acceleration, steady speed, deceleration) that allows the vehicle’s computer to run all its diagnostic monitors. This ensures that the repair has truly fixed the issue and that all systems are ready for an emissions test.
Common Mistakes to Avoid
- Clearing Codes Without Diagnosis: As I mentioned, this is a big one. It’s tempting to just clear the light, but it only hides the problem. Always diagnose the code first.
- Ignoring Pending Codes: Pending codes are early warnings. Addressing them before they become confirmed codes can save you from more significant repairs down the line.
- Misinterpreting Codes: A DTC tells you where to start looking, not necessarily what to replace. For example, a “P0420: Catalyst System Efficiency Below Threshold” code doesn’t automatically mean you need a new catalytic converter. It could be an oxygen sensor, an exhaust leak, or a misfire causing the converter to fail.
- Not Checking for Technical Service Bulletins (TSBs): Before diving into complex diagnostics, check if there are any known TSBs for your vehicle’s make, model, year, and the specific DTC you’re seeing. Manufacturers often issue TSBs for common issues, providing specific diagnostic steps or known fixes.
- Forgetting to Update Firmware: Like any electronic device, your Ancel scanner may receive firmware updates. These updates can improve compatibility, add new features, or fix bugs. Check Ancel’s website periodically for updates for your specific model.
- Not Using Proper Safety Precautions: If you’re working with the engine running or under the hood, always ensure the vehicle is in park with the parking brake engaged. Be aware of moving parts and hot surfaces.
Beyond Basic Code Reading: Practical Applications
Your Ancel OBD2 scanner is more than just a Check Engine Light reader; it’s a versatile tool for various aspects of vehicle ownership and maintenance. I find myself using mine for several practical applications beyond just troubleshooting a warning light.
Pre-Purchase Inspections
When buying a used car, an Ancel scanner can be an invaluable asset. I always connect one to check for any stored or pending DTCs, even if the Check Engine Light isn’t on. This can reveal hidden issues that the seller might not be disclosing or even be aware of. I also check the I/M readiness monitors. If they are incomplete, it could indicate that the seller recently cleared codes to hide a problem, and the monitors haven’t had a chance to run their diagnostic tests yet.
Routine Maintenance and Monitoring
I use my scanner to monitor various parameters during routine maintenance. For instance:
- Engine Coolant Temperature: After replacing a thermostat or performing a coolant flush, I monitor the coolant temperature to ensure the engine reaches and maintains its optimal operating temperature.
- Fuel Trim Values: Keeping an eye on fuel trims (STFT and LTFT) can indicate potential issues with fuel injectors, vacuum leaks, or oxygen sensors before they become severe enough to trigger a Check Engine Light. Significant deviations from zero (positive or negative) suggest the engine’s computer is struggling to maintain the correct air/fuel mixture.
- Battery Voltage: While not a full battery test, monitoring the system voltage can give you an early warning of a failing alternator or battery, especially when observed during engine start-up or under electrical load.
- O2 Sensor Performance: Observing the fluctuating voltage of oxygen sensors helps confirm they are switching correctly, which is vital for fuel efficiency and emissions control.
Verifying Repairs
After I’ve performed a repair, I use the scanner to verify that the fix was successful. This involves:
- Clearing the original DTCs: As mentioned, only after the repair.
- Performing a drive cycle: This allows the vehicle’s computer to re-run all its diagnostic monitors.
- Checking I/M Readiness: Ensuring all monitors show “Complete” or “OK.”
- Re-scanning for codes: Confirming that the original codes do not reappear, and no new codes have been set.
- Monitoring live data: Observing relevant sensor readings to ensure they are within normal operating parameters for the repaired system. For example, after replacing a MAF sensor, I’d monitor its readings to ensure they are accurate.
Emissions Test Preparation
For those in areas with emissions testing, your Ancel scanner is your best friend. I always check the I/M Readiness status a few days before an inspection. If any monitors are incomplete, I have time to perform a drive cycle to get them to complete their tests. This proactive step can save you from failing an inspection and having to return.
Troubleshooting Intermittent Issues
Intermittent problems are notoriously difficult to diagnose. This is where the ability to view live data and freeze frame data becomes invaluable. If a problem only occurs under specific conditions (e.g., heavy acceleration, cold start), I try to replicate those conditions while monitoring relevant sensors. The freeze frame data, captured at the moment a code is set, can often provide the “smoking gun” by showing what the engine was doing when the fault occurred.
For example, if a misfire only happens when the engine is cold, reviewing the freeze frame data might show a low coolant temperature reading, pointing towards a faulty coolant temperature sensor or thermostat affecting fuel delivery.
Choosing the Right Ancel Scanner for Your Needs
Ancel offers a range of OBD2 scanners, from basic code readers to professional-grade diagnostic tools. Deciding which one is right for you depends on your budget, your technical comfort level, and the types of tasks you anticipate performing. I’ve found that considering these factors helps narrow down the choices.
Entry-Level Code Readers (e.g., Ancel AD310, Ancel BD200)
- Best for: Home users, beginners, those who primarily need to read and clear Check Engine Light codes.
- Features: Typically read/clear DTCs, view freeze frame data, I/M readiness, basic live data.
- Pros: Very affordable, easy to use, compact.
- Cons: Limited advanced features, may not offer detailed explanations for codes, no ABS/SRS/transmission diagnostics.
- My Take: If you just want to know why your Check Engine Light is on and clear it after a simple repair, these are perfectly adequate and a great starting point.
Mid-Range Diagnostic Scanners (e.g., Ancel FX2000, Ancel FX3000)
- Best for: Enthusiasts, DIY mechanics, those who want more in-depth diagnostics without a professional price tag.
- Features: All basic features plus enhanced diagnostics for ABS, SRS, Transmission, and Engine systems. May include battery test, oil light reset, and graphing capabilities for live data.
- Pros: Good balance of features and price, covers more vehicle systems, often has a larger, color screen.
- Cons: More expensive than basic readers, still not full bi-directional control or advanced coding.
- My Take: This category offers excellent value. If you plan to do more than just read engine codes, investing in a mid-range Ancel scanner will significantly expand your diagnostic capabilities.
Professional-Level Diagnostic Tools (e.g., Ancel X7, Ancel DS700)
- Best for: Professional technicians, advanced DIYers, small repair shops.
- Features: Comprehensive system diagnostics (engine, ABS, SRS, transmission, body, chassis, etc.), bi-directional control, coding functions, service resets (oil, EPB, SAS, BMS, DPF, TPMS), extensive vehicle coverage, often tablet-based with Wi-Fi updates.
- Pros: Extremely powerful, covers virtually all vehicle systems, performs active tests, future-proof with regular updates.
- Cons: Significantly more expensive, can have a steeper learning curve due to the sheer number of features.
- My Take: Unless you’re running a professional shop or are a very serious home mechanic tackling complex issues, these might be overkill. However, for those who need the full suite of diagnostic and service functions, they are robust tools.
Considerations When Choosing
- Vehicle Coverage: Ensure the scanner supports your specific vehicle make, model, and year. Ancel scanners generally have broad OBD-II compatibility, but advanced features might be brand-specific.
- Update Frequency: Look for scanners that offer regular software or firmware updates. This ensures compatibility with newer vehicles and keeps the diagnostic database current.
- Screen Size and Interface: A larger, color screen can make reading data and navigating menus much easier.
- Portability: If you plan to use it on the go, consider the size and whether it comes with a protective case.
- Customer Support: Good customer support can be invaluable if you encounter issues or have questions about specific functions.
Ultimately, the best Ancel scanner is the one that meets your specific diagnostic needs without breaking your budget. Start by identifying what problems you want to solve, and then match those needs to the scanner’s feature set.
Conclusion: Empowering Your Automotive Diagnostics
Learning how to use an Ancel OBD2 scanner is a significant step towards becoming a more informed and capable vehicle owner. It transforms the intimidating “Check Engine Light” into a manageable diagnostic starting point, empowering you to understand your car’s health in a way that was once reserved for professional mechanics. From simply reading and clearing codes to diving deep into live data streams and understanding freeze frame information, your Ancel scanner provides a window into your vehicle’s complex systems.
I hope this guide has demystified the process and given you the confidence to connect your scanner and begin your diagnostic journey. Remember, the key is not just to read the codes, but to interpret them, combine them with other data, and use that information to make informed decisions about your vehicle’s maintenance and repair. With practice and a little patience, your Ancel OBD2 scanner will become an indispensable tool in your automotive arsenal, saving you time, money, and unnecessary trips to the repair shop. A reliable answer to “how to use ancel obd2 scanner” comes from applying these points to the specific situation rather than relying on one rule.