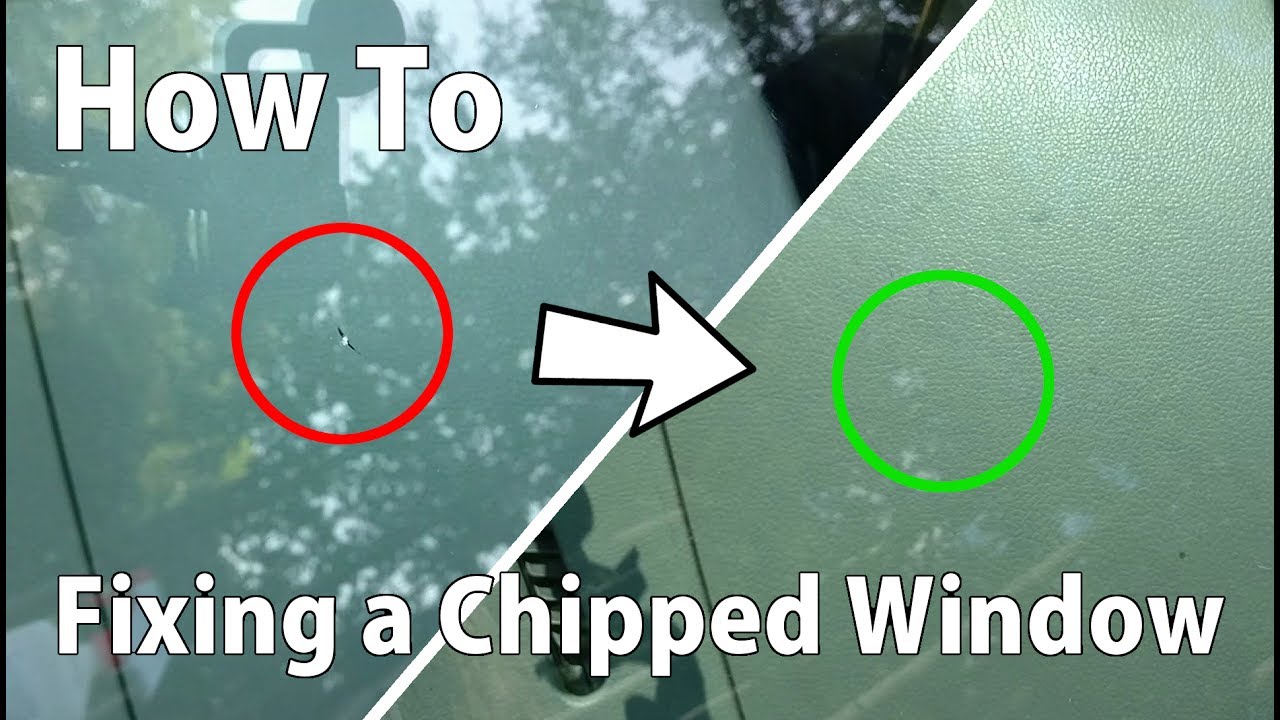
To fix a small rock chip in a windshield, clean and dry the damaged area, remove loose glass, center a windshield repair tool over the impact point, inject repair resin, remove trapped air according to the kit instructions, cure the resin with UV light or sunlight, and scrape away the hardened excess.
Rock chips are common on U.S. roads, especially where interstate traffic, road construction, loose gravel, winter sanding, and trucks can send small stones toward a windshield at highway speed. A chip that initially looks harmless can develop into a longer crack after temperature changes, vibration, another impact, or moisture enters the damaged glass. Repairing suitable damage promptly can therefore save the original windshield and reduce the chance that a minor problem becomes a replacement job.
The important question is not simply how to fix a rock chip in windshield glass, but whether your particular chip is suitable for a do-it-yourself repair. Small bull’s-eye, star, half-moon, and combination chips in the outer layer of a laminated windshield are commonly repairable. Damage near an edge, damage that reaches the inner glass layer, heavily contaminated chips, stress cracks, large impact pits, or damage affecting the driver’s view or a camera and sensor area should be professionally evaluated instead.
The basic repair method uses a low-viscosity resin to displace air inside the break and bond the damaged glass. The finished spot may still be visible. The primary goal is to stabilize the damage and improve clarity, not necessarily to make every trace of the impact disappear.
Can You Fix the Rock Chip or Does the Windshield Need Replacement?
Start by deciding whether the damage is appropriate for repair. This decision matters more than the brand of repair resin you use. Laminated automotive windshields contain two layers of glass bonded around a plastic interlayer. Most DIY repair systems are intended for limited damage that affects the outer glass layer.
Small bull’s-eye and star-shaped impact breaks are common repair candidates. As a conservative rule for a home repair, a chip around 1 inch or less across is a much more reasonable candidate than extensive or complicated damage. Professional repair standards can permit certain larger breaks under controlled conditions, but that does not mean every larger break is appropriate for an inexperienced DIY repair.
Location matters as much as size. Damage very close to the windshield edge can be under greater structural stress and may spread. Damage directly in front of the driver’s primary viewing area can also leave optical distortion after resin is cured. On vehicles equipped with forward-facing cameras, rain sensors, head-up displays, antennas, or other windshield-mounted technology, damage near those features deserves professional evaluation.
Source: bluediamondautoglass.com
Good DIY candidate
A fresh, small chip in the outside layer with a distinct impact point and no long spreading crack.
Professional evaluation recommended
Damage near an edge, inside-layer damage, a large or heavily contaminated break, or a chip with several long cracks extending from it.
Visibility concern
Consider professional repair or replacement when the damage sits directly in the driver’s critical field of view because even a repaired mark can cause distortion.
Sensor concern
Use extra caution around ADAS cameras, rain sensors, head-up display areas, antennas, and other windshield-integrated features.
Common Types of Repairable Windshield Chips
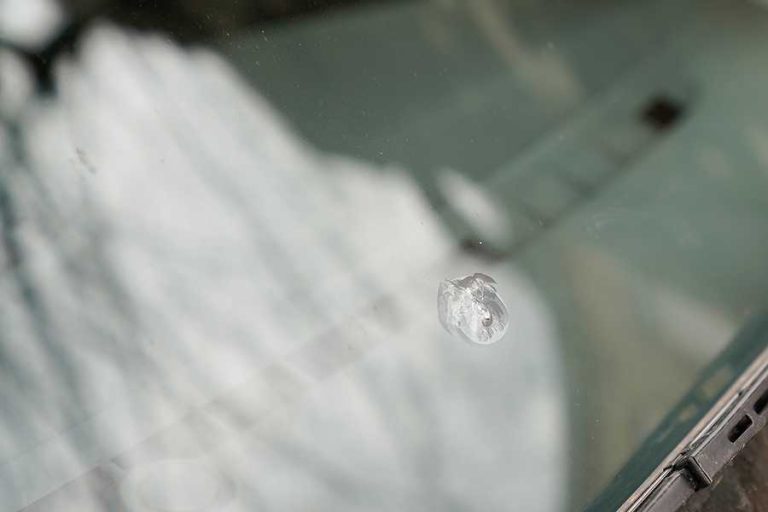
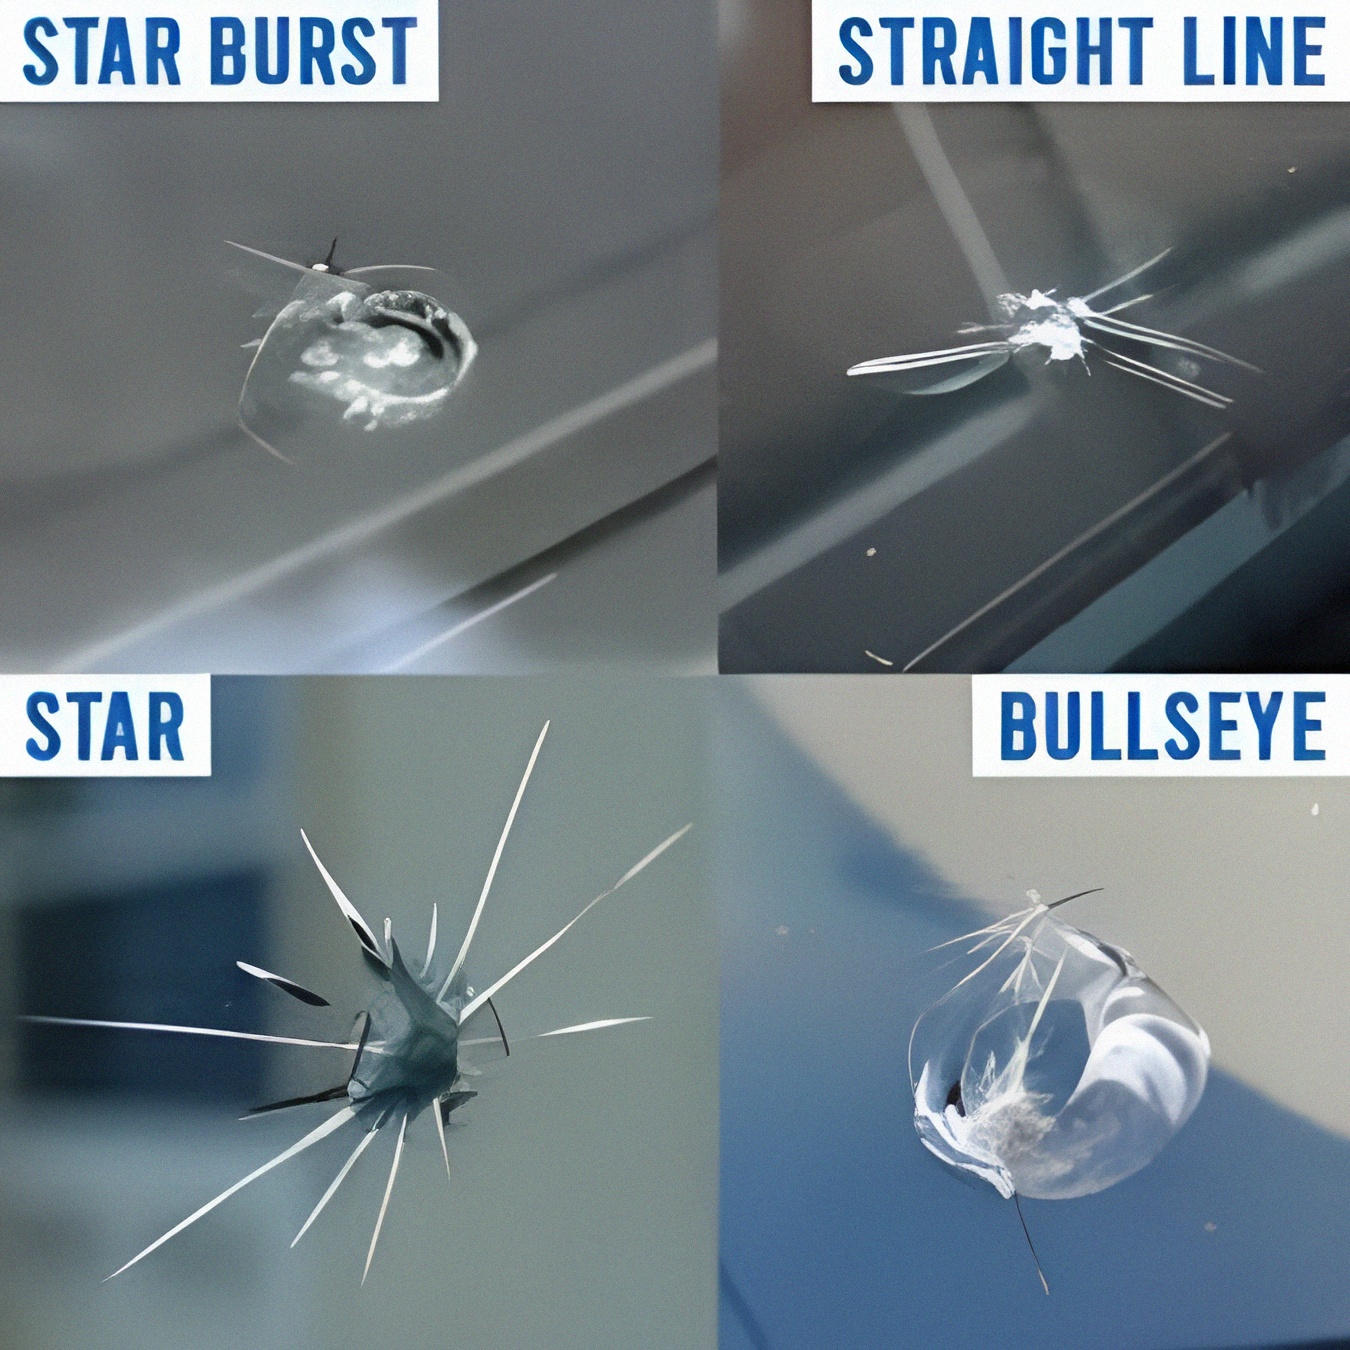
A bull’s-eye usually has a circular damaged area surrounding the impact point. A half-moon resembles a partial bull’s-eye. A star break has short cracks radiating outward, while a combination break contains characteristics of more than one chip type. These shapes can often accept repair resin when they are small, dry, relatively clean, and confined to the repairable portion of the windshield.
Bull’s-eye
Round damage with a clearly defined impact center.
Star break
An impact point with several short fracture lines radiating outward.
Half-moon
A partial circular break that does not form a complete bull’s-eye.
Combination break
A chip containing both circular and radiating fracture characteristics.
What You Need to Fix a Rock Chip in a Windshield
A basic windshield repair kit normally provides the specialized parts needed to inject resin into a chip. Designs differ, so read the instructions included with your kit before starting. Some systems use suction cups and a threaded resin chamber, while others use an adhesive mounting seal, syringe, bridge, or injector.
Avoid substituting household glue, clear nail polish, cyanoacrylate adhesive, or similar products for dedicated windshield repair resin. A proper repair system is designed to move low-viscosity resin into the damaged glass and cure it appropriately.
Source: oceanproperty.co.th
Windshield repair kit
Use a kit designed specifically for laminated automotive windshield chips.
Repair resin
The resin fills fractures and is later cured using UV exposure according to the product directions.
Cleaning supplies
Have a clean dry cloth or paper towel available for cleaning the surrounding glass.
Loose-glass tool
Use the supplied tool or another method specifically recommended by the repair kit to remove loose fragments from the impact point.
Curing film
Many kits include a transparent curing strip that holds finishing resin flat against the windshield.
UV source
Many resins cure in strong sunlight, while some products can use an appropriate UV lamp. Follow the resin manufacturer’s requirements.
Choose the Right Working Conditions
Work on dry glass and keep the windshield out of direct sunlight during preparation and resin injection unless your kit specifically instructs otherwise. Excessively hot glass can make resin handling more difficult, and moisture inside the chip can interfere with a good repair.
Temperature requirements vary by resin. For example, some current consumer windshield repair products recommend application at approximately 40 degrees Fahrenheit or warmer and require strong UV exposure during the curing stage. The instructions supplied with your specific kit take priority because resin formulations and applicator designs are not identical.
Dry
Do not intentionally trap rainwater, washer fluid, or cleaning liquid inside the chip.
Shaded during setup
Keep UV-curing resin away from strong sunlight until you are ready for curing.
Stable temperature
Avoid rapidly heating or cooling damaged glass while you work.
How to Fix a Rock Chip in Windshield Glass Step by Step
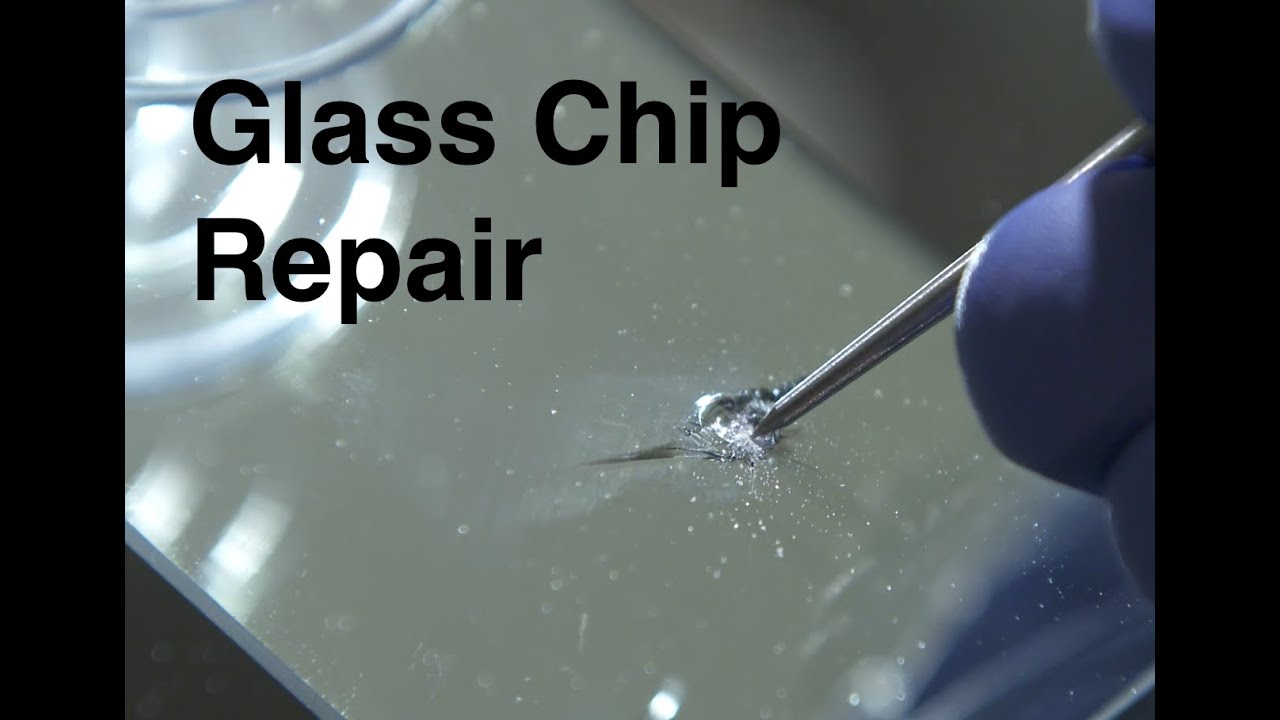
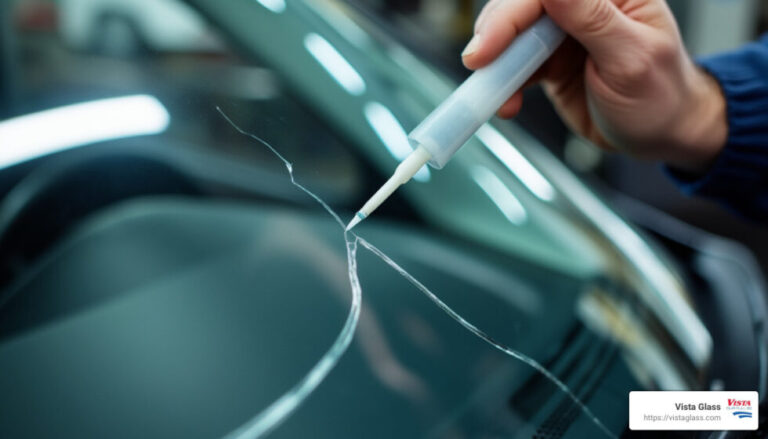
The exact injector sequence varies among repair kits, but the underlying process is similar: prepare the impact point, seal an injector over it, force resin into the break while releasing trapped air, remove the applicator, add finishing resin if required, and cure it with UV light.
Before proceeding, park safely, turn the vehicle off, and inspect the chip from both sides of the windshield. Stop if you discover interior-layer damage, a rapidly extending crack, or damage that appears unsuitable for the instructions supplied with your kit.
Source: youtube.com
Step 1: Clean and dry the chip
Wipe dirt from the surrounding glass without flooding the impact point with cleaner. The break should be dry before resin is injected.
Step 2: Remove loose glass
Carefully remove loose fragments from the impact point using the tool and technique specified by your repair kit. Do not enlarge the crater unnecessarily.
Step 3: Position the applicator
Center the repair bridge, suction-cup base, adhesive seal, or injector directly over the impact point. Check alignment from inside the vehicle if necessary.
Step 4: Add the repair resin
Place the specified quantity of resin into the injector or chamber. Avoid touching or contaminating the resin opening.
Step 5: Apply the kit’s pressure and vacuum sequence
Follow the manufacturer’s sequence exactly. Pressure helps move resin into fractures while vacuum or pressure-release stages help remove trapped air.
Step 6: Inspect resin penetration
Look at the damaged area from inside the car and at an angle. Dark lines often indicate remaining air, while properly filled fractures commonly become less noticeable.
Step 7: Remove the repair device
Once the injection sequence is complete, carefully release the applicator without pulling aggressively against the damaged glass.
Step 8: Apply finishing resin
If directed by the kit, place a small drop of resin on the remaining surface pit and cover it with the supplied clear curing strip.
Step 9: Cure the resin
Move the vehicle or expose the repaired area to the UV conditions specified by the manufacturer. Do not disturb the curing strip until the resin has hardened.
Step 10: Finish the surface
Remove the curing strip and carefully scrape hardened excess resin from the surface using the kit’s specified technique. The area should feel smooth enough that the wiper can pass over it normally.
Why the Pressure and Vacuum Stages Matter
A rock chip contains tiny voids and fracture paths filled with air. Simply putting resin on top may leave those spaces unfilled. An injector is intended to reduce trapped air and move resin through the damaged area.
This is why improvising the pressure sequence can produce a poor repair. Some kits use a screw-style pressure driver, while others alternate syringe positions or bridge pressure. Use the timing and number of cycles printed for your kit instead of assuming every repair system works the same way.
How to Tell If the Rock Chip Repair Worked
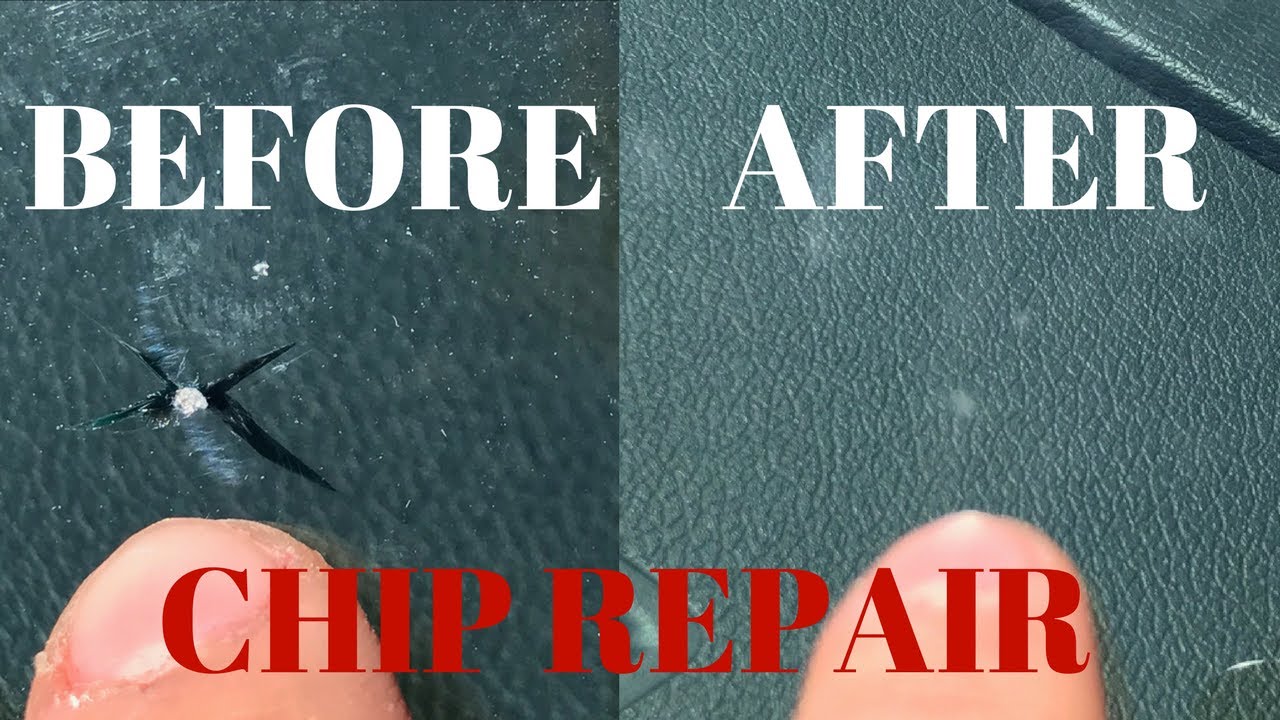
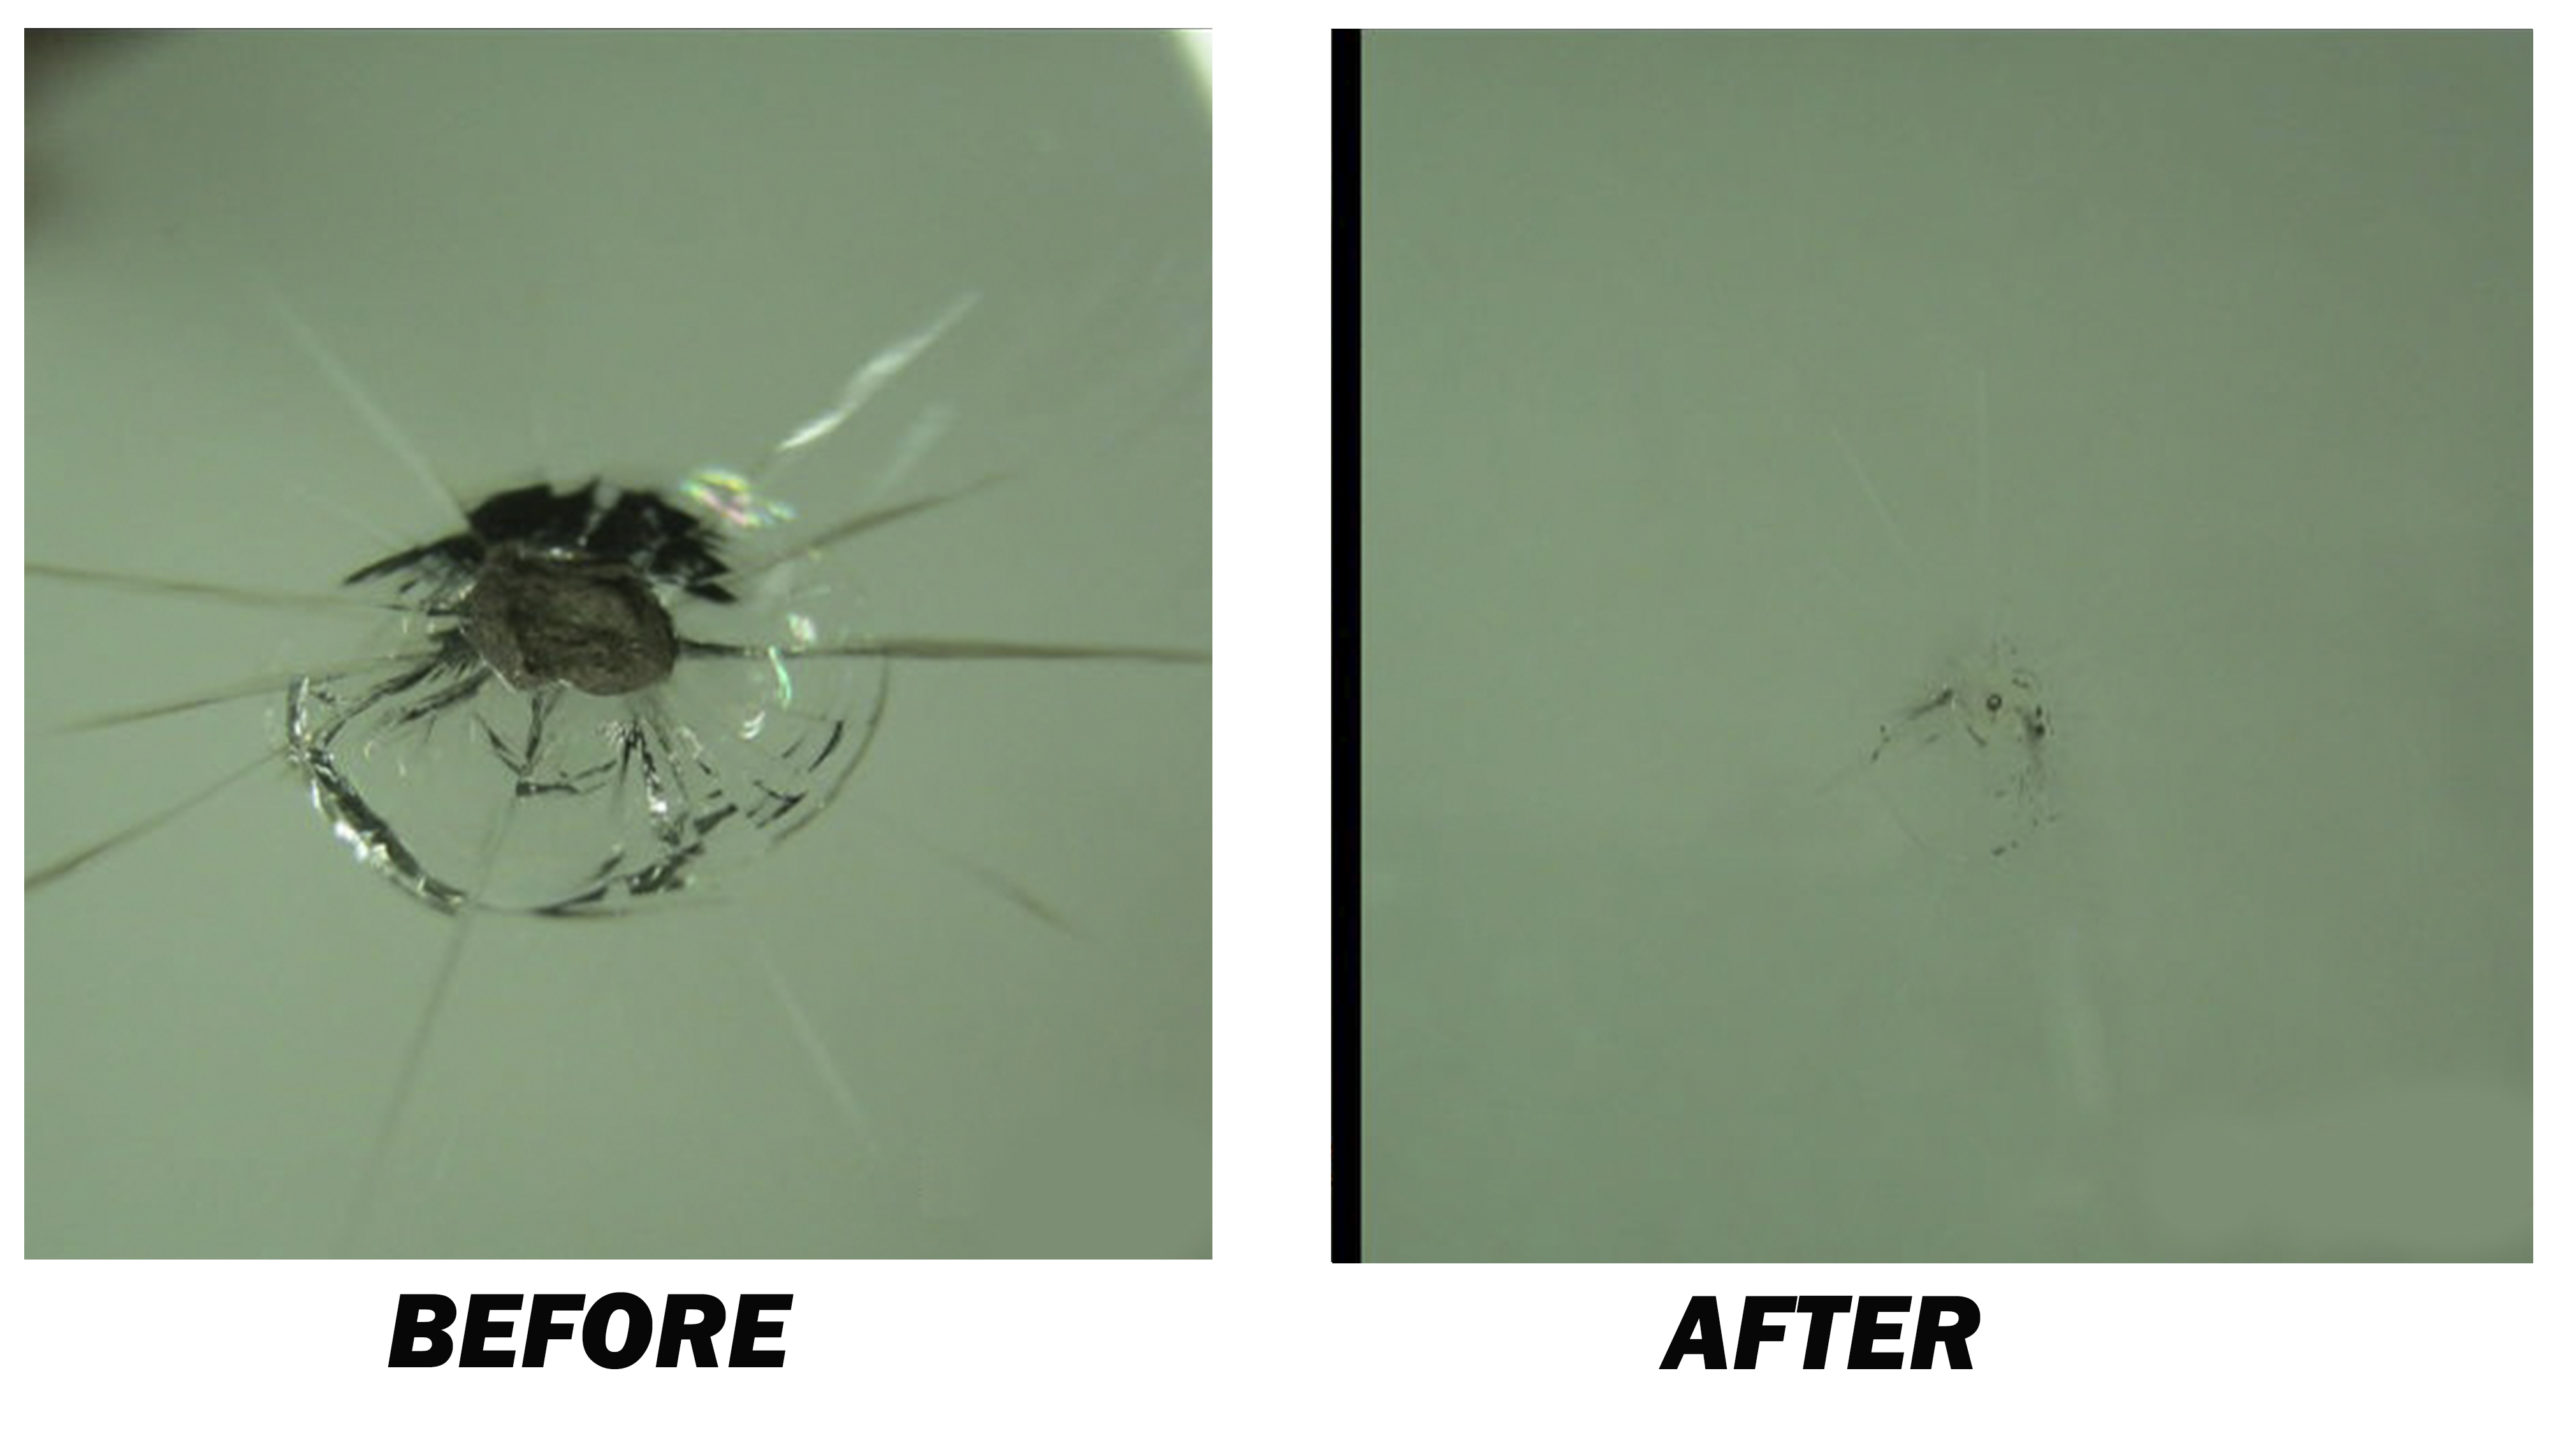
A successful repair should stabilize the damaged area, fill much of the visible fracture network, seal the surface, and leave the repair reasonably smooth. Do not judge success only by appearance. Windshield repair can substantially improve clarity without making the impact mark completely invisible.
Look through the repair from several angles. Some residual outline, cloudiness, or a tiny impact scar can remain because fractured glass does not become physically identical to untouched glass after resin is added.
After the resin has fully cured, run a fingertip gently across the finished surface. It should not contain a sharp protrusion or large open pit that could interfere with a windshield wiper. If the damage continues spreading, remains obviously open, or appears structurally questionable, stop treating it as a cosmetic problem and have the windshield inspected by an auto-glass professional.
Source: oceanproperty.co.th
Good sign
Radiating lines are less visible because resin has entered the break.
Good sign
The surface pit is sealed and smooth after finishing.
Normal result
A faint outline or small visual blemish remains even though the chip has been stabilized.
Warning sign
A crack continues to lengthen after the repair.
Warning sign
Large dark areas or obvious empty fracture lines remain and the repair appears unfilled.
Do Not Expect the Windshield to Look Brand New
Repair resin improves the damaged area, but it cannot reverse the fact that the glass was fractured. The degree of cosmetic improvement depends on the chip shape, age, contamination, moisture, fracture depth, and how completely resin reaches the damaged paths. A stabilized but slightly visible chip can still represent a successful repair.
Common Windshield Rock Chip Repair Mistakes
Most avoidable problems happen before or during resin injection. Waiting too long allows dirt and moisture to enter the break. Working on very hot glass can complicate resin handling, while exposing UV-curing resin to strong sunlight prematurely may begin curing before the injection process is complete.
Another mistake is repeatedly trying to improve a cured repair. Once resin has hardened inside the chip, reinjecting the same location may not restore the original flow paths. At least one major consumer repair-kit manufacturer specifically advises against repeatedly reopening and applying its resin to the same cured damage because the additional attempt may be ineffective or place extra stress on the glass.
Do not intentionally drill, strike, flex, or enlarge a chip unless a professional repair procedure and appropriate training specifically call for it. A small impact break can turn into a long crack surprisingly quickly when additional stress is applied.
Source: pinterest.com
Waiting too long
Water, road grime, car-wash chemicals, and dirt can contaminate the fracture paths.
Repairing wet damage
Moisture trapped inside the chip can interfere with resin filling and appearance.
Using household adhesives
Ordinary glue and nail products are not substitutes for a windshield repair system.
Curing too early
UV resin that hardens before penetrating the break can prevent proper filling.
Using excessive force
Overtightening or pressing aggressively against damaged glass can increase stress.
Chasing cosmetic perfection
A repair can be structurally stabilized while still leaving a visible mark.
Protect a Fresh Chip Before You Can Repair It
If you cannot repair the chip immediately, keeping contamination out of it can improve the chance of a cleaner repair later. Keep the windshield dry when practical and avoid unnecessary rapid temperature changes. Do not wash the damage aggressively or force liquid into the impact point.
Avoid blasting a cold windshield with very hot defroster air or pouring hot water on icy glass. A sudden temperature difference across already damaged glass can add stress and may encourage a crack to spread.
When You Should Call a Professional Instead
DIY repair is best treated as an option for limited, straightforward damage. Professional auto-glass technicians have specialized injectors, inspection equipment, resins, experience, and repair procedures that allow them to evaluate breaks that are difficult for a vehicle owner to judge accurately.
Consider professional service when the chip is large, complicated, dirty, old, close to an edge, associated with a long crack, or directly in an important viewing area. Replacement may be necessary if both glass layers are damaged, the plastic interlayer is affected, the windshield has a stress crack, or the damage compromises an area containing important vehicle technology.
U.S. drivers should also remember that windshield repair and replacement requirements can vary by state and vehicle situation. Insurance coverage varies as well. Some auto policies provide glass coverage or handle chip repair differently from windshield replacement, so check your current policy rather than assuming the deductible or coverage will be the same.
Source: youtube.com
Edge damage
Damage extending into or very near an edge deserves professional inspection because edge areas can be highly stressed.
Inner-layer damage
A standard exterior DIY repair is not appropriate when the inner windshield glass is damaged.
Stress crack
A crack without a typical impact point can indicate stresses that a simple chip repair will not address.
ADAS or sensor area
Damage around forward cameras, sensors, antennas, head-up display zones, or other integrated systems should be evaluated with the vehicle manufacturer’s requirements in mind.
Driver visibility
Professional evaluation is prudent when repair artifacts could interfere with the driver’s clear view of the road.
Will a Professional Repair Make the Chip Invisible?
Not necessarily. Professional equipment can produce excellent resin penetration, but optical results still depend on the original fracture. The main objectives are to stabilize appropriate damage, restore a smoother surface, and improve visual clarity. A slight blemish can remain after a technically successful repair.
Repair or Replace a Chipped Windshield: Quick Decision Guide
For a U.S. vehicle owner deciding what to do next, begin with size, depth, location, and complexity rather than cost alone. A small fresh chip in the outer glass and away from critical areas often favors repair. Deeper or more extensive damage shifts the decision toward professional assessment and possible replacement.
Do not rely on a single universal size rule. Consumer repair kits, professional repair standards, insurers, glass companies, vehicle manufacturers, and state requirements can use different limits. The conservative choice is to use a DIY kit only when the damage clearly falls within that kit’s stated capabilities.
Source: youtube.com
Small fresh exterior chip
Often suitable for repair if the kit instructions allow its shape and size.
Dirty or moisture-filled chip
May be more difficult to repair cleanly and can justify professional service.
Long spreading crack
Professional assessment is preferable because crack length and location can change whether repair remains appropriate.
Damage reaching an edge
Replacement may be recommended depending on the extent and structural implications.
Damage through multiple layers
Do not treat it as a simple exterior rock-chip repair.
Damage affecting cameras or visibility
Professional evaluation is the safer approach because optical quality and vehicle systems can be involved.
Why Repairing Early Usually Helps
Fresh damage is generally easier to fill because the fractures have had less time to collect water, dirt, wax, washer fluid, or other contaminants. Repairing a suitable chip promptly can also stabilize the break before normal driving vibration or temperature changes contribute to additional cracking.
Frequently Asked Questions
Q
How soon should I repair a rock chip in my windshield?
Repair suitable damage as soon as practical. A fresh chip is less likely to contain dirt and moisture, and stabilizing it early reduces the time it is exposed to vibration and temperature changes that can contribute to spreading.
Q
Can I fix a windshield rock chip myself?
Yes, many small exterior chips can be repaired with a consumer windshield repair kit when the damage falls within the kit manufacturer’s size, type, depth, and location limits. DIY repair is not appropriate for every chip, especially damage involving an edge, multiple glass layers, critical visibility areas, long cracks, or windshield-mounted technology.
Q
Will the chip completely disappear after repair?
Usually not. Resin often makes the damage substantially less noticeable, but the original fracture can leave a faint outline, impact mark, or slight optical change. Stabilization and proper filling are more important indicators of success than complete invisibility.
Q
Can I use super glue or clear nail polish on a windshield chip?
They are not appropriate substitutes for a dedicated windshield repair system. Windshield repair resin is formulated to penetrate damaged laminated glass and cure in a controlled way. Household adhesives can contaminate the chip and potentially make a later professional repair more difficult.
Q
Can a repaired windshield chip crack again?
A properly repaired chip is intended to stabilize the damaged area, but no repair makes previously fractured glass identical to undamaged glass. New impacts, severe temperature stress, body flex, unrelated cracks, or an unsuccessful initial repair can still create additional windshield damage.
Q
Can I repair a rock chip when the windshield is wet?
A dry chip is preferable because trapped moisture can interfere with resin penetration and the cosmetic result. If rain or washing has filled the chip, allow it to dry properly before attempting a repair rather than sealing moisture inside.
Q
Should I repair a chip directly in front of the driver?
Professional evaluation is usually the better approach for damage in a critical viewing area. Even a successful repair can leave slight distortion or a visible blemish, and applicable requirements can vary by location.
Q
Does car insurance cover windshield rock chip repair in the United States?
Coverage depends on your insurer, policy, deductible, state, and selected glass coverage. Some policies treat small glass repairs differently from windshield replacement. Check the terms of your current policy or contact your insurer before assuming that a repair will be free or that a deductible will apply.
✦ Wrapping Up
Conclusion
Learning how to fix a rock chip in windshield glass is mainly about choosing appropriate damage and following the resin system correctly. For a small, fresh exterior chip, clean and dry the area, remove loose material carefully, center the injector, add the specified resin, perform the required pressure and air-removal sequence, cure the resin with the specified UV exposure, and finish the surface.
Do not let the simplicity of a DIY kit turn every windshield problem into a home repair. Edge damage, inner-layer damage, long or spreading cracks, stress cracks, poor visibility areas, and damage near ADAS cameras or other integrated windshield features deserve professional evaluation. When a chip is repairable, acting early gives you a better opportunity to keep contaminants out and stabilize the original windshield before the damage grows.
💡 Key Takeaway
Inspect the rock chip today. If it is small, dry, limited to the exterior layer, away from critical edges and sensor areas, and within your repair kit’s stated limits, repair it promptly by following the kit’s exact resin injection and curing instructions. Otherwise, have an auto-glass professional evaluate it before the damage spreads.
Learn how to install a windshield sun shade correctly in your car. Follow simple steps for folding, roll-up, and umbrella-style shades, plus fit, safety, storage, and troubleshooting tips.
Learn how to fold a windshield sun shade correctly with simple steps for pop-up, accordion, and umbrella styles, plus storage and troubleshooting tips.

1-408w.jpg "How To Repair A Rock Chip In A Windshield, 42% OFF")