A small, shallow windshield crack or impact break can sometimes be repaired with a windshield repair resin kit, but long, edge-reaching, deep, contaminated, or vision-obstructing damage should be inspected by a professional and may require windshield replacement.
For drivers in the United States, a cracked windshield is more than a cosmetic problem. Highway debris, gravel, temperature swings, potholes, winter freezing, and summer heat can turn a small impact mark into a spreading crack. Windshield inspection and visibility requirements also vary by state, so damage that interferes with the driver’s view should be addressed promptly rather than treated as something that can simply be ignored.
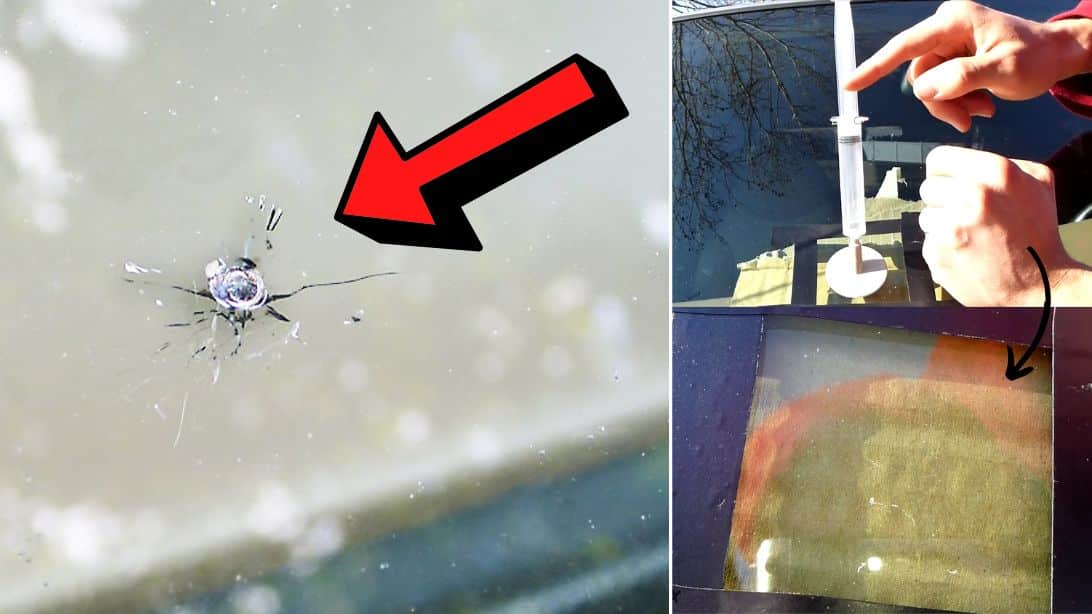
If you are trying to learn how to repair a cracked windshield yourself, the first step is deciding whether the damage is actually appropriate for a DIY repair. Windshield resin works by flowing into fractures in laminated glass, displacing air, and curing into a hardened material that helps stabilize the damaged area. It does not restore the glass to factory-new condition, and a repaired mark may remain visible.
This guide explains how to identify repairable damage, prepare the windshield, use a common resin-and-injector repair system, cure and finish the repair, recognize a successful result, and know when to stop and arrange professional repair or replacement. Because repair-kit designs differ, the instructions supplied with your specific kit should always take priority over generalized steps.
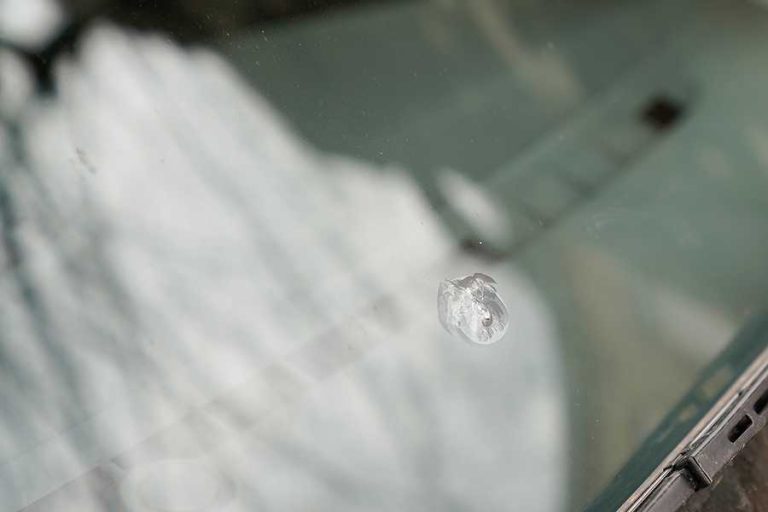
You can sometimes repair a cracked windshield yourself, but the answer depends on the size, shape, depth, location, cleanliness, and age of the damage. Small stone-impact breaks are generally much better candidates for DIY resin repair than long running cracks.
Modern vehicle windshields are generally laminated safety glass. They use two glass layers bonded around a plastic interlayer. Many repair methods work by introducing optical resin into damage in the outer glass layer and then curing that resin. If the damage penetrates both glass layers, affects the plastic interlayer, or involves the inside layer, a simple DIY resin repair is not an appropriate solution.
Size limits also vary by repair system. For example, some consumer repair kits are specifically designed for bullseye or star-type damage approximately 1.25 inches in diameter or smaller. Professional repair businesses may use different equipment and may accept certain cracks several inches long, so the limit printed on your kit should be treated as the controlling DIY specification.
Location matters just as much as size. A small defect directly in front of the driver can remain optically visible after repair. Repairing damage close to windshield-mounted cameras, sensors, antennas, heating elements, or other embedded technology can also require vehicle-specific procedures.
Source: franksautoglasschicago.com
Usually better DIY candidates
Small bullseye, combination, or star-type impact damage that affects the outer glass layer and remains within the size limit of the selected repair kit.
Needs professional evaluation
A running crack, damage close to an edge, multiple damaged areas, heavily contaminated damage, or anything within the driver’s critical viewing area.
Usually replacement territory
Damage through multiple layers, major edge-to-edge cracking, extensive branching, damage to the plastic interlayer, or glass that is no longer structurally secure.
Repair Versus Replacement Decision Guide
There is no single universal crack length that guarantees repairability. Consumer products, professional repair companies, vehicle manufacturers, and auto-glass standards may use different limits. A cautious DIY approach is to repair only damage explicitly covered by your kit and refer anything questionable to an auto-glass technician.
Professional replacement becomes especially important when the crack compromises visibility or reaches structurally sensitive areas of the windshield. Replacement may also require recalibration of windshield-mounted advanced driver-assistance system cameras on equipped vehicles.
Small and isolated
DIY repair may be reasonable if the kit specifically supports the damage type.
Long or spreading
Have the windshield professionally assessed before attempting to inject resin.
In the driver’s view
Professional evaluation is preferable because even a successful repair can leave visible distortion or a cosmetic blemish.
At the windshield edge
Treat the damage cautiously because edge involvement can make a crack more difficult to repair reliably.
What You Need Before Repairing a Cracked Windshield
Before beginning the repair, gather everything required by your specific windshield repair kit and make sure the glass is dry, reasonably clean, and at an acceptable temperature. Resin systems are sensitive to contamination and curing conditions, so preparation can make a large difference in the final result.
A typical consumer kit may contain repair resin, an adhesive seal, a pedestal or bridge, an injector or syringe, curing film, a push pin, and a razor blade. Some designs use a different bridge assembly, so do not substitute one manufacturer’s sequence for another manufacturer’s kit.
Many common repair resins cure when exposed to ultraviolet light. That does not mean the entire repair should necessarily be carried out in direct sunlight. Some kits instruct users to perform the injection process in shade and move the vehicle into sunlight only for curing. Always follow the resin manufacturer’s temperature and UV instructions.
Wear eye protection and disposable gloves. Keep uncured resin away from your eyes, skin, dashboard, trim, and painted surfaces. Work in a well-ventilated area and follow every chemical warning included with the product.
Source: beacar.com
Windshield repair kit
Use a kit designed for laminated automotive windshield damage and verify that your damage falls within its stated repair limits.
Clean dry cloth
Use it around the repair area without forcing fibers, cleaner, or moisture into the fracture.
Push pin or supplied probe
Some kits use this to carefully remove loose glass from the impact pit.
Razor blade
Often used during final finishing to remove excess fully cured resin from the glass surface.
Protective equipment
Wear eye protection and gloves while handling resin and damaged glass.
Choose the Right Working Conditions
Avoid repairing a windshield immediately after it has been sitting in intense summer sun or extreme winter cold. Rapid temperature changes place additional stress on cracked glass. Let the windshield gradually reach the temperature range specified by the repair-kit instructions.
As one example, a commonly sold consumer windshield repair kit specifies performing the repair in shade with the windshield between 50 degrees Fahrenheit and 75 degrees Fahrenheit. Other products may specify different conditions, so check your kit rather than assuming those numbers apply universally.
Keep it dry
Water inside the fracture can interfere with resin penetration.
Avoid extreme glass temperatures
Do not work on very hot or frozen glass unless your product specifically allows it.
Prevent contamination
Keep wax, washer fluid, glass polish, dirt, and oily cleaners out of the damaged area.
How to Repair a Cracked Windshield Step by Step
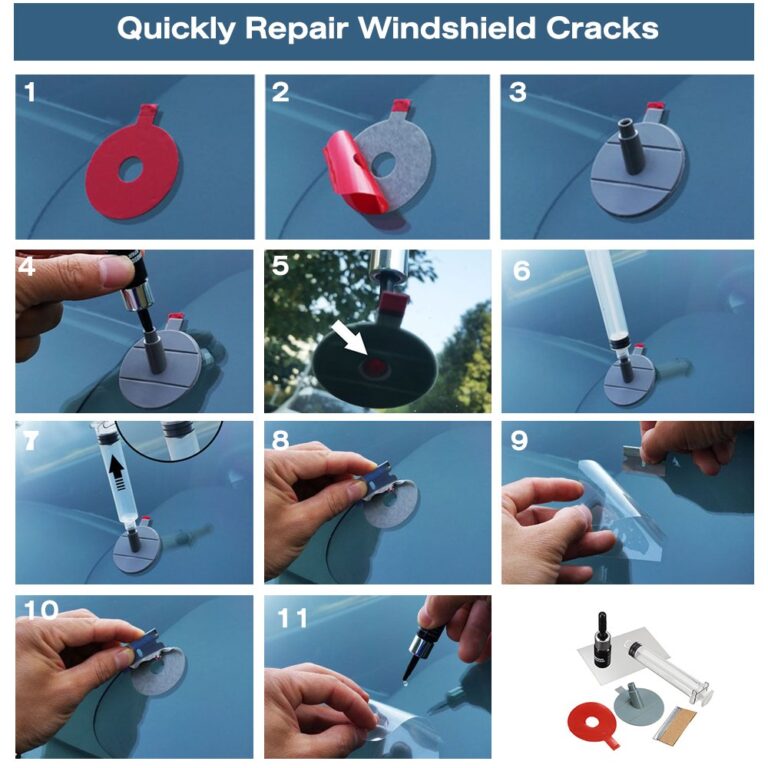
The exact method depends on your repair kit, but most resin-injection systems follow the same general principle: clean the impact point, seal an applicator over the damage, introduce resin, use pressure or vacuum to move resin into the fracture, cure it, and finish the surface.
Do not improvise the pressure, vacuum, cure time, or resin quantity. The following sequence explains the process so you know what is happening, but your kit’s printed directions should control the actual repair.
Source: diyjoy.com
Step 1: Inspect the damage
Look from both inside and outside the vehicle. Stop if the damage reaches multiple layers, appears to involve the inside glass, enters an unsafe viewing area, or falls outside the repair kit’s stated limits.
Step 2: Protect the work area
Park safely, switch off the vehicle, protect nearby paint and dashboard surfaces, and wear gloves and eye protection.
Step 3: Clean around the crack
Wipe the surrounding glass carefully. Remove loose glass from the impact pit only as directed by the kit. Do not flood the fracture with household cleaner.
Step 4: Center the applicator
Position the adhesive seal, bridge, pedestal, or injector directly over the impact point. An off-center applicator may prevent resin from reaching all parts of the break.
Step 5: Add the repair resin
Dispense the quantity specified by the manufacturer. Keep resin away from the vehicle’s paint, trim, and interior surfaces.
Step 6: Create vacuum or pressure
Use the kit’s injector, syringe, or bridge mechanism exactly as instructed. This stage is intended to remove trapped air and encourage resin to travel through the fracture.
Step 7: Inspect resin penetration
View the damage from different angles. Properly filled fracture lines often become less reflective or less obvious as air is displaced by resin.
Step 8: Remove the applicator
After the specified injection period, carefully remove the repair fixture without applying unnecessary force to the windshield.
Step 9: Apply finishing resin and curing film
Where instructed, add a small amount of finishing resin over the impact pit and place the supplied transparent curing strip on top.
Step 10: Cure the resin
Expose the repair to sunlight or the specified UV source for the full period stated by the resin manufacturer.
Step 11: Finish the surface
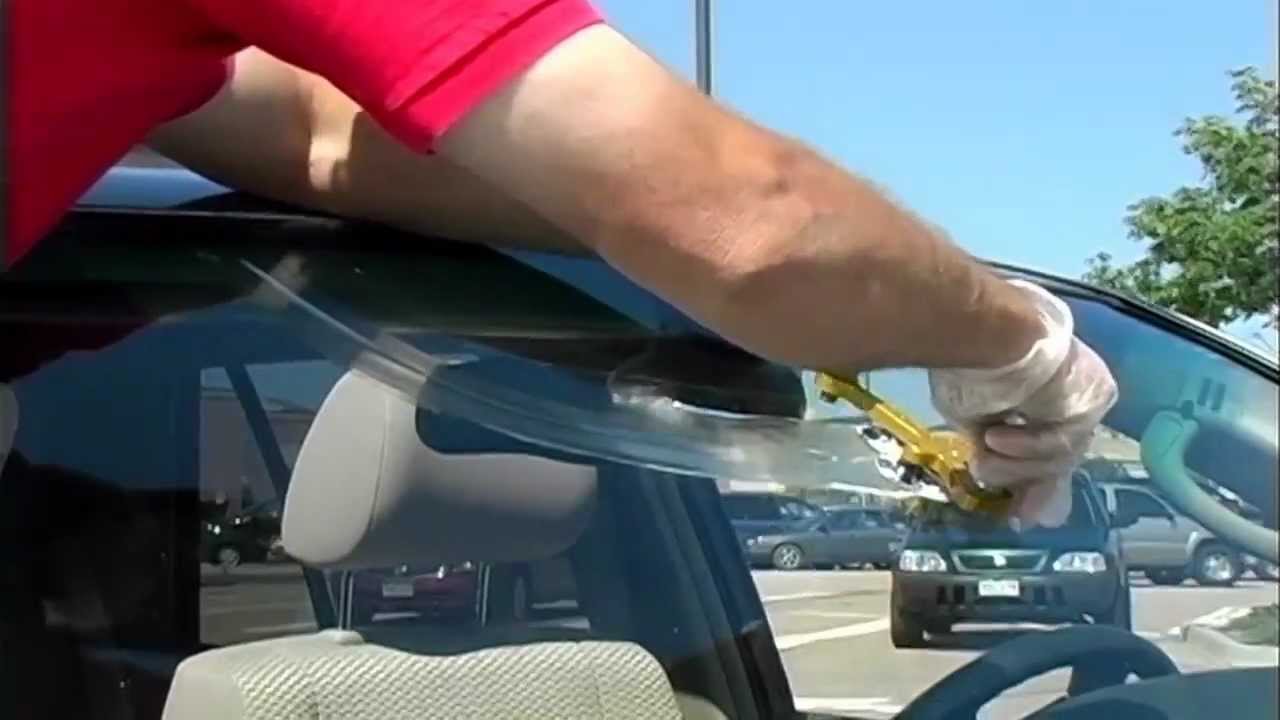
After the resin is fully cured, remove the curing film. If the product instructions permit it, hold a razor blade almost flat against the glass and carefully remove excess cured resin.
Why Vacuum and Pressure Matter
A windshield fracture contains extremely narrow spaces that may hold air. Resin placed only on top of the crack may never penetrate those spaces. An injector or bridge system creates controlled pressure changes that help exchange trapped air for liquid resin.
This is one reason household adhesives, clear nail polish, and improvised surface coatings are poor substitutes for a purpose-made windshield repair system. They do not reproduce the controlled injection process required to fill the fracture.
Vacuum stage
Helps draw trapped air from the damaged area in systems designed to use vacuum.
Pressure stage
Helps push liquid resin through small fracture paths.
UV curing
Hardens compatible repair resin after it has penetrated the damage.
Do Not Force Resin Into a Long Crack
A long running crack is different from a compact stone-impact break. If a crack is already several inches long, approaching an edge, branching substantially, or continuing to grow, do not assume that a basic chip-repair kit will stabilize it.
Professional long-crack repair may use specialized tools and techniques that are not included in common consumer kits. Attempting an unsupported DIY repair can contaminate the crack with cured resin and complicate later professional work.
How to Tell Whether the Windshield Repair Worked
A successful windshield repair stabilizes the damaged area and fills much of the fracture with cured resin. The damage does not necessarily disappear. A faint outline, small impact pit, shadow, or optical blemish may remain visible even after a technically successful repair.
Inspect the repair from both sides of the windshield once the resin has completely cured. Look for obvious unfilled fracture lines, bubbles, surface depressions, or evidence that the crack has extended beyond its original boundary.
Do not repeatedly add more resin simply because the repair remains visible. Cosmetic appearance and structural stabilization are different goals. Some damage remains noticeable because fractured glass reflects light differently even after the void has been filled.
Source: vanitystardom.com
Good sign
The fracture appears substantially filled and does not continue spreading.
Normal limitation
A small blemish or shadow remains visible after curing.
Possible failed repair
Large air pockets or clearly empty fracture lines remain after completing the manufacturer’s procedure.
Stop using DIY methods
The crack grows during repair, reaches an edge, or develops additional branches.
What If Air Bubbles Remain?
Small bubbles can indicate that air was not fully displaced by resin. Before curing, some repair systems allow another pressure or vacuum cycle. Once the resin has cured, however, correcting an incomplete repair becomes much more difficult.
Consult the instructions before repeating any step. If the product does not provide a procedure for incomplete filling, professional assessment is safer than drilling, heating, flexing, or repeatedly pressing on the windshield.
What to Do If You Cannot Repair the Crack Immediately
If you cannot repair the windshield immediately, your goal is to reduce contamination and mechanical or thermal stress until the glass can be evaluated. A temporary protective measure should never be confused with an actual windshield repair.
Temperature differences are particularly hard on damaged glass. Avoid blasting a very hot windshield with maximum air conditioning or directing maximum defroster heat at very cold glass. Allow cabin and glass temperatures to change progressively.
Driving over potholes, railroad crossings, rough unpaved surfaces, and severe road irregularities can flex the vehicle body and place additional stress on an existing crack. You may not be able to avoid every bump, but gentle driving reduces unnecessary shock.
Some auto-glass guidance recommends temporarily covering small damage with clean clear tape to reduce dirt or moisture entry, while other guidance prefers leaving the damage uncovered before professional service. Because procedures differ, follow the repair provider’s instructions when you already have an appointment scheduled.
Source: tcotreport.com
Avoid sudden temperature changes
Gradually heat or cool the cabin instead of directing extreme air temperatures at the crack.
Do not pour hot water on frozen glass
The rapid temperature difference can place severe stress on already cracked glass.
Drive gently
Reduce pothole impacts, door slamming, and other avoidable vibration until the windshield is repaired.
Avoid high-pressure washing
Repair significant windshield damage before exposing it to automatic car-wash pressure and mechanical stress.
Arrange evaluation promptly
The longer the damage remains exposed to dirt, water, vibration, and temperature cycling, the less favorable repair conditions may become.
Can You Stop a Windshield Crack From Spreading?
You can reduce the conditions that encourage spreading, but there is no reliable temporary trick that guarantees an untreated crack will stop permanently. Resin repair or windshield replacement addresses the damage itself; tape and careful driving merely buy time.
Avoid online remedies that recommend drilling the glass, forcing glue into the crack, heating it with an open flame, or applying excessive pressure. These approaches can extend the fracture, create optical defects, injure the person performing the work, or make later repair more difficult.
When You Should Replace the Windshield Instead
Replace or professionally assess the windshield instead of relying on a DIY resin kit when the damage falls outside the kit’s repair capability or creates a safety concern. Size is only one deciding factor. Depth, location, contamination, branching, proximity to an edge, and vehicle technology all matter.
Damage that penetrates both the inside and outside layers of laminated windshield glass is unsuitable for standard laminated-glass repair under recognized industry repair criteria. Damage to the inner glass layer, plastic interlayer, or certain areas containing value-added features also requires additional caution.
Windshield-mounted technology is another reason modern replacement work can be more complicated than simply installing new glass. Vehicles equipped with forward-facing cameras may require calibration after windshield replacement so systems such as lane assistance or automatic emergency braking operate according to manufacturer requirements.
For U.S. drivers, state vehicle and windshield rules are not identical. If the crack interferes with your clear view of the road, do not rely on a generalized nationwide rule to decide whether it is acceptable to drive. Check the requirements applicable in your state and prioritize unobstructed visibility.
Source: youtube.com
The crack is outside your kit’s limit
Do not stretch a consumer repair product beyond the damage dimensions and types specified by its manufacturer.
The crack reaches a windshield edge
Edge involvement warrants professional evaluation because it can make the damage substantially less suitable for simple repair.
The damage penetrates multiple layers
A surface resin repair is not an appropriate fix for damage extending through both laminated glass layers.
The driver’s view is obstructed
Even repaired damage can leave optical distortion or a visible blemish in a critical viewing area.
Cameras or sensors are involved
Follow vehicle-manufacturer and qualified glass-service procedures for windshields associated with advanced driver-assistance equipment.
The windshield has multiple serious breaks
Several damaged areas can make replacement more appropriate than attempting individual DIY repairs.
What About Insurance Coverage?
Comprehensive auto insurance often applies to windshield damage caused by road debris, but deductibles, glass endorsements, repair benefits, replacement coverage, and state requirements vary. Some policies encourage repair because it can cost less than replacement, while others apply normal comprehensive deductibles.
Before authorizing expensive replacement work, check your current policy or contact your insurer. Do not assume that another driver’s no-deductible glass coverage applies to you, because coverage can differ by state, insurer, policy, and type of claim.
Common Windshield Repair Mistakes to Avoid
Most DIY windshield repair problems come from attempting the wrong damage, allowing contamination into the fracture, ignoring temperature requirements, or curing the resin before it has properly penetrated the break.
The goal is not to force a repair at any cost. If the damage does not respond as expected, stopping before the windshield is further altered can preserve the possibility of professional repair.
Source: youtube.com
Waiting too long
Dust, water, washer fluid, wax, and road contamination can enter the fracture and reduce repair quality.
Working on very hot glass
Heat can change resin behavior and increase stress in damaged glass. Use the temperature range specified by the product.
Using household glue
General-purpose adhesives are not substitutes for optical windshield repair resin and may contaminate the damage.
Expecting invisible results
A repair can stabilize a fracture without completely eliminating its appearance.
Pressing hard on the windshield
Excessive pressure can extend existing cracks rather than help resin flow.
Curing too early
UV exposure can harden resin before it has adequately penetrated the fracture.
Ignoring the repair-kit instructions
Injection pressures, wait times, temperature ranges, and curing procedures vary between products.
Repairing unsafe damage
Deep, long, edge-related, vision-obstructing, or technologically sensitive damage should not be treated as a routine DIY chip repair.
Why Clear Nail Polish Is Not a Proper Repair
Clear nail polish is sometimes suggested as a temporary crack treatment, but it is not engineered as a windshield repair resin or injection system. It does not reliably remove trapped air from a fracture or recreate the properties of a professional automotive glass repair product.
The same concern applies to super glue and similar household adhesives. Introducing the wrong material can contaminate the fracture and potentially reduce the quality of a later professional resin repair.
Frequently Asked Questions
Q
How long can a windshield crack be and still be repaired?
There is no universal DIY length limit. Some professional services repair certain cracks shorter than about six inches, while many consumer kits are intended primarily for compact bullseye, star, or combination damage and specify much smaller dimensions. Use the exact limits stated by your repair-kit manufacturer and have longer cracks professionally evaluated.
Q
Will windshield repair make the crack completely disappear?
Usually not. Resin can fill and stabilize damage and may make it significantly less noticeable, but a shadow, impact point, outline, or small optical blemish can remain. Repair success should not be judged solely by whether the mark becomes invisible.
Q
Can I repair a windshield crack in cold weather?
Only if the windshield is brought gradually into the temperature range specified by the repair product. Do not pour hot water onto cold or frozen glass or suddenly blast it with maximum defroster heat. Rapid temperature changes can extend existing cracks.
Q
Can I drive immediately after a windshield repair?
After a resin repair, wait until the product has completed its required curing process and follow the manufacturer’s instructions before driving. Professional services may use different resins and curing equipment, so follow the technician’s release instructions after professional work.
Q
Can I repair a crack that reaches the edge of the windshield?
Edge-reaching cracks deserve professional evaluation rather than an improvised DIY repair. Damage at or near an edge can be more difficult to repair reliably and can affect an area important to how the windshield is supported.
Q
Can I use super glue to fix a windshield crack?
Super glue is not a substitute for purpose-made windshield repair resin. It does not provide the controlled vacuum, pressure, optical properties, and curing process used by proper repair systems and may contaminate the crack.
Q
Does a repaired windshield crack remain safe forever?
A properly completed repair is intended to stabilize suitable damage, but no DIY repair should be assumed to make severely damaged glass equivalent to an undamaged windshield. Monitor the area. If the crack grows, additional branches appear, visibility worsens, or the glass develops new damage, arrange professional evaluation.
✦ Wrapping Up
Conclusion
Learning how to repair a cracked windshield starts with knowing when not to repair one yourself. Small, suitable impact damage in the outer layer of a laminated windshield can often be stabilized with a purpose-made resin kit when the glass is clean, dry, within the required temperature range, and repaired according to the manufacturer’s instructions.
Preparation matters as much as the resin. Inspect the damage carefully, prevent contamination, center the applicator correctly, allow the pressure or vacuum cycle to move resin through the fracture, and give the resin enough UV curing time. Do not expect every repaired mark to disappear completely.
For U.S. drivers, professional assessment is the better next step when a crack is long, spreading, heavily branched, reaches an edge, penetrates multiple layers, blocks the driver’s view, or affects windshield-mounted cameras or sensors. State visibility and inspection requirements vary, so significant damage should be addressed promptly rather than assumed legal or safe simply because the vehicle remains drivable.
💡 Key Takeaway
Inspect the crack before buying or applying resin. If the damage clearly fits your repair kit’s size, type, depth, and location limits, repair it promptly according to the manufacturer’s procedure. If any of those conditions are uncertain, have an auto-glass professional evaluate the windshield before altering the damage.
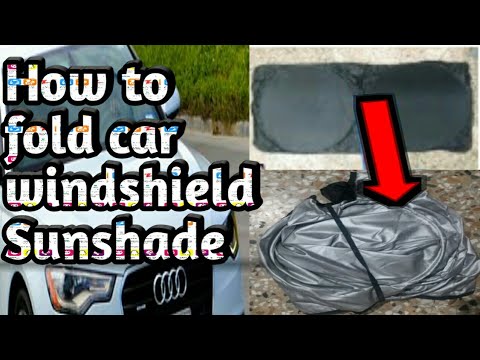
Learn how to fold a collapsible windshield sun shade using the simple figure-eight method, plus tips for storage, troubleshooting, and different shade designs.
Learn how to fold a round windshield sun shade correctly without bending the frame. Follow these simple steps, avoid common mistakes, and store it neatly.