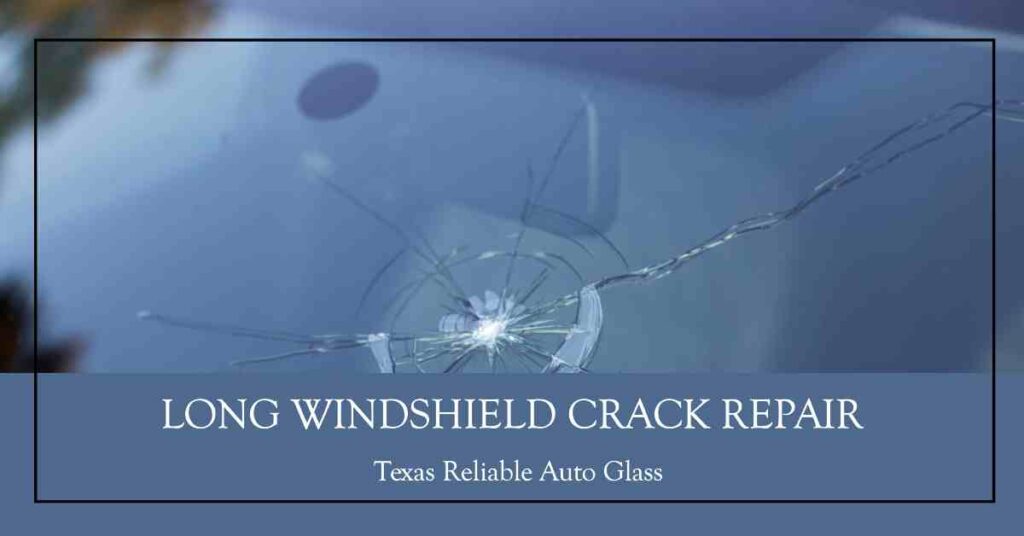
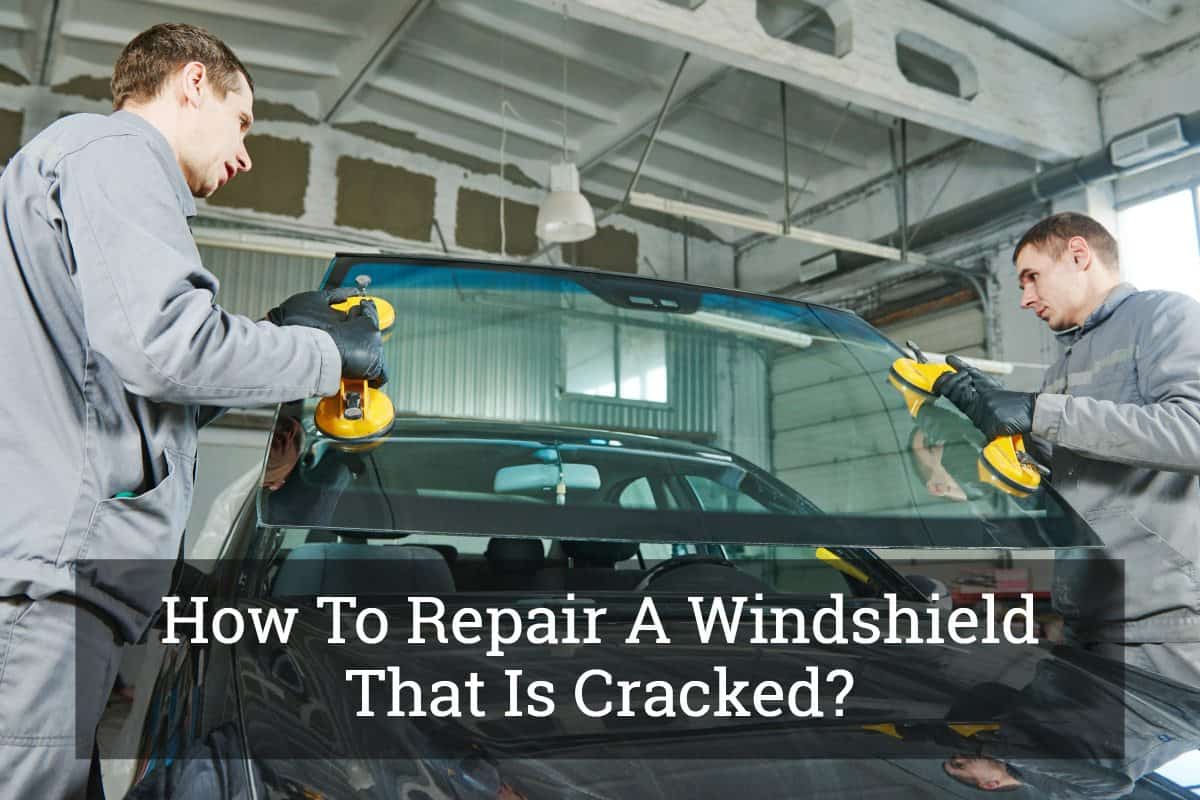
To repair a long windshield crack, keep the glass dry and stable, clean the damaged area carefully, use a long-crack windshield repair resin system designed for laminated auto glass, inject resin along the crack according to the kit instructions, cure it completely, and inspect the repair before driving. However, many long cracks are poor candidates for DIY repair, especially when they reach an edge, obstruct the driver’s view, contain contamination, penetrate deeply, or affect the area around a windshield-mounted safety camera.
For drivers in the United States, a long windshield crack is more than a cosmetic problem. Interstate driving, potholes, summer heat, winter defrosters, freezing temperatures, and normal body flex can place additional stress on damaged laminated glass. A crack that looks stable in the driveway can continue spreading after a temperature change or a hard bump. State vehicle-equipment and inspection requirements also vary, so a repaired windshield still needs to provide an unobstructed, safe view for the driver.
The most useful first step is deciding whether the crack should be repaired at all. In automotive-glass terminology, a crack longer than about 6 inches is commonly considered a long crack. Specialized technicians can sometimes repair damage longer than the small chips and short cracks handled by typical consumer kits, but repairability depends on location, depth, contamination, age, branching, edge involvement, and the windshield itself. This guide explains how to assess the damage, stabilize it, attempt an appropriate resin repair when conditions allow, recognize a successful repair, and know when professional repair or complete windshield replacement is the safer choice.
Sometimes, but not every long crack is a sensible repair candidate. Laminated windshields consist of glass layers bonded around a plastic interlayer. Repair typically works by replacing air inside the damaged outer glass with a transparent resin that is then cured. The goal is primarily to stabilize the break and improve visibility, not to restore the windshield to factory-new condition.
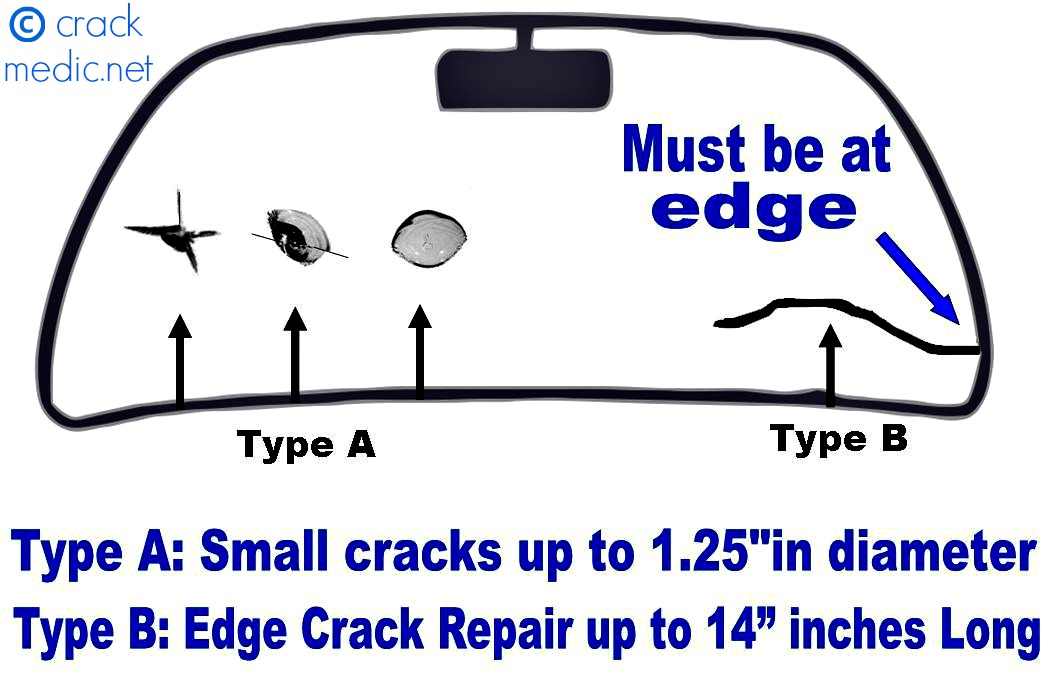
A crack that is clean, relatively recent, confined mainly to the outer glass layer, and away from heavily stressed or safety-critical areas generally presents a better repair situation than an old, dirty, branched, edge-to-edge crack. Long-crack repair also requires more control than filling a small stone chip because resin has to travel consistently through a much greater distance.
Do not assume that a consumer repair kit advertising crack repair is suitable for an unusually long crack. Many kits are designed mainly for small chips, bullseyes, stars, and short cracks. Read the manufacturer’s damage-size limits before starting. If your crack exceeds those limits, professional equipment and evaluation are more appropriate.
Source: crackmedic.net
Better repair candidate
The crack is recent, clean, relatively simple, accessible, and does not severely obstruct the driver’s view.
Poor repair candidate
The crack reaches an edge, has multiple branches, contains dirt or moisture, has been repaired unsuccessfully before, or appears to involve multiple glass layers.
Replacement candidate
Damage compromises safe visibility, structural condition, camera mounting areas, or cannot be reliably filled and stabilized.
Measure and Inspect the Crack Before Doing Anything
Park the vehicle in good light and inspect the crack from both inside and outside. Measure its total visible length rather than estimating it. Look at both ends to see whether the crack terminates within the glass or runs all the way to an edge.
Also check for branches, impact pits, crushed glass, cloudy areas, moisture, previous resin, and damage on the interior surface. If the inner surface is cracked or you are unsure how deeply the damage extends, professional inspection is preferable to experimenting with additional resin.
Length
Measure the complete crack from end to end.
Location
Note whether it reaches an edge, crosses the driver’s view, or passes through a camera or sensor area.
Condition
Check for dirt, water, branching, missing glass, and previous repair material.
Why an Edge Crack Deserves Extra Caution
The perimeter of a windshield is mechanically important because the glass is bonded to the vehicle body. Damage extending into this region can be more difficult to stabilize reliably. It can also continue growing as the body flexes over bumps, driveway entrances, and uneven pavement.
For that reason, a long crack touching an edge should generally receive professional evaluation before a DIY attempt. The cost saved by forcing resin into a questionable crack may not be worthwhile if the damage continues spreading and replacement is still required.
What You Need Before Repairing a Long Windshield Crack
Use equipment intended specifically for laminated automotive windshield repair. The resin must be able to penetrate fine cracks and cure as directed by the manufacturer. A generic adhesive, super glue, clear nail polish, epoxy, or household sealant is not an equivalent substitute.
Choose a dry working location with moderate glass temperature. Resin behavior can change when the windshield is excessively hot or cold. Direct sunlight can also begin curing ultraviolet-sensitive material before you have finished filling the crack, depending on the product.
Read the complete repair-kit instructions before opening the resin. Different systems use different injectors, applicators, curing films, vacuum cycles, pressure cycles, and ultraviolet curing procedures. The sequence supplied with your particular system takes priority over a generalized procedure.
Source: beacar.com
Long-crack repair resin or suitable kit
Confirm that the product specifically supports the type and length of crack you intend to repair.
Glass cleaner and lint-free material
Use them around the damage without flooding cleaner into the open crack.
Sharp razor blade
This is commonly used after curing to remove excess hardened resin from the glass surface.
Curing film
Many resin systems use transparent film to hold finishing resin over the damaged surface during curing.
UV source when required
Some products cure in sunlight while others work best with a compatible ultraviolet lamp.
Eye and hand protection
Wear appropriate protective equipment and avoid skin or eye contact with repair chemicals.
Stabilize the Windshield Before the Repair
Until you can work on the crack, minimize the conditions that make it spread. Avoid slamming doors, driving aggressively over potholes, using extremely hot water on cold glass, or directing maximum defroster heat onto a freezing windshield.
Keep rain, washer fluid, dirt, wax, and glass-treatment chemicals out of the crack as much as practical. Contamination inside the break can make proper resin penetration more difficult and may leave a more visible finished repair.
Keep it dry
Moisture inside a crack can interfere with preparation and resin filling.
Limit temperature shock
Change windshield temperature gradually rather than heating or cooling damaged glass abruptly.
Drive gently
Reducing severe vibration and body flex can help prevent further crack growth before repair.
How to Repair a Long Windshield Crack Step by Step
The exact technique depends on the repair system, so follow the kit manufacturer’s directions whenever they differ from this general sequence. Long-crack repair requires patience because incomplete filling can leave air pockets and unstabilized sections.
Do not start if the windshield is wet, extremely hot, frozen, or still rapidly changing temperature. Give the glass time to reach a stable condition in a shaded, dry workspace.
Source: drivinglife.net
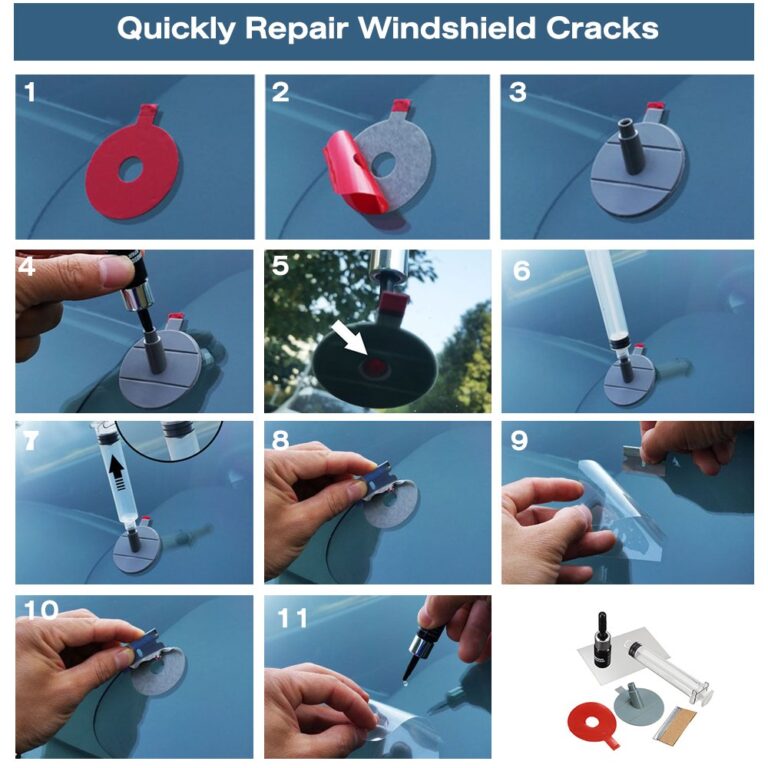
Step 1: Inspect the full crack
Identify both ends, impact points, branches, edge contact, contamination, and any section that appears deeper or wider than the rest.
Step 2: Clean around the damaged area
Remove surface dirt from the surrounding windshield. Do not scrub material into the crack or saturate the break with ordinary glass cleaner.
Step 3: Make sure the crack is dry
Repair resin needs access to the damaged space. If moisture is present, follow the repair-system guidance for safe drying rather than overheating the glass.
Step 4: Position the repair equipment
Install the applicator, injector, suction assembly, or other components exactly as directed by the repair-kit manufacturer.
Step 5: Introduce repair resin
Apply the specified resin so that it can travel through the crack. Avoid substituting thicker finishing resin unless the instructions specifically call for it.
Step 6: Work systematically along the crack
Monitor resin movement rather than assuming the entire crack filled from one application point. Long cracks may require controlled movement or multiple stages depending on the system.
Step 7: Check for trapped air
Look at the crack from several angles. Dark or highly reflective sections may indicate areas that have not filled completely.
Step 8: Apply finishing resin and curing film
Once the main break is filled, finish exposed surface areas according to the kit instructions and place curing film where required.
Step 9: Cure the resin completely
Use the specified sunlight exposure or compatible UV curing method for the full recommended period.
Step 10: Remove excess cured resin
After curing, remove film and carefully scrape excess surface resin with the blade held as directed by the repair system.
Step 11: Inspect the entire repair
Check that the crack appears consistently filled and stable from end to end before returning the vehicle to normal use.
Do Not Force the Crack Open
Some professional long-crack techniques involve controlled pressure and specialized procedures, but aggressively flexing a windshield without the correct training can extend the damage. A DIY repair should not involve pushing hard enough on the glass to make the crack visibly race across the windshield.
If resin will not enter a section using the repair system’s normal procedure, stop and reassess. Contamination, moisture, a closed crack, unusual damage geometry, or an unsuitable resin may be preventing proper filling.
Do Not Drill the Windshield Unless Your System Specifically Requires It
Professional technicians may use specialized drills and burs for particular repair methods, but drilling laminated auto glass is not a universal DIY step. Incorrect depth, pressure, or placement can damage the laminate, create a new break, or enlarge the existing crack.
If your consumer kit does not specifically instruct you to drill and provide the appropriate equipment and procedure, do not improvise this step.
How to Tell Whether the Windshield Repair Worked
A successful repair should leave the damaged area stable and substantially filled with cured resin. The original line may remain visible. Cosmetic improvement varies with crack type, age, contamination, lighting, and how completely resin replaced the air inside the break.
Do not judge the result only by whether the line disappeared. Structural stabilization is the primary purpose of repair. A faint line that remains unchanged can be a better outcome than a nearly invisible repair containing an unfilled section that continues growing.
Inspect the repair in daylight from inside and outside the vehicle. Compare the entire crack, especially its ends and any branches. If a section still looks distinctly hollow, dark, wet, or reflective, it may not have filled properly.
Source: revrebel.com
Good sign
The repaired line looks consistently filled, cured resin is firm, and the crack does not continue extending.
Possible incomplete fill
A section remains obviously dark or changes appearance dramatically when viewed from different angles.
Repair failure
The crack becomes longer, develops a new branch, opens again, or continues moving after curing.
Visibility problem
Even a stable repair may still justify replacement if optical distortion or the remaining blemish interferes with safe vision.
What to Do if Resin Will Not Fill the Whole Crack
Stop repeatedly adding resin if part of the crack will not accept it. More material on the surface does not guarantee penetration inside the glass. An experienced auto-glass technician may be able to determine whether the unfilled area can be reopened and repaired with professional tools.
If the crack cannot be completely stabilized, especially when it is long or close to an edge, replacement may be a more reliable solution.
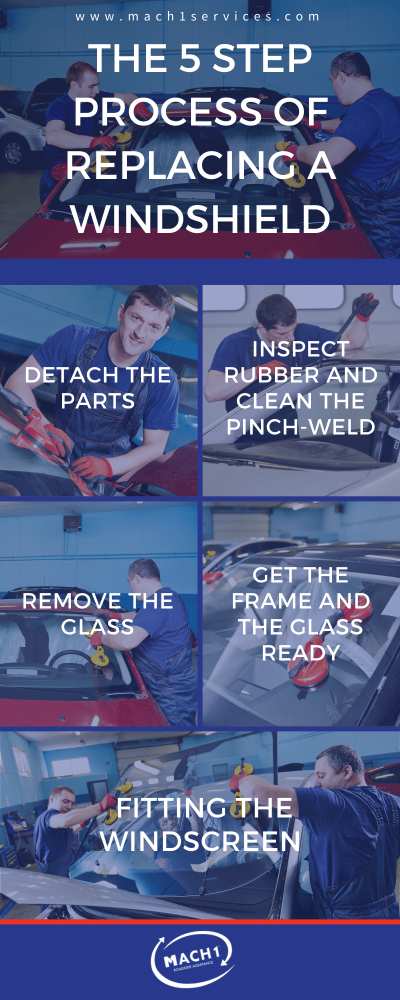
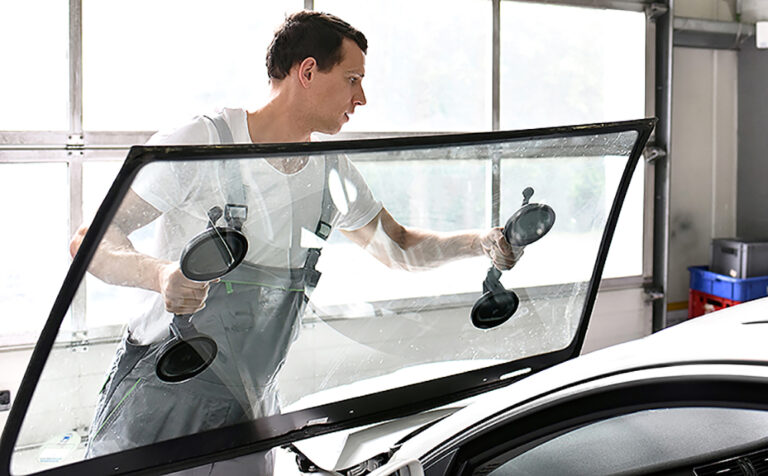
When a Long Windshield Crack Should Be Professionally Repaired or Replaced
Replacement becomes increasingly reasonable when the damage presents a visibility, structural, or repair-quality concern. There is no single crack length that decides every case because the shape and location of the damage matter along with its length.
A windshield is also part of a modern vehicle’s integrated safety environment. Depending on the vehicle, cameras, rain sensors, light sensors, antennas, head-up-display components, heating elements, or other equipment may be attached to or operate through the windshield. Replacement must preserve the correct glass specifications and associated system functions.
Vehicles equipped with forward-facing cameras may require camera calibration after windshield replacement according to the vehicle manufacturer’s procedures. Do not assume that installing the new glass completes the job.
Source: franksautoglasschicago.com
The crack reaches an edge
Edge involvement can make reliable repair more difficult and deserves professional assessment.
The driver’s view is compromised
A repaired line, distortion, or extensive damage in a critical viewing area may still interfere with safe driving.
There are several branches
Complex branching increases the amount of damaged glass that must be filled and stabilized.
Both sides appear damaged
Damage involving more than the normal outer-glass repair area should not be treated as a routine resin job.
The crack is contaminated
Old dirt, wax, water, or previous repair products can reduce the quality of a new resin repair.
The glass is already severely damaged
Multiple impacts, extensive cracking, delamination, or missing glass can make replacement the practical option.
ADAS equipment is involved
Damage or replacement around a windshield-mounted camera or related sensor must account for vehicle-specific installation and calibration requirements.
Repair Versus Replacement Decision Table
Use the following conditions as a decision aid rather than a universal pass-or-fail rule. A qualified auto-glass technician can inspect the actual windshield and account for the vehicle, damage geometry, and applicable repair standard.
Long but clean floater crack
Professional repair may be possible if the crack remains away from the edge and other conditions are favorable.
Long crack touching the edge
Professional evaluation is strongly preferred, with replacement often becoming more appropriate.
Crack directly impairing driver vision
Replacement may provide a better safety outcome when the remaining repair mark or distortion would obstruct vision.
Old dirty crack with several branches
Repair quality becomes less predictable and replacement may be more practical.
Inner glass or extensive laminated damage
Do not treat this as an ordinary DIY resin repair.
Common Mistakes When Repairing a Long Windshield Crack
Most avoidable problems happen before the resin cures. Working on wet glass, choosing the wrong resin, exposing UV-sensitive resin to sunlight too soon, contaminating the break, or rushing the filling process can reduce the chance of a satisfactory result.
Another common mistake is treating cosmetic appearance as the only measure of success. Windshield repair is intended to stabilize damaged laminated glass and improve optical appearance. A repair does not turn previously cracked glass into new glass.
Source: amazon.ca
Waiting too long
Driving for weeks or months gives water and dirt more opportunities to enter the crack and gives the crack more opportunities to spread.
Using household glue
Super glue, epoxy, nail polish, and general adhesives are not substitutes for an automotive windshield repair system.
Repairing in extreme temperatures
Very hot or cold glass can complicate repair and increases concern about thermal stress.
Flooding the crack with cleaner
Liquid and cleaning residue inside the damaged area can interfere with preparation.
Curing too early
Resin that hardens before the entire break is filled can trap unfilled sections.
Applying excessive pressure
Forcing or flexing damaged glass can cause a long crack to extend.
Ignoring the crack after repair
Inspect it periodically and act if the line begins extending or developing branches.
Can You Stop a Crack Temporarily Before Repair?
The safest temporary strategy is protection rather than a makeshift permanent fix. Keep the windshield dry, minimize drastic temperature swings, avoid aggressive road impacts, and arrange repair promptly.
Do not pour household adhesive into the damage simply to stop it from spreading. That material can contaminate the break and may make a later professional resin repair more difficult.
U.S. Insurance, Inspection, and ADAS Considerations
Before paying for a replacement yourself, check your U.S. auto insurance policy. Comprehensive coverage commonly addresses windshield damage caused by events other than a collision, but deductibles, separate glass coverage, claim procedures, and state-specific rules vary. Coverage should be confirmed directly with your insurer rather than assumed.
Windshield requirements are not identical across all 50 states. A crack that does not lead to an inspection failure in one jurisdiction may still be unacceptable if it obstructs required visibility or violates another state’s equipment rules. If your state has periodic safety inspection, check the current state requirements when the crack crosses the driver’s viewing area or is extensive.
Modern driver-assistance systems add another issue. A camera mounted behind the windshield may support functions such as lane departure warning, lane keeping assistance, forward collision warning, or automatic emergency braking. Windshield removal and installation can change the camera’s relationship to the road, which is why vehicle manufacturers may specify static calibration, dynamic calibration, or another verification procedure after replacement.
If your vehicle has a forward camera near the rearview mirror, tell the glass shop before the work begins and confirm that the replacement glass matches the vehicle specification. After installation, make sure any required calibration has been completed according to the vehicle manufacturer’s service procedure.
Source: youtube.com
Check comprehensive coverage
Windshield damage may be covered, but the deductible and glass provisions depend on the policy and state.
Check state requirements
Visibility and vehicle-inspection rules differ, so use the current rules for the state where the vehicle is operated or inspected.
Identify windshield cameras
A camera housing near the rearview mirror is a sign that replacement may involve additional procedures.
Confirm calibration
When the manufacturer requires ADAS calibration after windshield replacement, it should be completed before relying on the affected assistance features.
What to Ask an Auto Glass Shop
If DIY repair is questionable, a short conversation with a reputable auto-glass shop can clarify whether the crack is realistically repairable. Describe the length, location, age, edge involvement, and whether the vehicle has a windshield-mounted camera.
Ask whether the shop repairs long cracks of your specific type, whether the repair is expected to remain visibly noticeable, what happens if the repair cannot be completed, and whether replacement would require ADAS calibration on your vehicle.
Is this specific crack repairable?
The answer should consider more than length alone.
Will the repair remain visible?
A professional should set realistic expectations about cosmetic improvement.
Does my vehicle require calibration?
Confirm the procedure based on the exact year, make, model, equipment, and replacement process.
Frequently Asked Questions
Q
How long of a windshield crack can be repaired?
There is no single length that determines every repair. A crack longer than about 6 inches is generally considered a long crack, and some trained technicians use specialized systems to repair damage well beyond the size handled by ordinary consumer kits. Location, edge involvement, contamination, branching, depth, age, and visibility are also important.
For DIY work, follow the maximum crack length and damage types specified by the repair-kit manufacturer. Do not assume a standard chip-repair kit can handle an extended crack.
Q
Will windshield repair make a long crack disappear completely?
Usually not. Resin can reduce the visual contrast of a crack, but some line, reflection, or blemish may remain. The primary purpose is to fill and stabilize repairable damage while improving its appearance.
If the remaining line would seriously interfere with your view, particularly in a critical viewing area, replacement may provide a better result.
Q
Can super glue stop a windshield crack from spreading?
Super glue is not a proper substitute for automotive windshield repair resin. It may contaminate the break, cure on the surface without filling the internal crack correctly, and complicate a later professional repair.
Protect the crack from moisture and contamination and use a windshield repair system designed for laminated automotive glass.
Q
Can I drive with a long crack in my windshield?
A crack may continue spreading from vibration, body flex, impact, or temperature changes, so delaying attention increases uncertainty. A crack that interferes with visibility or has extensive edge involvement deserves prompt professional assessment.
Vehicle-equipment and inspection rules vary by state. If you are unsure whether the windshield is legal or safe to drive in its current condition, check your state’s current requirements and have the glass inspected.
Q
Does insurance pay for a cracked windshield in the USA?
Comprehensive auto coverage commonly includes windshield damage caused by covered non-collision events, but the amount you pay depends on your policy, deductible, optional glass coverage, state rules, and cause of damage.
Contact your insurer before scheduling expensive work if you intend to make a claim. Ask specifically about windshield repair, replacement, deductible requirements, approved procedures, and ADAS calibration coverage when applicable.
Q
Can a windshield crack spread after it has been repaired?
A properly completed repair is intended to stabilize the damaged area, but no repair can guarantee that already damaged glass will never develop another problem. Continued movement may indicate that part of the original break was not fully stabilized, that the windshield experienced additional stress, or that new damage occurred.
If the repaired crack starts growing again, have it evaluated rather than repeatedly applying surface resin without determining why it failed.
Q
Should I repair or replace a windshield with a crack near a camera?
The answer depends on the exact damage and vehicle. Do not perform a repair that leaves significant optical distortion in a camera’s viewing area. If windshield replacement is required, the vehicle manufacturer may specify camera or ADAS calibration afterward.
A qualified glass shop should identify the correct windshield specification and determine the required calibration procedure for the exact vehicle.
✦ Wrapping Up
Conclusion
Learning how to repair a long windshield crack starts with deciding whether the damage is genuinely repairable. If the crack is clean, relatively simple, within the capabilities of the repair system, and located where a repair will not create a safety or visibility concern, carefully injected and fully cured windshield resin may stabilize the damage. Keep the glass dry, work at a stable temperature, follow the repair-system instructions precisely, fill the entire crack, and inspect the finished work rather than judging success only by appearance.
Do not force a DIY repair when the crack reaches an edge, has extensive branching or contamination, affects more than the normal repairable outer-glass area, seriously interferes with the driver’s view, or involves a complicated sensor or camera region. In those situations, a professional auto-glass assessment can determine whether specialized long-crack repair is realistic or whether windshield replacement is the safer solution.
💡 Key Takeaway
Measure and photograph the crack now, keep it clean and dry, check whether it touches an edge or obstructs your view, and use only a repair system specifically rated for that type and length of damage. If any of those conditions make DIY repair questionable, have an auto-glass professional inspect the windshield before the crack spreads farther.
Learn how to install a windshield sun shade correctly in your car. Follow simple steps for folding, roll-up, and umbrella-style shades, plus fit, safety, storage, and troubleshooting tips.
Learn how to fold a pop up windshield sun shade safely and quickly. Follow simple steps, avoid common mistakes, and store your car sun shade without damaging its frame.