To install a windshield washer pump, locate the washer-fluid reservoir, disconnect the electrical connector and fluid hose, remove the old pump, replace its seal or grommet if needed, press the new pump securely into the reservoir, reconnect everything, refill the reservoir, and test the washers for proper spray and leaks.
For drivers in the United States, a working windshield washer system is more than a convenience. Rain, road salt, dust, insects, pollen, slush, and highway grime can quickly reduce windshield visibility. If the reservoir contains fluid but nothing reaches the windshield when you operate the washer control, the pump is one component that may need testing or replacement.
Installing a windshield washer pump is usually a manageable DIY repair, but access varies considerably among vehicles sold in the U.S. On some cars, the pump is visible from the engine compartment. On others, the washer reservoir sits behind the front bumper or inner fender liner, so a wheel, splash shield, or trim panel may need to be removed. The basic installation process remains similar: gain safe access, disconnect the old pump, install the correct replacement without damaging the reservoir seal, reconnect the hose and wiring, refill the system, and confirm that the nozzles spray correctly.
Before replacing the pump, confirm that the problem is not simply an empty or frozen reservoir, a blown fuse, clogged washer nozzle, disconnected hose, or electrical fault. Installing a new pump will not correct those problems.
What You Need Before Installing a Windshield Washer Pump
Start by identifying the correct replacement pump and determining how the washer reservoir is accessed on your vehicle. Windshield washer pump designs are not universal. Vehicles may use different electrical connectors, pump diameters, hose fittings, reservoir grommets, and mounting positions. Some vehicles also use more than one pump for separate front, rear, or headlamp washer circuits.
Check the vehicle owner’s information or an appropriate service procedure when access is unclear. If you must raise the vehicle or remove a wheel to reach the reservoir, work on a level surface and support the vehicle properly rather than relying only on a jack.
A typical installation requires only basic hand tools. However, the exact socket sizes, screwdrivers, trim tools, and access procedure depend on the vehicle.
Source: 2carpros.com
Replacement washer pump
Verify compatibility with the vehicle year, make, model, engine configuration when relevant, and the washer circuit being repaired.
Pump grommet or reservoir seal
Have a replacement available if the old seal is brittle, distorted, cracked, swollen, or leaking.
Basic hand tools
Common possibilities include sockets, a ratchet, screwdrivers, pliers, and a plastic trim removal tool.
Drain pan or container
Use it to catch washer fluid that drains from the reservoir when the pump is removed.
Correct washer fluid
Use automotive windshield washer fluid appropriate for the temperatures in which the vehicle will operate.
Gloves and eye protection
They help protect against washer fluid, dirt, sharp plastic edges, and debris around wheel-well components.
Make Sure the Replacement Pump Matches
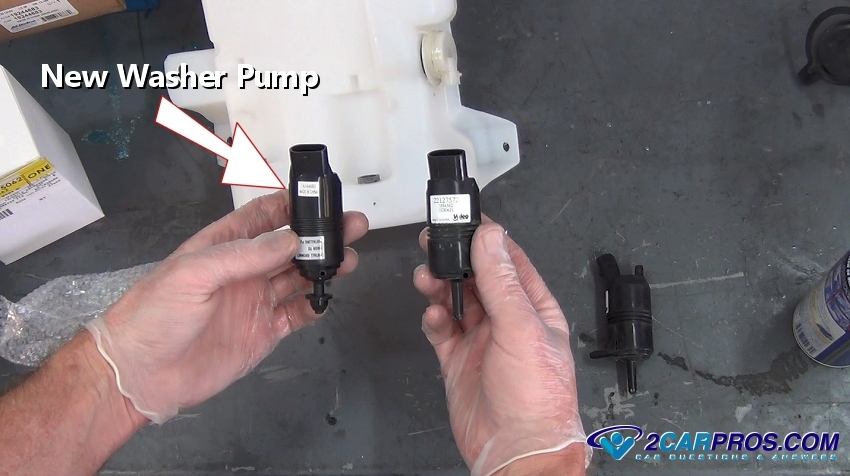
Compare the new pump with the old unit before installing it. The body shape does not always have to look identical, but the electrical connection, inlet that enters the reservoir, outlet connection, mounting depth, and intended function must be compatible.
Pay particular attention when the reservoir contains two pumps. A vehicle with a rear window washer may have separate pumps or a bidirectional system. Photographing the original hose and connector positions before disassembly can prevent accidental cross-connection.
How to Tell Whether the Washer Pump Really Needs Replacement
Do not replace the washer pump solely because fluid does not spray. First determine whether the pump is receiving power and whether the rest of the washer system is capable of moving fluid.
With the ignition and vehicle controls set as required by the manufacturer, operate the washer switch and listen near the reservoir. A pump that produces a normal electric humming sound but no spray may still be working electrically. In that situation, inspect the fluid level, hoses, filter or pickup area if equipped, and washer nozzles before condemning the pump.
A completely silent pump may be defective, but silence can also result from a blown fuse, faulty switch, damaged wiring, corroded connector, control-module issue, or lack of electrical power. Electrical testing is especially useful before buying a replacement pump.
Source: youtube.com
Reservoir is empty
Refill it and inspect for leaks before assuming the pump has failed.
Pump hums but there is no spray
Check for a pinched, detached, split, frozen, or blocked hose and clogged nozzles.
Pump is completely silent
Check the appropriate fuse and verify power and ground at the pump before replacement when possible.
Fluid leaks near the pump
Inspect both the pump body and its reservoir grommet because the seal may be the actual source of the leak.
Check for Frozen Washer Fluid in Cold Weather
Cold-weather drivers should consider frozen fluid before diagnosing a failed pump. Water or washer fluid that is not rated for local winter temperatures can freeze in the reservoir, pump, hoses, or nozzles. Repeatedly operating a pump against a frozen system can place unnecessary stress on the pump.
Allow the vehicle and washer system to thaw safely, then use washer fluid rated appropriately for anticipated temperatures. Never pour boiling water onto frozen windshield or washer components.
How to Install Windshield Washer Pump Step by Step
The following procedure covers the common installation method used on many passenger cars, SUVs, and light trucks. Your vehicle may require additional disassembly, so do not force panels, reservoirs, connectors, or hoses that do not release normally.
Before starting, park on a stable level surface, switch off the vehicle, remove the key or keep the key fob away from the vehicle as appropriate, set the parking brake, and allow moving or hot components to stop or cool.
Source: storage.googleapis.com
Step 1: Locate the windshield washer reservoir
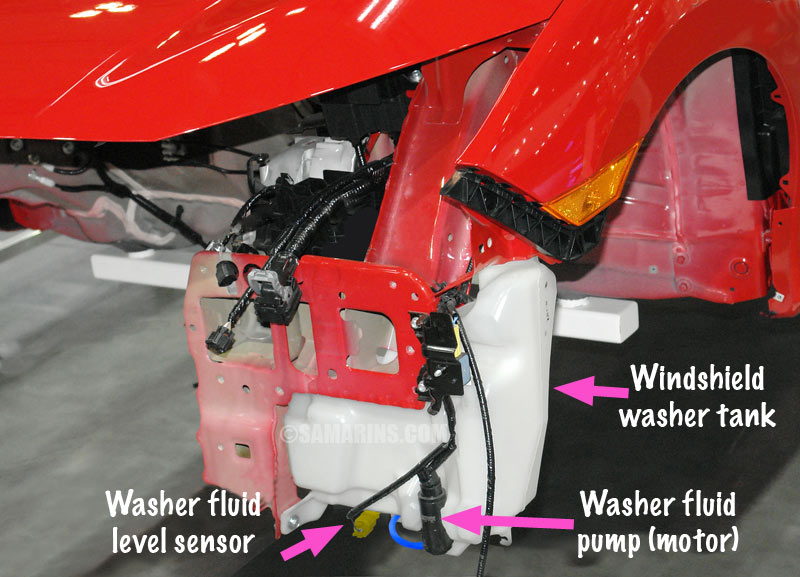
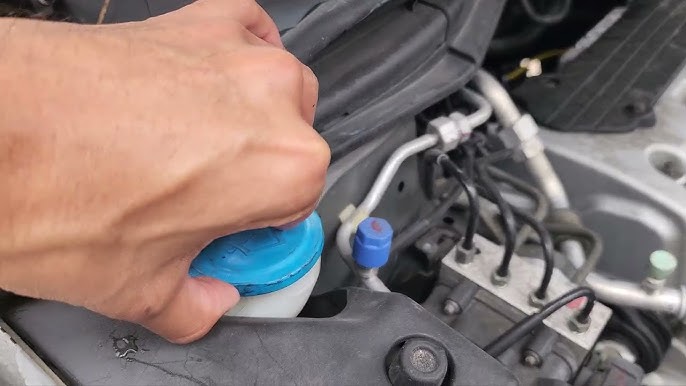
Find the translucent or plastic reservoir used for windshield washer fluid. It is commonly positioned near a front corner of the engine compartment, behind a fender area, or behind the front bumper.
Step 2: Gain access to the pump
Remove only the components required for access. Depending on the vehicle, this may include an engine-bay cover, lower splash shield, wheel-well liner, front wheel, or other trim.
Step 3: Place a drain pan below the reservoir
Position a suitable container beneath the pump because fluid may drain rapidly after the hose or pump is removed.
Step 4: Disconnect the electrical connector
Release the connector locking tab and pull on the connector body rather than tugging on the wires. Inspect the terminals for corrosion, moisture, looseness, or damage.
Step 5: Disconnect the washer hose
Carefully twist and pull the hose from the pump outlet when the design permits. Avoid excessive force on old plastic fittings because they can become brittle.
Step 6: Remove the old pump
Many pumps are pressed into a rubber grommet in the side or bottom of the reservoir. Pull or gently work the pump out according to its mounting design. Some vehicles instead use clips or other retainers.
Step 7: Inspect and replace the grommet
Remove the old seal if it is damaged or if the replacement procedure specifies a new one. Clean dirt from the reservoir opening without pushing contamination into the tank.
Step 8: Install the new pump
Seat the correct grommet first when applicable, then insert the pump straight into the opening until it reaches its normal installed position. Avoid forcing the pump at an angle because this can damage the seal or reservoir.
Step 9: Reconnect the hose and electrical connector
Push the fluid hose fully onto the outlet and reconnect the electrical plug until its locking feature engages.
Step 10: Add washer fluid and inspect for leaks
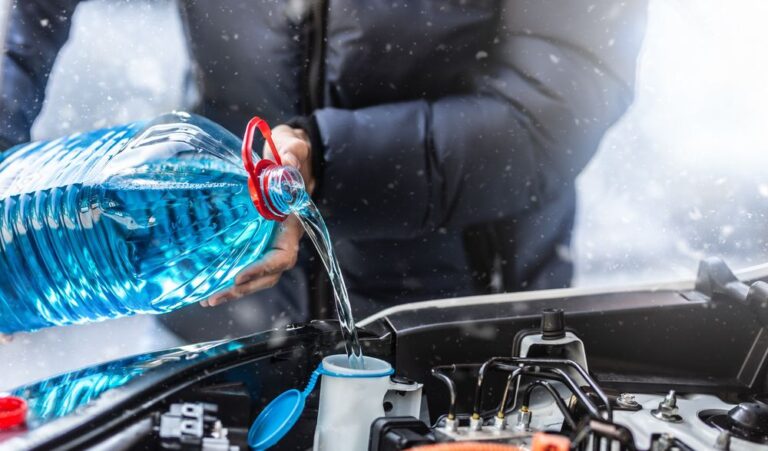
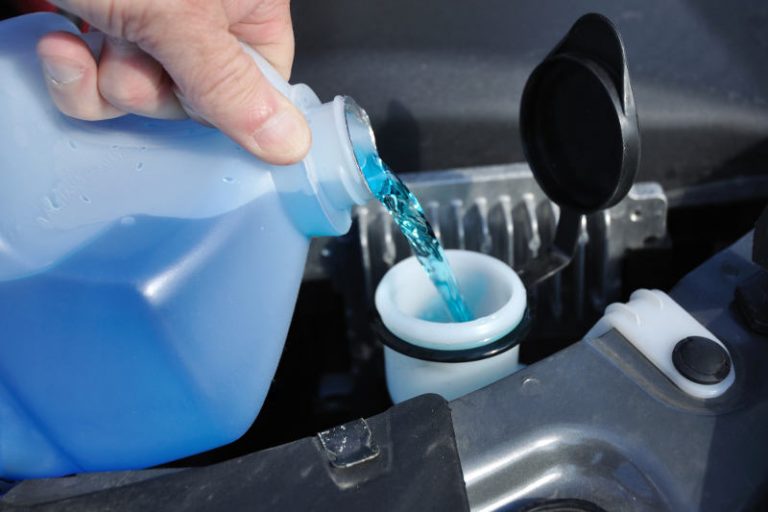
Add enough correct washer fluid to cover the pump inlet and inspect the pump-to-reservoir seal and hose connection before completing reassembly.
Step 11: Test the washer system
Operate the washer briefly and verify that the pump runs, fluid reaches the windshield, and no fluid leaks from the repaired area.
Step 12: Reinstall removed components
Once operation and sealing are confirmed, reinstall the liner, splash shield, wheel, trim, fasteners, and other components in their correct positions.
How to Remove a Pump From a Rubber Grommet
A common washer pump is held by friction in a rubber grommet fitted into the reservoir. After disconnecting the wiring and hose, grip the pump body and work it outward using controlled movement. Avoid levering aggressively against a thin plastic reservoir wall.
If the grommet remains in the reservoir, inspect it closely. A hardened grommet may fail to seal around the new pump even if it did not visibly leak before removal.
Installing the New Reservoir Grommet
Clean the reservoir opening and install the replacement grommet evenly without folding its edge. If the service procedure for your vehicle calls for a particular lubricant or installation method, follow that instruction. Do not apply petroleum grease, sealant, adhesive, or another chemical simply to make installation easier unless the material is confirmed compatible with the reservoir, grommet, pump, and washer fluid.
Press the pump into the grommet in the intended orientation. The pump should feel securely supported after installation rather than loose or crooked.
Windshield Washer Pump Installation Diagram and Connections
Understanding the fluid path makes installation and troubleshooting easier. Washer fluid is stored in the reservoir. The pump draws fluid through its inlet and sends it through an outlet hose. The hose then routes fluid toward the windshield washer nozzles, often through connectors, check valves, or tees depending on the vehicle.
The electrical side usually includes the washer control, vehicle wiring, circuit protection, and pump motor. Modern vehicles may route the command through electronic control modules rather than sending switch current directly to the pump. This is why the correct vehicle wiring diagram is preferable when diagnosing a pump that receives no power.
If the reservoir contains more than one pump, mark the connectors and hoses before removal. Connecting a front washer hose to a rear washer pump, or installing the wrong pump in the wrong opening, can create confusing symptoms after reassembly.
Source: docs.cholonautas.edu.pe
Reservoir
Stores windshield washer fluid.
Pump inlet
Allows washer fluid to enter the pump from the reservoir.
Pump outlet
Directs pressurized fluid into the washer hose.
Washer hose
Carries fluid from the pump toward the nozzles.
Electrical connector
Provides the electrical connection required to operate the pump motor.
Washer nozzles
Distribute washer fluid onto the windshield.
How to Test the New Windshield Washer Pump After Installation
Test the repair before reinstalling difficult-to-remove panels whenever it is safe to operate the system with those panels temporarily removed. This gives you a chance to find a leaking grommet, loose hose, or disconnected electrical plug without repeating the entire disassembly process.
Add washer fluid, wait briefly, and look around the reservoir opening and pump body. A properly sealed pump should not produce continuous dripping where it enters the reservoir. Then operate the washer in short intervals and watch for leaks while confirming that fluid reaches the windshield.
The first spray may take a moment if the hose emptied during repair because the pump must refill the line. Avoid holding the washer control continuously for a long period if no fluid appears.
Source: youtube.com
Pump operates
You can normally hear or feel the pump motor running when the washer is activated.
Fluid reaches the glass
Both the flow and nozzle pattern should be adequate to wet the intended windshield area.
No reservoir leak
The grommet and pump opening should remain dry after filling and operation.
No hose leak
Inspect the pump outlet and any hose connection disturbed during the repair.
Electrical connector stays secure
The connector should latch firmly and should not pull free under light normal movement.
What Successful Installation Looks Like
A successful installation results in reliable pump operation, an intact reservoir seal, correct fluid delivery, and a consistent spray from the washer nozzles. The reservoir level should remain stable when the system is not being used, apart from normal consumption.
If the pump sounds normal but the spray remains weak, continue troubleshooting the fluid path instead of immediately replacing the new pump.
What to Do If the New Washer Pump Does Not Work
A new pump that does not spray does not automatically mean the replacement part is defective. Recheck the installation logically, starting with the easiest conditions to verify.
First confirm that the reservoir contains enough fluid and that no large leak developed after installation. Check that the electrical connector is fully seated and that the washer hose is connected to the correct pump outlet.
If you can hear the new pump running but no fluid reaches the windshield, inspect the hose for a kink, blockage, disconnection, or reversed connection where the system design makes that possible. Check the nozzles for blockage as well.
If the new pump does not run, check the appropriate fuse and verify the electrical circuit using reliable service information. A multimeter or test equipment can help determine whether the pump receives the required electrical supply when the washer command is activated. Electrical diagnosis should be performed carefully because wiring arrangements vary among vehicles.
Source: youtube.com
No sound and no spray
Inspect the connector, fuse, power supply, ground path where applicable, wiring, and control circuit.
Pump runs but no fluid sprays
Check fluid level, hose routing, clogged nozzles, blocked lines, and possible air or leakage in the fluid path.
Weak windshield spray
Look for restrictions, partially clogged nozzles, split hoses, poor hose connections, or an incorrect pump.
Fluid leaks immediately after filling
Inspect the pump grommet, reservoir opening, pump seating, hose connection, and reservoir for cracks.
Wrong washer circuit operates
On multi-pump reservoirs, verify that the electrical connectors and hoses were returned to their original pump positions.
When to Get Professional Diagnosis
Professional diagnosis is sensible when pump access requires extensive bumper or body-panel removal, when the electrical connector has no power despite normal circuit protection, when wiring damage is suspected, or when a control module may be involved.
Also consider professional service if safe access requires raising the vehicle and you do not have suitable lifting and support equipment. A washer pump is relatively small, but reaching it should never require unsafe work beneath an improperly supported vehicle.
Common Windshield Washer Pump Installation Mistakes
Most installation problems occur around access, sealing, hose routing, or diagnosis rather than the mechanical act of inserting the pump. Taking a few minutes to inspect the old arrangement before removal can prevent repeated work.
One of the most common avoidable errors is reusing a deteriorated grommet. The old seal may look acceptable until it is disturbed, after which it can leak around the replacement pump. Another mistake is assuming that every no-spray condition is caused by the pump.
Replacing the pump without diagnosis
A clogged nozzle, broken hose, fuse problem, wiring fault, or frozen system can imitate pump failure.
Ordering the wrong pump
Similar-looking pumps can have different connectors, outlet orientations, flow characteristics, or mounting dimensions.
Damaging the reservoir
Aggressive prying around a plastic reservoir opening can crack or distort it.
Reusing a failed grommet
A hardened or damaged seal can allow washer fluid to leak around the new pump.
Pulling electrical wires instead of the connector
This can damage terminals or wiring and create an additional electrical problem.
Testing only after complete reassembly
When practical and safe, test before reinstalling difficult access panels so leaks or loose connections can be corrected easily.
Using unsuitable fluid
Use automotive washer fluid suitable for expected weather rather than relying on plain water, especially where freezing temperatures occur.
Windshield Washer Pump Installation Safety Tips
Treat access and vehicle support as the main safety concerns during this repair. Some washer reservoirs can be serviced entirely from above, while others require wheel-well or underside access.
If a wheel must be removed, follow the vehicle manufacturer’s lifting procedure and use equipment appropriate for the vehicle. Never place any part of your body beneath a vehicle supported only by a jack.
Washer fluid should also be handled responsibly. Avoid eye and prolonged skin contact, keep it away from children and pets, and clean spills. Store and dispose of unwanted fluid according to its label and applicable local requirements.
Work on a level surface
A stable work area reduces risk when lifting or removing vehicle components.
Protect your eyes
Fluid can drain unexpectedly when the pump or hose is disconnected.
Support raised vehicles correctly
Use proper support equipment and the vehicle’s specified lifting points.
Keep washer fluid contained
Catch draining fluid and prevent access by children and animals.
Avoid forcing brittle parts
Older hoses, connectors, trim clips, and reservoirs can crack with excessive force.
How Long Does It Take to Install a Windshield Washer Pump
Installation time depends much more on pump access than on the pump itself. A pump mounted on an exposed reservoir can be a relatively short repair. A pump hidden behind a wheel-well liner, bumper component, or lower splash shield requires additional disassembly and reassembly.
Corroded fasteners, brittle trim clips, a full reservoir, multiple washer pumps, or difficult electrical connectors can also extend the job. Rather than relying on a universal time estimate, review the access procedure for the exact vehicle before starting.
If the reservoir itself must be removed, plan for additional work because hoses, level sensors, filler tubes, mounting fasteners, and other connections may also need to be disconnected.
Should You Replace the Washer Pump Grommet Too
Replace the grommet whenever it is cracked, brittle, swollen, distorted, loose, or already leaking. Installing a new pump into a damaged old seal can create a leak even when the pump itself works perfectly.
A fresh grommet is particularly useful when the old pump has been installed for many years and removing it noticeably disturbs the seal. Use the correct seal for the reservoir opening and pump diameter rather than improvising with an unrelated rubber part.
If the original grommet remains flexible, undamaged, correctly sized, and leak-free, whether replacement is mandatory depends on the vehicle and service procedure. When a replacement pump includes a new specified grommet, installing the matching new seal is generally the straightforward approach.
Frequently Asked Questions
Q
Can I install a windshield washer pump myself?
Many vehicle owners can install a windshield washer pump with basic tools if the reservoir and pump are easily accessible. The job becomes more demanding when access requires removing a wheel, inner fender liner, bumper components, or the reservoir itself. Use the correct service procedure and safe vehicle support whenever the vehicle must be raised.
Q
Do I need to drain the washer reservoir before replacing the pump?
Not always, but washer fluid located above the pump opening can drain when the pump is removed. You can remove or transfer fluid beforehand, or position a suitable drain pan beneath the reservoir to catch it during removal. Avoid allowing washer fluid to spill onto the ground.
Q
Why does my new windshield washer pump run but not spray?
If the pump can be heard running, check whether the reservoir has enough fluid and inspect the hose for disconnection, kinks, leaks, or blockage. Clogged nozzles can also prevent proper spray. On vehicles with multiple pumps, verify that the correct hose is connected to the correct pump.
Q
Why is washer fluid leaking around my new pump?
Leakage around a newly installed pump commonly points to a damaged, incorrectly installed, or incompatible reservoir grommet. The pump may also be crooked or insufficiently seated. Inspect the reservoir opening for cracks before replacing the seal or reseating the pump.
Q
Can I replace only the windshield washer pump instead of the whole reservoir?
Yes, on many vehicles the pump is a separately replaceable component. The reservoir normally needs replacement only when it is cracked, damaged, badly contaminated, or when the specific vehicle design does not allow the failed component to be serviced separately.
✦ Wrapping Up
Conclusion
Learning how to install windshield washer pump components is straightforward once you know how the pump is mounted and how to reach the reservoir. The usual process is to verify the fault, gain safe access, disconnect the hose and electrical connector, remove the old pump, inspect or replace the grommet, install the replacement pump, reconnect everything, and test for both spray and leaks.
The diagnostic step matters as much as the installation. A new pump cannot correct a clogged nozzle, split hose, frozen washer fluid, blown fuse, damaged wiring, or control-circuit problem. Confirming the cause before replacing parts can save both time and unnecessary expense.
After the new pump is installed, test the washer before completing difficult reassembly whenever safe access permits. Proper pump operation, good windshield spray, secure connections, and a dry reservoir seal are the clearest signs that the repair has succeeded.
💡 Key Takeaway
Before removing the old pump, verify the replacement part, photograph hose and connector locations, place a drain pan under the reservoir, and keep a correct replacement grommet available. After installation, check for leaks and confirm normal spray before reinstalling hard-to-remove panels.