To install a windshield, remove the old glass without damaging the pinch weld, prepare the bonding surface, apply the correct automotive urethane, position the replacement windshield accurately, reinstall removed components, and keep the vehicle stationary until the adhesive manufacturer’s minimum drive-away time has passed.
For drivers in the United States, learning how to install a windshield involves more than simply gluing a piece of glass into the opening. A modern windshield is part of the vehicle’s engineered glazing and retention system, and many newer U.S.-market vehicles also place cameras, rain sensors, antennas, heating elements, and other equipment on or near the glass. A replacement therefore needs to match the vehicle, the adhesive system needs to be used exactly as specified, and any required driver-assistance calibration must be completed before the vehicle is considered fully restored.
A careful do-it-yourself installation is possible on some older or relatively simple vehicles, especially when you have the correct replacement glass, automotive glass tools, suction handles, and vehicle-specific service information. However, installation errors can cause water leaks, wind noise, damaged paint, corrosion, sensor problems, or poor glass retention. If the windshield opening is rusty or distorted, the vehicle uses windshield-mounted ADAS cameras, or you are uncertain about the bonding procedure, professional auto-glass installation is the safer approach.
Start by confirming that the replacement windshield is correct for the exact year, make, model, body style, and equipment configuration of the vehicle. Windshields that appear identical can have different brackets, ceramic frit patterns, acoustic layers, antenna connections, heating elements, head-up display compatibility, rain-sensor mounts, or forward-camera provisions.
Read the vehicle manufacturer’s windshield replacement procedure and the instructions supplied with the adhesive system before cutting out the old glass. Automotive urethane products are systems rather than interchangeable tubes of glue. The cleaner, primer, activator, urethane, nozzle shape, application temperature, storage requirements, and minimum drive-away time should all follow the adhesive manufacturer’s instructions.
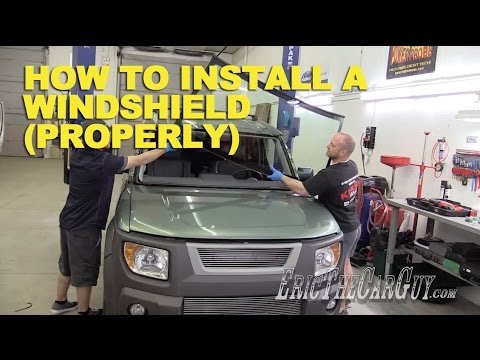
Choose a dry, clean work area with enough room to walk around the front of the vehicle. Wind, dust, rain, extreme temperatures, and contamination can make accurate installation more difficult. Two people are strongly recommended for manually setting a large windshield unless you have a professional glass-setting device.
Source: mach1services.com
Correct replacement windshield
Verify dimensions and all vehicle-specific features, brackets, sensors, electrical connections, and markings before removing the original glass.
Automotive windshield urethane system
Use an adhesive specifically approved for automotive glass replacement and follow its cleaner, primer, application, storage, and curing instructions.
Windshield removal tools
Common options include cold knives, wire or cord cutting systems, powered cutting tools, molding tools, and protective guards.
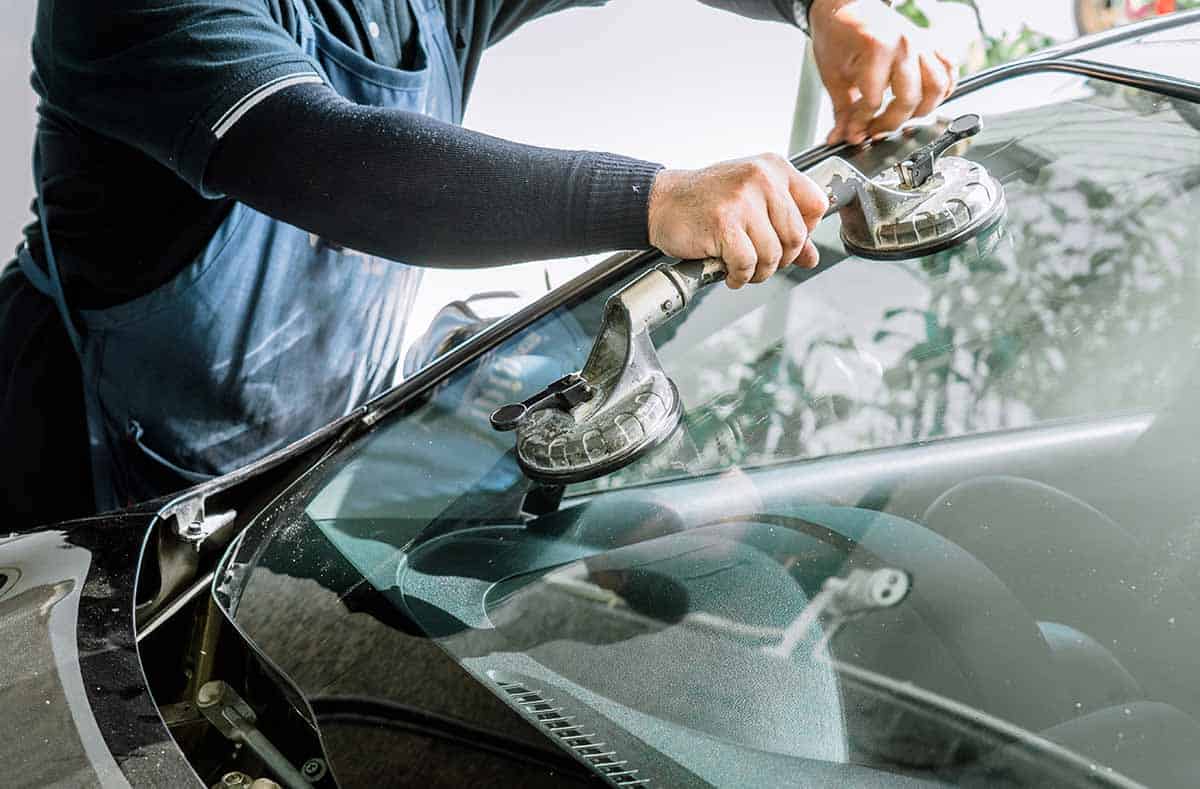
Suction handles
Quality glass suction cups provide safer control while lifting and positioning the windshield.
Personal protection
Wear cut-resistant gloves, eye protection, long sleeves, and other protection appropriate for handling automotive glass and urethane.
Vehicle protection
Use fender covers, dashboard protection, masking materials, and interior covers to keep tools, glass fragments, primer, and adhesive away from finished surfaces.
When a DIY Windshield Installation Is Not a Good Idea
Consider professional installation when the vehicle has complex ADAS equipment, extensive corrosion around the glass opening, previous collision repairs, damaged mounting flanges, bonded trim that requires specialized procedures, or a windshield that is unusually large or difficult to position. Professional help is also appropriate when you cannot verify the required adhesive system or calibration procedure.
Visible structural rust
Rust around the bonding flange requires proper corrosion assessment and repair before new glass is bonded.
Collision damage
A distorted windshield opening can prevent correct glass fit and create excessive stress after installation.
ADAS camera systems
Forward-facing cameras commonly require manufacturer-specified calibration after windshield replacement.
Step 1: Prepare the Vehicle and Inspect the New Glass
Park the vehicle on a stable, level surface and protect the hood, fenders, dashboard, seats, and surrounding paint. Lowering the front door windows slightly is sometimes recommended during service so a door is less likely to create a sudden pressure change inside the cabin, but follow the applicable vehicle and adhesive instructions rather than treating this as a universal requirement.
Before touching the installed windshield, place the replacement glass near the vehicle and compare it carefully. Confirm the shape, edge profile, mirror bracket, sensor mounts, electrical terminals, camera area, molding configuration, and other equipment. Discovering an incorrect glass part after the original windshield has been removed can leave the vehicle exposed and unusable.
If the vehicle has a forward-facing camera or another sensor attached to the windshield, record its original configuration and consult the manufacturer’s service procedure. Do not assume that transferring the camera to new glass completes the repair.
Source: miracleagc.com
Protect painted surfaces
Cutting tools and glass edges can scratch paint quickly, especially near the roof and A-pillars.
Check glass before removal
Verify the replacement before making the vehicle unusable by removing the original windshield.
Document sensor locations
Photographs can help you remember routing, clips, connectors, and trim positions during reassembly.
Check the Windshield for Shipping Damage
Inspect both surfaces and all edges under good lighting. Do not install glass with an edge chip, crack, serious distortion, damaged bracket, or other defect that could affect fit, visibility, or durability. Edge damage is particularly important because windshield stress is concentrated around the perimeter.
Step 2: Remove Wipers, Trim, Sensors, and Moldings
Remove components that prevent access to the windshield perimeter. Depending on the vehicle, this may include windshield-wiper arms, the plastic cowl panel, weatherstrips, exterior moldings, interior A-pillar trim, the rearview mirror, rain or light sensors, camera covers, and electrical connectors.
Mark the resting position of the wiper arms before removing them if the service procedure allows. Wiper arms can be tightly fitted to tapered splines, so a dedicated wiper-arm puller may be safer than prying against the cowl or glass.
Interior A-pillar trim deserves special care because some vehicles contain curtain airbags behind it. Do not blindly pry, drill, cut, or route tools around an airbag area. Follow the manufacturer’s instructions for trim removal and any required power-disconnection procedure.
Organize fasteners
Keep clips, screws, caps, and trim pieces separated so everything can return to its original location.
Disconnect equipment carefully
Release connectors by their locking mechanisms instead of pulling on wiring.
Replace damaged clips
Broken molding or cowl clips can cause loose trim, rattles, or poor weather sealing after the job.
Do Not Cut Through Hidden Wiring
Some vehicles route antenna leads, defroster connections, sensor wiring, or other equipment near the windshield edge. Know what is behind the cutting path before pushing a knife, wire, or powered tool through the adhesive.
Step 3: Cut the Old Windshield Out
The original windshield is normally held to the body by a continuous adhesive bead. The goal is to separate the glass from that bead while protecting the pinch weld, dashboard, headliner, wiring, trim, and painted body surfaces.
A cold knife may work on accessible edges, while wire or fiber-line systems can cut the urethane from inside or outside the vehicle. Powered removal tools can be effective but can also damage painted metal quickly if used without training. Choose a method appropriate for the vehicle and the available clearance.
Work around the entire perimeter until the glass is completely free. Never force one corner upward while another section remains bonded. Uneven force can crack the glass and can also damage the body flange.
Source: texasreliableautoglass.com
Control the cutting depth
Keep the tool in the adhesive and away from painted metal whenever possible.
Protect the dashboard
Interior cutting systems can damage dashboards, headliners, wiring, and trim if the cutting line is not controlled.
Expect glass breakage
A cracked windshield can propagate suddenly during removal, so wear appropriate hand and eye protection.
Lift the Old Windshield Away
Once the urethane is completely separated, attach suitable suction handles and lift the windshield evenly. Large windshields are easier and safer to control with two people. Move the removed glass to a protected storage or disposal area where it cannot fall or injure someone.
Step 4: Prepare the Pinch Weld and Existing Urethane
Proper preparation of the windshield opening is one of the most important stages of the job. Once the glass is removed, inspect the entire bonding area for scratches, bare metal, loose adhesive, contamination, rust, damaged welds, and evidence of previous repairs.
Many modern replacement procedures use a close-cut method in which most of the original cured urethane is trimmed down rather than completely removed from sound factory-painted metal. The exact remaining thickness and preparation method depend on the adhesive manufacturer’s instructions. Do not assume that every vehicle or urethane system uses the same trimming specification.
If your removal tool exposes bare metal, treat the area exactly as required by the adhesive manufacturer. Windshield primers often have very specific purposes, flash times, application limits, and compatibility requirements. Applying primer everywhere simply because it seems safer can be incorrect.
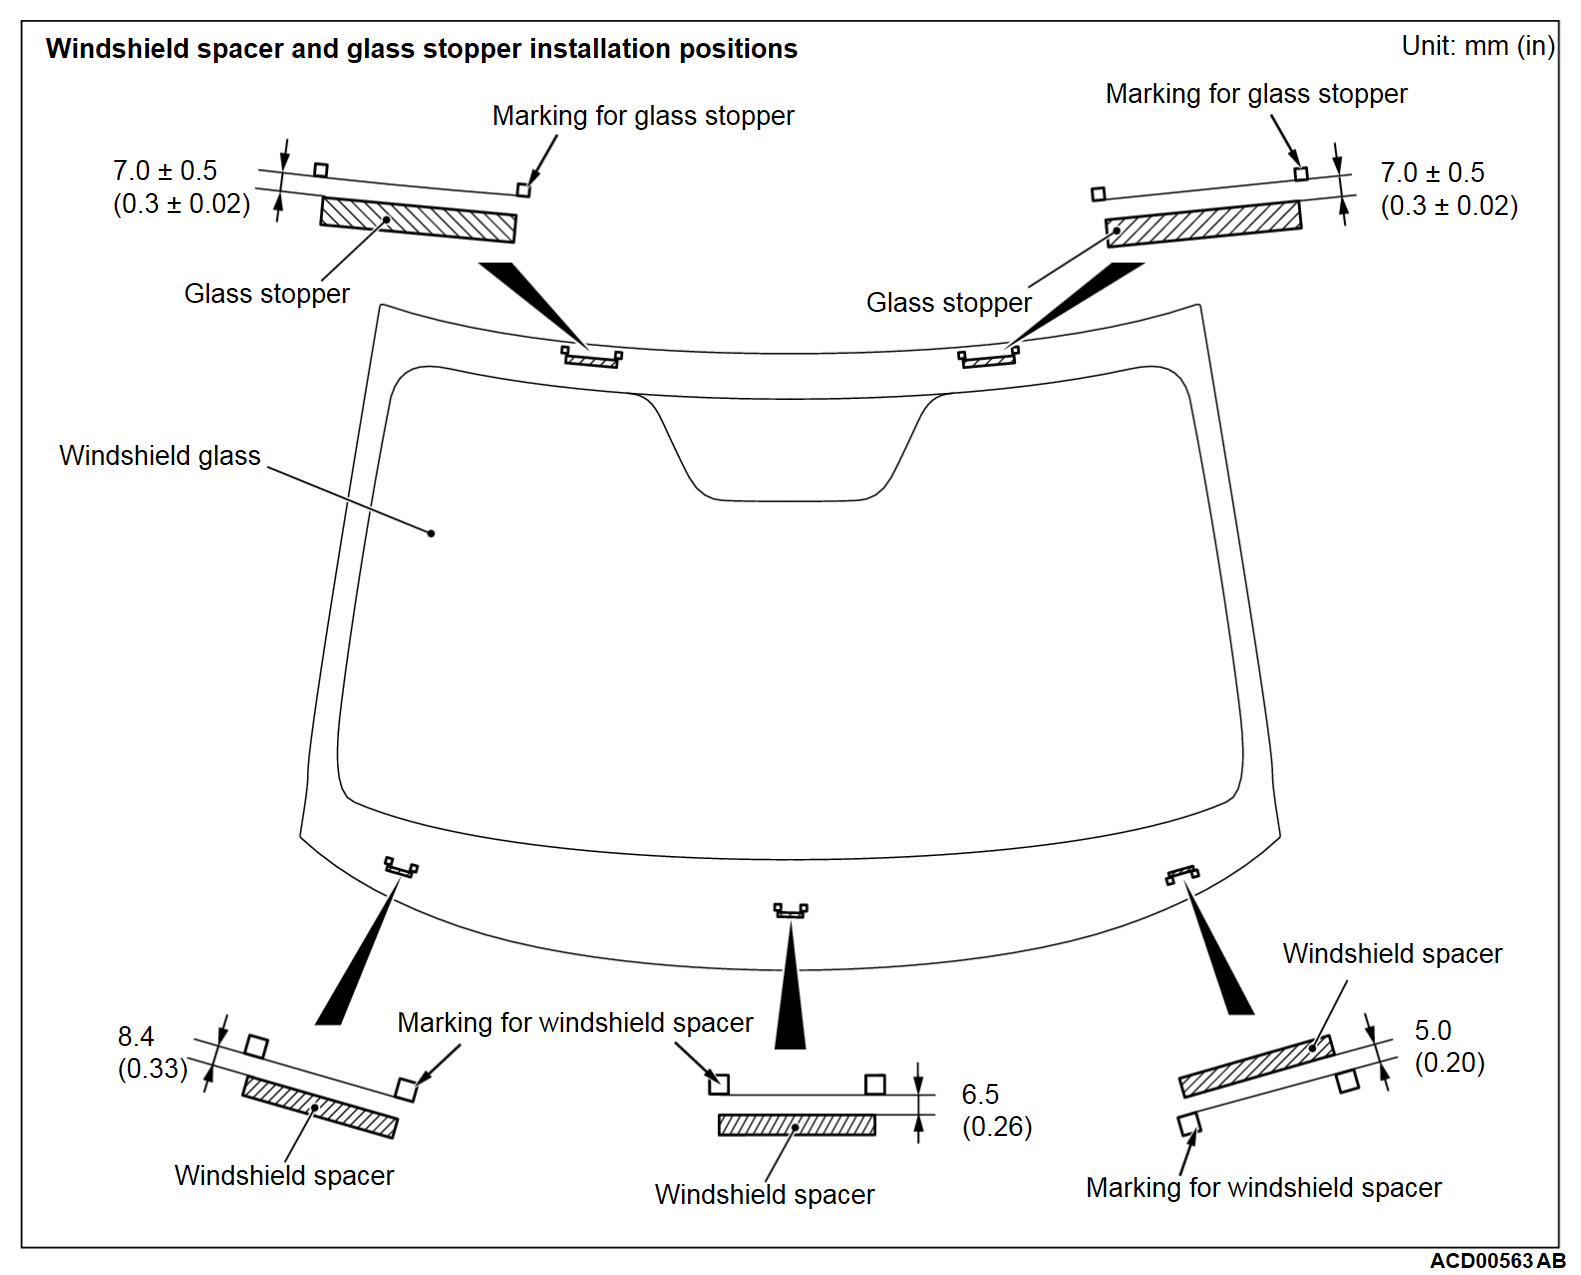
Source: mitsubishitechinfo.com
Remove loose contamination
The bonding area must be clean and prepared for the specified adhesive system.
Preserve sound factory coating
Avoid unnecessarily scraping properly bonded original paint from the windshield flange.
Address scratches immediately
Exposed metal should receive the corrosion-protection treatment specified by the adhesive system.
Stop for serious corrosion
Heavy rust, perforation, or deteriorated metal requires proper repair before a windshield can be safely bonded.
Why Rust Around the Windshield Matters
Urethane needs a properly prepared substrate. Bonding a new windshield over loose rust or deteriorated coatings can leave the adhesive attached to a weak surface rather than solid vehicle structure. Rust can also continue spreading beneath moldings where it is difficult to see.
Step 5: Prepare the Replacement Windshield
Clean and prepare the new windshield only with materials approved by the adhesive manufacturer. The black ceramic band around the perimeter of most bonded windshields is commonly called the frit. It helps provide the designed bonding area and protects the underlying adhesive from ultraviolet exposure, but it still must be prepared according to the chosen adhesive system.
Avoid touching the prepared bonding surface with bare fingers. Skin oils and other contamination can interfere with the preparation process. If the adhesive instructions call for glass cleaner, activator, or primer, apply the specified material in the specified area and respect its required drying or flash time.
Transfer approved moldings, brackets, sensors, or other parts only as directed by the vehicle manufacturer. Some components are intended for replacement rather than reuse.
Dry-fit when appropriate
A trial positioning check can reveal fitment problems before wet urethane is applied, provided the service procedure permits it.
Keep the bonding area clean
Do not rest the prepared windshield edge on dirty floors, cardboard, oily surfaces, or contaminated stands.
Follow primer timing
Do not set the windshield before a required primer flash time has elapsed or after an allowable working window has expired.
Check the Adhesive Expiration and Storage Conditions
Before opening the urethane, check its expiration date and storage requirements. Do not use material that has expired or has been stored outside the manufacturer’s allowable conditions. Once opened, some products also have limited usable life.
Step 6: Apply the Windshield Urethane
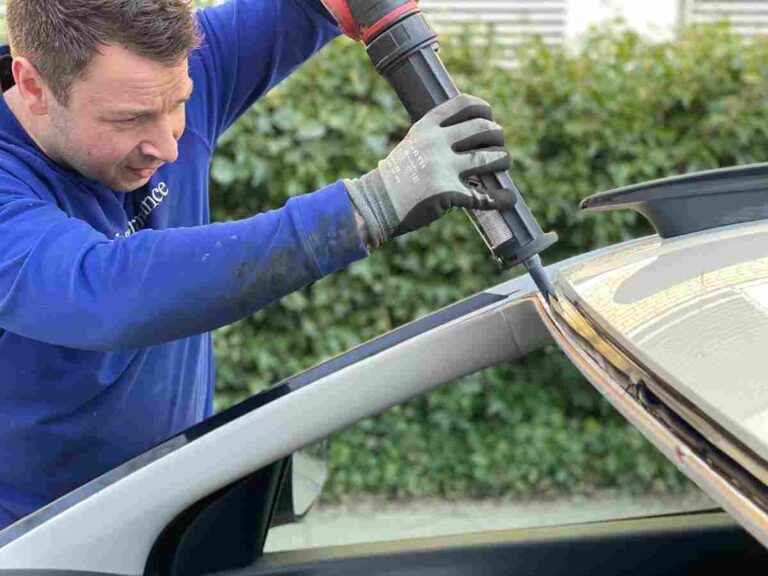
Apply the urethane as a continuous bead with the profile and dimensions required by the vehicle or adhesive system. Windshield nozzles are often cut to produce a tall triangular or V-shaped bead. That shape helps the adhesive make controlled contact as the windshield is pressed into position.
Maintain an uninterrupted bead around the opening. At the starting and ending point, join the urethane carefully so there is no gap that could become a leak path. Pay particular attention to corners and areas where the original bead height changes.
Do not substitute household silicone, construction adhesive, generic seam sealer, or an unidentified adhesive for automotive windshield urethane. The bonding system must be suitable for vehicle glazing and compatible with the surfaces being joined.
Source: freepik.com
Keep bead height consistent
The correct height helps position the windshield and maintain continuous contact around the perimeter.
Avoid gaps
An interrupted bead can allow water or air leakage and can reduce effective bonded area.
Work within the open time
The windshield must be set within the adhesive manufacturer’s specified working time.
Why You Should Not Guess the Urethane Bead Size
Too little adhesive can leave inadequate contact, while an excessive bead can change glass height, interfere with trim, or squeeze into areas where it does not belong. Use the original configuration, vehicle procedure, and adhesive manufacturer’s guidance to determine the appropriate bead.
Step 7: Set the New Windshield Into Position
Once the urethane is applied, position the windshield promptly and accurately. Attach clean suction handles, hold the glass above the opening, align it with the reference points or setting blocks, and lower it straight into the adhesive. Avoid sliding the windshield excessively after contact because movement can disturb the bead.
Two people should coordinate the placement from opposite sides of the vehicle when a mechanical setting device is unavailable. Check the gap along the roof and both A-pillars as the glass approaches the opening. The windshield should sit evenly and should not contact bare metal edges.
After setting the glass, apply only the pressure specified by the installation procedure to ensure contact with the adhesive. Do not repeatedly push the windshield deeper into the bead. Excessive pressure can alter its installed height or squeeze adhesive away from areas that need it.
Align before contact
Precise positioning is much easier before the windshield touches fresh urethane.
Lower instead of sliding
A controlled straight set helps preserve the intended adhesive bead.
Check perimeter spacing
Confirm that the glass is centered and has the expected clearances before the adhesive begins curing.
Signs the Windshield Is Positioned Correctly
The glass should appear centered in the opening, exterior moldings should align correctly, the windshield should sit at the expected height relative to the roof and A-pillars, and there should be no obvious place where the glass is floating above the adhesive. Exact fit checks vary by vehicle.
Step 8: Reinstall Trim, Sensors, Wipers, and Other Components
Reinstall the parts removed earlier in the sequence required by the vehicle manufacturer. This can include moldings, cowl panels, mirror assemblies, sensor covers, electrical connectors, A-pillar trim, and windshield-wiper arms.
Be careful not to disturb the newly set windshield while pushing moldings or trim into place. A component that requires heavy force may be misaligned rather than simply tight.
Reconnect electrical equipment and verify that connectors are fully seated. Reposition the wiper arms according to their original marks or the manufacturer’s alignment specifications. Before running the wipers, make sure the arms and blades are positioned correctly so they cannot strike the cowl, molding, or roof edge.
Verify trim engagement
Loose moldings and clips can create noise or detach during driving.
Check electrical connections
Reconnect rain sensors, heating elements, cameras, antennas, and other windshield-related equipment where fitted.
Confirm wiper movement
Test wipers only after correct installation and when doing so will not interfere with the adhesive manufacturer’s restrictions.
Step 9: Respect the Minimum Drive-Away Time
Do not drive the vehicle immediately unless the adhesive manufacturer specifically permits it under the actual installation conditions. Automotive-glass urethane requires time to develop the strength specified for returning the vehicle to service.
There is no single safe waiting period that applies to every windshield installation. Minimum drive-away time can vary with the urethane product, temperature, humidity, vehicle configuration, airbag requirements, and other conditions. Use the current instructions for the exact adhesive product rather than relying on a generic online statement such as one hour, two hours, or overnight.
Keep the vehicle stationary until the required time has passed. If the adhesive instructions impose additional restrictions during early curing, follow them as well.
Record installation conditions
Temperature, humidity, adhesive product, and installation time can help determine the applicable drive-away requirement.
Follow the adhesive data
The adhesive manufacturer establishes the applicable minimum drive-away guidance for its product.
Do not rush the vehicle into service
A windshield that looks firmly installed can still be within the adhesive’s required curing period.
Can You Wash the Car Immediately?
Follow the adhesive and installer’s post-installation instructions. High-pressure water, aggressive car-wash equipment, or anything that pushes against exterior moldings may be restricted during the early curing period. If the instructions are unclear, avoid unnecessary washing until you have confirmed the applicable limitation.
Step 10: Check for Leaks, Wind Noise, and Installation Problems
After the required curing period, visually inspect the complete windshield perimeter and verify that trim, moldings, wipers, sensors, and interior components are secure. Look for adhesive contamination, loose moldings, uneven glass height, or gaps that suggest the windshield was not positioned correctly.
A controlled water-leak inspection can help identify sealing problems, but avoid using extreme water pressure directly against newly installed moldings. If water appears inside the cabin, determine the actual leak path instead of simply smearing sealant around the exterior edge.
During the first drive, listen for unusual wind noise and watch for warning lights or driver-assistance messages. A significant whistle can indicate a molding or sealing issue, while camera or lane-assistance warnings may point to sensor installation or calibration requirements.
Water inside the vehicle
Investigate the exact leak path and correct the bonding or sealing problem properly.
Persistent wind whistle
Check glass position, moldings, cowl components, and perimeter sealing.
Loose exterior trim
Replace broken clips or incorrectly installed molding rather than relying on temporary tape.
ADAS warning message
Check sensor installation and perform the manufacturer-required diagnostic or calibration procedure.
ADAS Calibration After Windshield Replacement
Many newer vehicles sold in the United States use a forward-facing camera mounted behind the windshield for features such as lane-departure warning, lane-centering assistance, automatic emergency braking, traffic-sign recognition, or automatic high beams. Replacing the windshield can change the relationship between the camera, glass, and road.
The vehicle manufacturer determines whether calibration is required and what type must be performed. Depending on the vehicle, calibration may be static, dynamic, or a combination of both. Static calibration can require targets positioned at exact distances and heights on a level floor. Dynamic calibration may require driving the vehicle under specified road, speed, weather, and lane-marking conditions using a capable scan or calibration system.
Do not assume a camera is correctly aimed just because it clips back into its original bracket and no warning light appears. Check the service information for the specific vehicle.
Static calibration
Typically uses manufacturer-specific targets, measurements, scan equipment, and controlled shop conditions.
Dynamic calibration
Typically requires a prescribed driving procedure while a scan or calibration tool communicates with the vehicle.
Combined calibration
Some vehicles require both stationary target calibration and an on-road procedure.
Common Windshield Installation Mistakes
Most serious installation problems are not caused by one dramatic mistake. They often come from small preparation errors that reduce adhesion, create corrosion, allow leaks, or place the glass incorrectly. Avoid shortcuts simply because the finished windshield looks acceptable from outside.
Using the wrong windshield
A visually similar part may have the wrong camera bracket, tint, antenna, acoustic layer, heating system, or head-up display configuration.
Damaging the pinch weld
Deep scratches caused during removal can expose metal and become future corrosion sites.
Ignoring adhesive instructions
Primer use, flash time, application temperature, bead dimensions, open time, and drive-away time are product-specific.
Touching prepared surfaces
Fingerprints, oil, dirt, and other contamination can interfere with the intended bonding preparation.
Leaving gaps in the urethane
Discontinuities can contribute to leaks and insufficient bonded area.
Setting the windshield crooked
Poor alignment can create uneven gaps, trim problems, glass stress, or excessive wind noise.
Driving too early
Appearance alone cannot determine whether the adhesive has achieved its specified minimum drive-away condition.
Skipping required ADAS calibration
A windshield-mounted camera may need calibration even when it appears to work normally.
How to Know the Windshield Installation Was Successful
A successful installation is more than a windshield that stays in the opening. After the appropriate curing and calibration work is complete, the glass should be properly centered, the moldings and cowl should fit securely, and the interior should remain dry during normal rain or an appropriate leak test.
There should be no new persistent wind whistle, excessive adhesive visible where it should not be, loose trim, unusual glass movement, or warning messages caused by disconnected or uncalibrated windshield equipment. Wipers should park and sweep normally, and rain sensors, cameras, heating elements, mirrors, antennas, and related features should operate as specified.
Even glass position
The windshield sits consistently relative to the roof, pillars, and surrounding moldings.
Dry interior
There are no water leaks around the bonding perimeter under appropriate testing or normal weather.
Secure components
Cowls, clips, mirror assemblies, moldings, sensors, and interior trim are firmly installed.
No abnormal wind noise
There is no new whistle or air leak associated with the replacement.
Systems function correctly
Wipers, cameras, sensors, heating elements, and other glass-related equipment operate normally after required calibration.
Frequently Asked Questions
Q
Can I install a windshield myself?
You can install some windshields yourself if you have the correct glass, removal equipment, suction tools, compatible automotive urethane system, vehicle-specific instructions, and enough experience to protect the bonding surfaces. Older vehicles without windshield-mounted electronics are generally less complex.
Professional installation is preferable when the vehicle has ADAS cameras, complicated moldings, significant rust, collision damage, or a windshield opening that needs structural or corrosion repair.
Q
How long after installing a windshield can I drive?
Use the minimum drive-away time specified for the exact adhesive and installation conditions. There is no universal waiting period. Temperature, humidity, adhesive formulation, vehicle requirements, and other factors can change the required time.
Do not rely on a generic number from another installation or adhesive product.
Q
What adhesive is used to install a windshield?
Modern bonded windshields typically use an automotive polyurethane retention adhesive system, commonly called windshield urethane. Use a product intended for automotive glass and follow the complete system instructions, including any specified cleaner, activator, or primer.
Q
Should I remove all the old windshield urethane?
Not necessarily. Many adhesive systems use a close-cut method that leaves a controlled layer of sound existing urethane on the vehicle. The correct preparation depends on the adhesive manufacturer’s instructions and the condition of the existing bond.
Loose material, contamination, corrosion, damaged coatings, and previous improper repairs require additional attention. Do not strip sound factory paint unnecessarily.
Q
Does a vehicle need an alignment after windshield replacement?
A normal wheel alignment is not required simply because the windshield was replaced. However, vehicles with windshield-mounted advanced driver-assistance cameras may require camera calibration.
Calibration and wheel alignment are different procedures. Some ADAS calibration processes may require vehicle ride height, tire pressures, steering geometry, or wheel alignment to be within specification before calibration can be completed accurately.
Q
Why is my new windshield leaking?
Possible causes include a gap or void in the adhesive bead, contamination of the bonding surface, improper glass positioning, damaged body seams, poorly fitted moldings, or a leak entering somewhere other than the windshield.
Locate the actual water path before attempting a repair. Applying miscellaneous sealant around the exterior can hide the problem without restoring the intended windshield bond.
Q
Do all new windshields require ADAS calibration?
No. Calibration depends on the vehicle and the equipment associated with the windshield. Vehicles without windshield-mounted driver-assistance cameras generally do not require camera calibration for that reason.
For a vehicle equipped with a forward-facing camera, consult the manufacturer’s service information to determine whether replacement of the windshield triggers static calibration, dynamic calibration, or both.
✦ Wrapping Up
Conclusion
Knowing how to install a windshield correctly means understanding the entire retention system, not just how to remove and replace the glass. The job starts with selecting the correct windshield and protecting the vehicle, then moves through careful removal, pinch-weld inspection, adhesive-system preparation, urethane application, accurate glass placement, reassembly, curing, leak inspection, and any required electronic calibration.
For a straightforward vehicle with sound bodywork and no complicated windshield electronics, an experienced DIYer with the correct tools and manufacturer information may be able to complete the work successfully. On many newer U.S. vehicles, however, ADAS calibration requirements, specialized moldings, sensors, and strict adhesive procedures make professional installation a practical safety choice.
💡 Key Takeaway
Before starting, identify the exact replacement glass, obtain the vehicle-specific windshield procedure and current adhesive instructions, and determine whether ADAS calibration is required. If you cannot verify any of those three items, have a qualified auto-glass technician complete the installation.
Learn how to fold a round windshield sun shade correctly without bending the frame. Follow these simple steps, avoid common mistakes, and store it neatly.
Learn how to fold a pop up windshield sun shade safely and quickly. Follow simple steps, avoid common mistakes, and store your car sun shade without damaging its frame.