To fix a leaking windshield, first confirm exactly where the water is entering, clean and dry the affected area, and repair only minor accessible gaps with an automotive glass-compatible sealant. If the leak comes from failed windshield urethane, hidden rust, cracked glass, or a poorly installed windshield, professional removal and resealing is usually the safer permanent repair.
For drivers in the United States, a windshield leak can show up after a summer thunderstorm, an automatic car wash, winter freeze-thaw cycles, coastal humidity, or years of exposure to heat and road salt. Water may drip from the headliner, run down the A-pillar, collect on the dashboard, soak the carpet, or appear near the windshield only after heavy rain. The visible wet spot does not always identify the actual entry point because water can travel several inches behind trim before becoming noticeable.
The most important part of learning how to fix a leaking windshield is diagnosing the source before applying sealant. A small gap along an older rubber molding may sometimes be repairable without removing the glass. A leak caused by separated structural urethane, corrosion around the windshield opening, or an incorrectly installed replacement windshield requires a different approach. This guide explains how to test for the leak, distinguish common causes, attempt an appropriate minor DIY repair, verify the result, prevent interior damage, and recognize situations that should be handled by an auto glass professional.
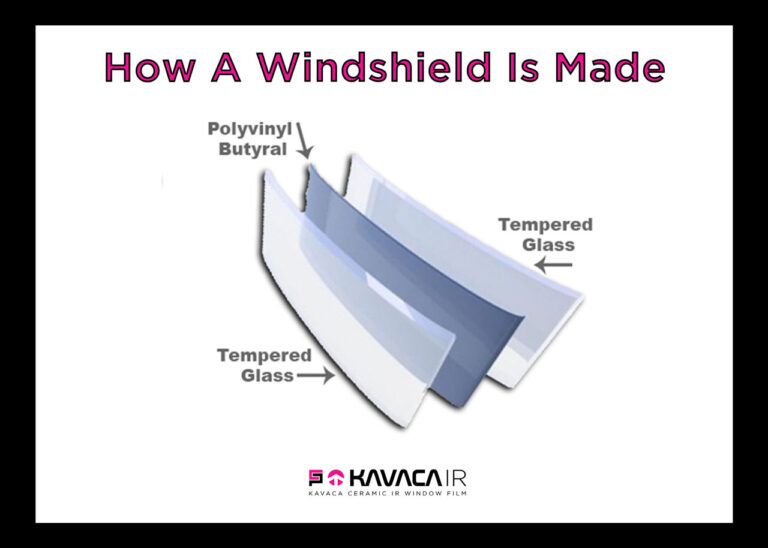
A leaking windshield usually results from a failure somewhere in the sealing system around the glass, but the exact cause varies by vehicle. Modern windshields are commonly bonded to the body with automotive urethane. Exterior moldings may cover the edge and improve appearance or water management, but the bonded urethane is typically the critical seal between the windshield and the body opening.
A leak can develop after an improper windshield replacement, deterioration of an older seal, corrosion around the windshield opening, body movement after collision damage, or debris interfering with drainage paths. On some vehicles, water that appears to come from the windshield may actually enter through a roof seam, sunroof drain, roof-mounted accessory, cowl area, door seal, or body seam.
That distinction matters because adding sealant to the visible windshield trim will not fix water entering from another part of the vehicle. Before repairing anything, inspect the surrounding area carefully and reproduce the leak under controlled conditions.
Source: tireburn.com
Failed windshield bond
A gap in the urethane adhesive can allow rainwater to pass between the glass and the vehicle body.
Previous installation problem
Contamination, inadequate adhesive preparation, damaged pinchweld surfaces, or an incomplete urethane bead can create leak paths.
Rust around the windshield opening
Corrosion can lift or undermine the adhesive and create channels that allow water into the cabin.
Aging molding or gasket
Older vehicles using rubber-mounted or gasket-style glass may develop hardened, cracked, or shrunken sealing material.
Leak from another body area
Sunroof drains, roof seams, antenna mounts, cowl drains, door seals, or body seams can imitate a windshield leak.
Common Signs of a Windshield Water Leak
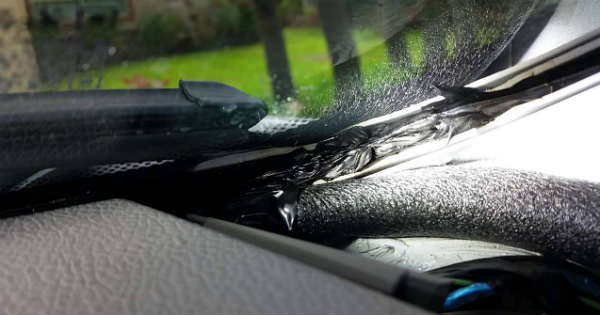
The clearest sign is visible water near the edge of the windshield during rain or washing, but smaller leaks may be harder to identify. You may notice a damp headliner near an A-pillar, wet dashboard corners, moisture beneath the front carpet, musty odors, recurring interior fogging, or water stains that appear after storms.
Treat repeated moisture seriously. Water inside the cabin can damage insulation, stain trim, encourage mold growth, and reach electrical connectors or modules located behind the dashboard or under the carpet.
Wet A-pillar trim
Moisture near the left or right windshield pillar may indicate water entering near an upper windshield corner.
Damp front carpet
Water can travel behind the dashboard and collect under carpet padding without leaving an obvious trail.
Musty interior odor
Persistent dampness can remain trapped beneath carpeting or insulation after the visible surface has dried.
How to Find the Exact Windshield Leak
Before attempting a repair, dry the vehicle and determine exactly where water enters. Testing one small section at a time is more useful than spraying the entire windshield because a large amount of water can hide the actual entry point.
Park the vehicle on a level surface when possible. Remove loose items from the dashboard and place clean towels along the lower edge of the windshield and front carpet. Have one person sit inside with a flashlight while another applies a gentle stream of water outside.
Start low and work upward. Test the lower windshield edge first, then the sides, and finally the upper corners and roofline. Moving upward gradually prevents water from a higher leak from running downward and making a lower area appear defective.
Use low-pressure water rather than a pressure washer. High-pressure spray can force water past seals that do not leak during normal rain and can produce a misleading result.
Source: jeepfixes.com
Step 1: Dry the area
Begin with dry glass, trim, headliner, dashboard edges, and carpet so new moisture is easy to identify.
Step 2: Test small sections
Apply a gentle stream of water to one portion of the windshield perimeter at a time.
Step 3: Watch from inside
Use a flashlight to inspect the glass edge, A-pillars, headliner, dashboard corners, and lower firewall area.
Step 4: Mark the suspected area
Once water appears, stop testing and mark the corresponding exterior location with removable tape.
Step 5: Confirm the source
Repeat the test on the suspected section before beginning a repair.
How to Tell Whether the Water Is Actually Coming From the Windshield
If no water appears when testing the windshield edge, expand the inspection to nearby components. Check roof seams, sunroof drains, roof racks, antenna mounts, door weatherstripping, and the cowl area below the windshield. Water entering through the cowl can sometimes travel behind the dashboard and be mistaken for a windshield leak.
Also check whether the air conditioning evaporator drain is working if the carpet becomes wet primarily while the air conditioner is running rather than after rain.
Rain-related moisture
Focus first on exterior seals, body seams, drains, and the windshield bonding area.
Air-conditioning-related moisture
Investigate the evaporator drain and HVAC housing before assuming the windshield is responsible.
How to Fix a Leaking Windshield Step by Step
A DIY repair is most appropriate when you have confirmed a small, accessible leak around a non-structural exterior gap and the windshield itself is secure, uncracked, and free of visible corrosion around the bonding surface. If the windshield moves, the urethane bond has separated, rust is present, or the glass was recently replaced, skip the patch repair and have the installation inspected.
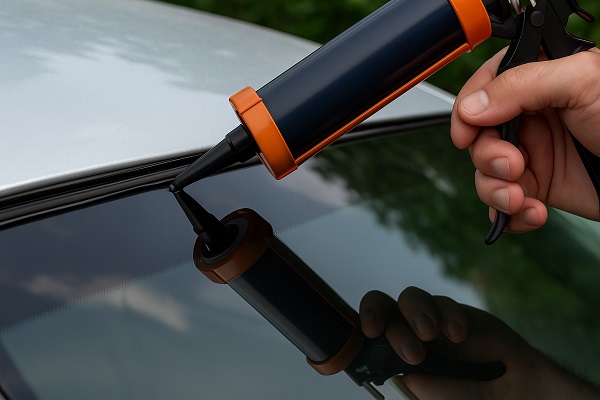
For a minor repair, use a sealant specifically intended for automotive glass and the type of sealing system on your vehicle. Some products are designed to flow into narrow gaps, while windshield urethane is a structural adhesive with specific surface-preparation and curing requirements. Do not assume the two products are interchangeable.
Read the product instructions before application because surface preparation, temperature range, bead size, cure time, and safe handling requirements vary. Wear gloves and work in a well-ventilated area.
Source: tsautoglass.com
Step 1: Clean the leaking area
Remove dirt, wax, loose adhesive, and debris from the accessible exterior area without damaging the glass, paint, or molding.
Step 2: Let everything dry completely
Sealant applied over trapped water or damp contamination may not bond correctly.
Step 3: Protect surrounding surfaces
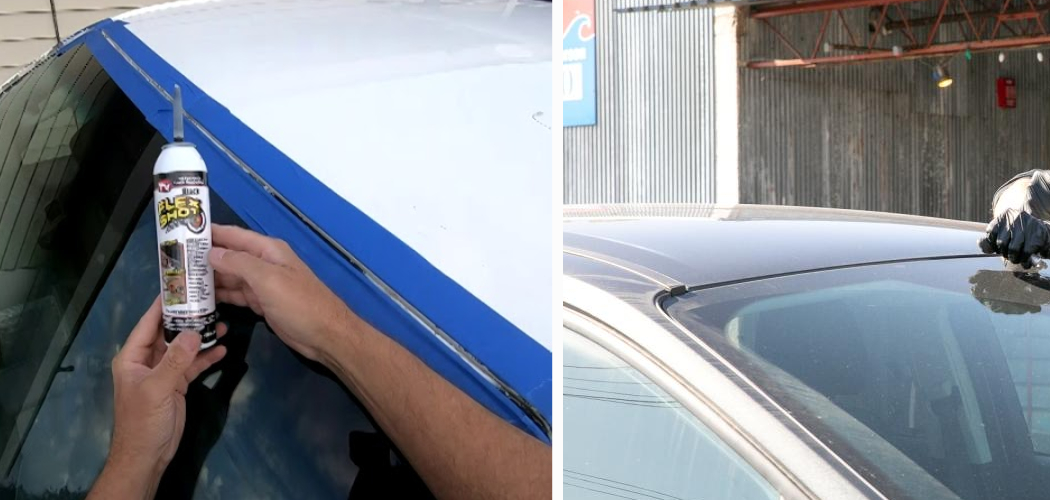
Use suitable masking tape around the repair area if the sealant manufacturer permits it.
Step 4: Apply the correct automotive sealant
Fill only the confirmed leak path using a controlled, continuous application rather than covering the entire windshield edge unnecessarily.
Step 5: Tool or finish the bead if required
Follow the sealant manufacturer’s instructions for smoothing, tooling, or leaving the bead untouched.
Step 6: Allow full curing time
Keep the repair dry and avoid disturbing the area until the product has cured according to its instructions.
Step 7: Retest with gentle water
After curing, repeat the same controlled water test used during diagnosis.
What You May Need Before Starting
The exact materials depend on the leak type. For a small exterior sealing repair, useful items can include clean microfiber towels, automotive-safe cleaner, masking tape, gloves, a flashlight, a plastic trim tool when appropriate, and an automotive glass-compatible sealing product.
Avoid removing windshield moldings unless you understand how they are attached. Some trim pieces use fragile clips and are not designed to be repeatedly removed. Damaging the molding can create another leak or increase the cost of professional repair.
Cleaning supplies
Use products that leave the bonding or sealing area free of dirt, oil, wax, and residue.
Automotive glass sealant
Select a product appropriate for the specific type of minor gap you are repairing.
Gloves and eye protection
Follow the safety precautions listed by the sealant manufacturer.
Signs the Repair Worked
A successful repair should remain dry during a controlled water test and during subsequent normal rain. Check both the visible windshield edge and less obvious locations such as beneath the A-pillar trim, around the dashboard corners, and under the front carpet.
Continue monitoring the area for several days because carpet padding and insulation can retain old moisture. A damp carpet immediately after repair does not necessarily prove the windshield is still leaking if trapped water has not yet dried.
No new water trail
The repaired section remains dry while water is applied outside.
No recurring stains
Headliner and pillar trim remain dry after later rain.
Cabin dries normally
Residual moisture decreases rather than returning after every storm.
When a Windshield Leak Should Not Be Patched
Not every windshield leak should be treated by applying more sealant around the outside. The windshield is part of the vehicle’s body and restraint system environment, and modern bonded glass depends on proper adhesive preparation and installation. A superficial patch can hide a deeper bonding or corrosion problem without restoring the original installation.
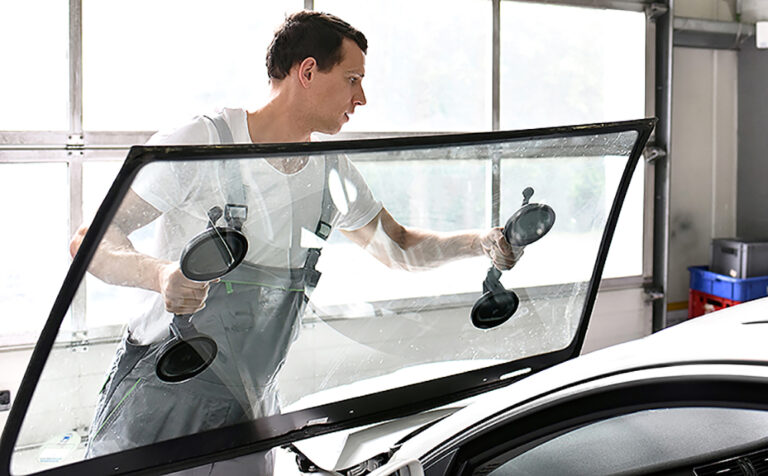
Professional inspection is the better choice when the glass appears loose, when a large section of adhesive has separated, when the leak began shortly after windshield replacement, or when rust is visible around the glass opening. In these situations, the windshield may need to be removed so the bonding surface can be inspected, cleaned, repaired, primed as required, and rebonded correctly.
Cracked or chipped glass also requires separate evaluation. Sealing the perimeter will not repair a structural crack in the windshield. Likewise, adding exterior sealant over corrosion does not stop rust developing underneath the adhesive.
Source: miracleagc.com
Visible rust
Corrosion around the windshield opening can continue beneath a surface patch and may require glass removal and body repair.
Loose windshield
Movement or separation between the windshield and body indicates a bonding problem that should not be treated as a simple cosmetic leak.
Leak after replacement
A recently installed windshield should be inspected by the installer rather than immediately covered with additional sealant.
Large adhesive gap
Extensive urethane separation generally requires proper removal and rebonding rather than spot sealing.
Damaged glass
A crack or significant chip must be evaluated separately from the perimeter water leak.
Why Household Silicone or Caulk Is Usually a Poor Choice
General-purpose household caulk is not designed as a substitute for an automotive windshield bonding system. It may adhere poorly to contaminated automotive surfaces, create a messy barrier that complicates later glass removal, or conceal the actual failure without addressing it.
If a minor leak is suitable for a DIY repair, choose a product specifically intended for automotive glass sealing and confirm that it is compatible with the existing materials. For structural bonding, use the correct professional windshield urethane system and preparation process rather than a household sealant.
Compatibility matters
Automotive glass, painted metal, existing urethane, primers, and moldings may require specific compatible products.
A patch is not a rebond
Filling an exterior gap does not restore a failed structural adhesive bond.
What to Do If the Windshield Still Leaks After Repair
If the leak returns, do not keep adding layers of sealant without repeating the diagnosis. A recurring leak often means the original entry point was misidentified, the repair surface was not properly prepared, the selected product was inappropriate, or the water is entering from somewhere other than the windshield.
Dry the interior again and repeat the controlled water test in small sections. Check the roofline, sunroof drains, roof rack mounts, antenna areas, door seals, cowl drains, and nearby body seams. If the same windshield location repeatedly leaks after a correctly performed minor repair, have an auto glass technician inspect the bond.
Also address water already trapped inside the vehicle. Remove standing water, blot wet carpeting, and dry the interior thoroughly. Deep carpet padding may hold much more water than the visible carpet surface suggests. Persistent dampness can create odor, staining, corrosion, and electrical problems.
Source: youtube.com
Retest before resealing
Verify the entry point again instead of assuming the first diagnosis was correct.
Check adjacent leak sources
Inspect roof seams, drains, doors, cowl areas, and body penetrations.
Dry the cabin thoroughly
Remove residual moisture from carpet, padding, trim, and insulation after the exterior leak is corrected.
Escalate recurring leaks
Repeated leakage at the bonded windshield edge usually deserves professional inspection.
How to Protect the Interior While Waiting for Repair
If you cannot repair the leak immediately, keep the vehicle covered or parked in a dry location when practical. Use towels only as a short-term method to catch water, and replace or dry them frequently so they do not keep the interior damp.
Avoid taping plastic directly across areas where it could interfere with visibility, windshield wipers, vehicle sensors, or safe driving. If water is reaching electrical equipment, creating heavy windshield fogging, or interfering with visibility, address the problem before continuing normal vehicle use.
Keep water out when parked
Use covered parking when available until the leak is repaired.
Remove wet materials
Do not leave saturated towels or mats inside the vehicle.
Protect visibility
Do not use temporary coverings that obstruct the windshield, wipers, cameras, or sensors.
Frequently Asked Questions
Q
Can I fix a leaking windshield without removing it?
Sometimes. A small, confirmed, accessible sealing gap may be repairable without removing the windshield if the glass is secure and there is no evidence of corrosion or major adhesive failure. However, leaks caused by failed structural urethane, rust, or improper windshield installation may require removal and rebonding.
Q
What sealant should I use for a leaking windshield?
Use a product specifically designed and labeled for the type of automotive glass sealing repair you are performing. Flowable automotive glass sealers may be suitable for certain small non-structural gaps, while windshield urethane is used for bonded glass installation. Follow the product manufacturer’s compatibility, preparation, temperature, and curing instructions.
Q
Can a windshield leak cause electrical problems?
Yes. Depending on the vehicle, water entering around the windshield can travel behind the dashboard, along wiring, or beneath the carpet where electrical connectors and control modules may be located. If water is reaching electrical components, professional diagnosis should not be delayed.
Q
Why does my windshield leak only during heavy rain?
A very small gap may admit water only when enough water accumulates around the windshield edge, roofline, or drainage area. Heavy rain can also overwhelm partially blocked drains and expose leaks from roof seams or the cowl that may be mistaken for windshield leakage. Controlled section-by-section testing helps distinguish these possibilities.
Q
Why did my windshield start leaking after it was replaced?
A leak that begins soon after replacement can be associated with an incomplete adhesive seal, contamination, inadequate preparation of the bonding surface, damaged molding, or another installation-related issue. Contact the installer and have the windshield inspected before applying additional sealant, especially if the replacement is covered by a workmanship warranty.
Q
How can I tell if rust is causing the windshield leak?
Visible bubbling paint, brown corrosion, flaking material, or deterioration around the windshield edge can indicate rust, but corrosion may also be hidden beneath the glass or molding. Repeated leaks from the same area despite surface sealing are another reason to suspect a deeper problem. Proper inspection may require windshield removal.
✦ Wrapping Up
Conclusion
Knowing how to fix a leaking windshield starts with finding the actual path of the water. Dry the vehicle, test the windshield in small sections with gentle water, and confirm the source before applying any sealant. If the problem is a small accessible gap and the windshield is otherwise secure, cleaning, drying, and applying the correct automotive glass-compatible sealant may stop the leak.
Do not treat every windshield leak as a simple sealing job. Rust, loose glass, failed structural urethane, cracked glass, or leakage following a recent windshield installation can require professional removal and rebonding. After any repair, retest the area and dry the cabin completely so hidden moisture does not continue damaging the interior.
💡 Key Takeaway
Start by performing a controlled low-pressure water test from the bottom of the windshield upward. Repair only a confirmed minor sealing gap yourself; arrange professional auto glass inspection if you find rust, loose glass, major adhesive separation, damaged glass, or a recurring leak.
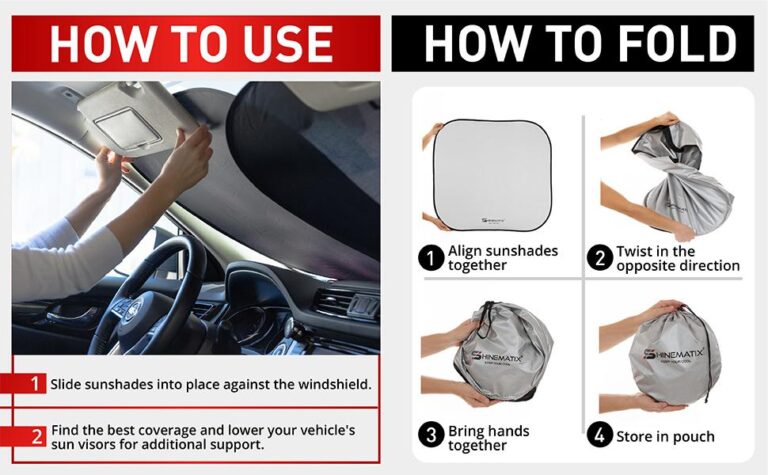
Learn how to fold a pop up windshield sun shade safely and quickly. Follow simple steps, avoid common mistakes, and store your car sun shade without damaging its frame.