To repair a windshield washer hose, locate the leak or disconnected section, inspect the tubing, and reconnect it or replace the damaged portion with compatible washer-fluid hose and a suitable connector. Test the system before reinstalling any covers.
In the United States, a working windshield washer system helps drivers maintain visibility during rain, road spray, dust, and winter driving. When washer fluid stops reaching the windshield, a cracked hose, loose connection, blocked nozzle, or failed pump may be responsible. A leaking hose is often a manageable DIY repair, provided you identify the actual fault before replacing parts.
The repair method depends on the location and extent of the damage. A loose hose may only need to be reconnected, while a split or brittle section generally needs replacement. Using tubing designed for automotive windshield washer fluid, protecting the hose from hot or moving components, and checking for leaks under operating pressure help produce a reliable repair.
How to Tell Whether the Windshield Washer Hose Is Damaged
A damaged windshield washer hose commonly causes fluid to leak under the hood, spray weakly, or fail to reach the windshield. The location of the fluid and the behavior of the washer pump can help distinguish a hose problem from a blocked nozzle or failed pump.
Park the vehicle on level ground, switch off the engine, and inspect the system before operating it repeatedly. Have someone activate the washer control briefly only when it is safe to do so, keeping hands and clothing away from moving components. On vehicles with an accessible hose, watch for fluid escaping from a split or disconnected section.
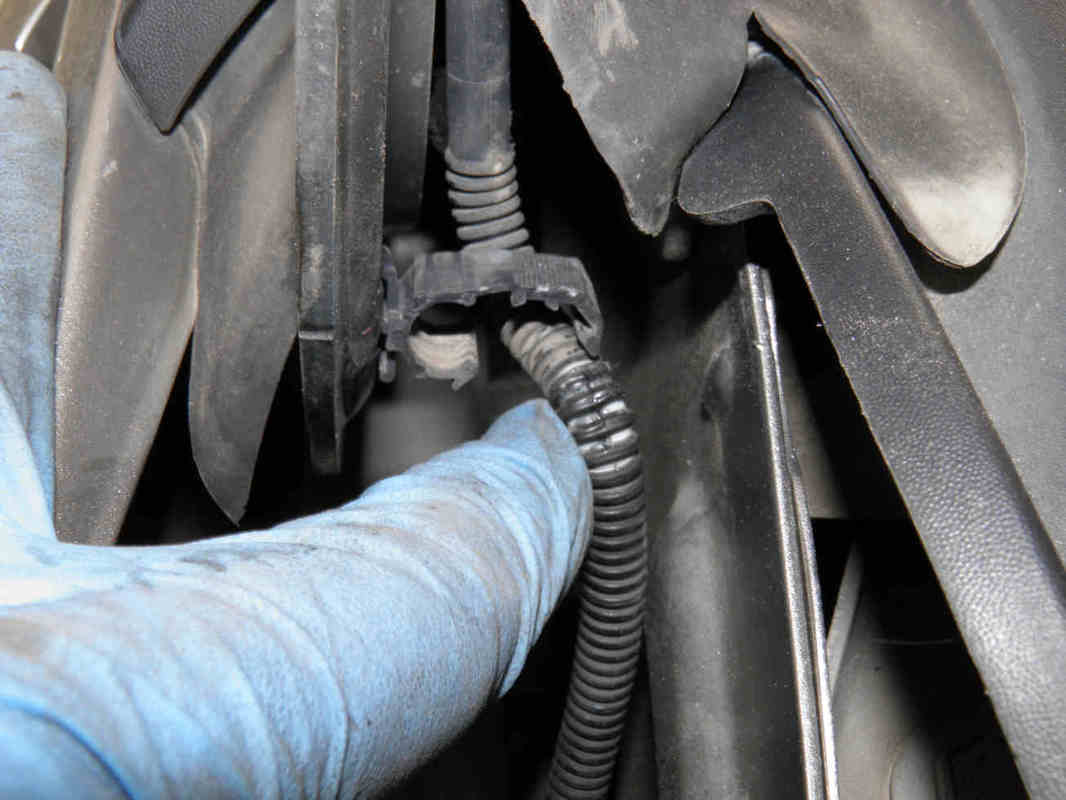
Source: familyhandyman.com
Fluid leaking beneath the hood
Wet tubing, dripping connections, or a fresh trail of washer fluid can indicate a split hose, loose fitting, or leaking connector.
The pump runs but little fluid reaches the windshield
A disconnected, kinked, leaking, or obstructed hose can prevent normal spray. A clogged nozzle or restricted filter can produce similar symptoms.
Fluid sprays inside the engine compartment
A hose that has come off a nozzle fitting or split near a bend may release fluid away from the windshield when the pump operates.
No pump sound and no spray
Check the washer fluid level and relevant electrical components before assuming the hose is faulty. A pump, fuse, wiring connection, or control problem may be responsible.
Check the Hose Before Replacing Other Components
Follow the tubing from the washer-fluid reservoir or pump toward the hood-mounted or cowl-mounted nozzles. Depending on the vehicle, the route may pass through the engine compartment, under plastic trim, or inside the hood. Look for disconnected ends, wet spots, kinks, abrasions, and hardened sections.
If the hose appears intact but the nozzles do not spray, disconnect an accessible hose end only when the system is switched off and the connection can be reached safely. A brief, controlled pump test can help determine whether fluid reaches that point. Do not direct fluid toward electrical components or assume that a weak flow automatically proves the hose is defective.
Inspect connections first
Loose joints and disconnected nozzle fittings are often easier to correct than damage hidden along the hose route.
Look for damage at bends
Tight bends, hood hinges, clips, and rubbing points can stress the tubing and create cracks or restrictions.
Tools and Materials Needed to Repair a Washer Hose
Most accessible washer-hose repairs require basic hand tools and replacement tubing rather than specialized automotive equipment. The exact supplies depend on whether the hose has separated from a fitting or suffered physical damage.
Check the vehicle service information or compare the replacement tubing with the original before buying parts. Hose diameter, connector shape, routing, and material compatibility matter because an incorrect fit can leak, restrict flow, or disconnect when the pump operates.
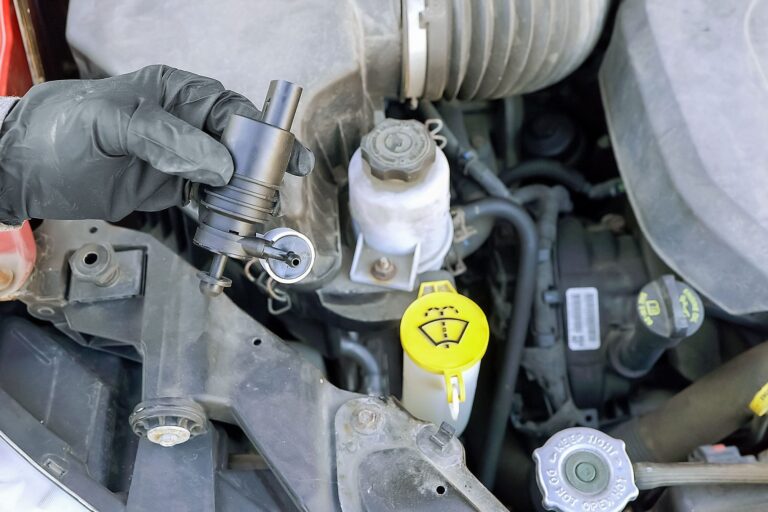
Source: nomaallim.com
Replacement washer-fluid hose
Use automotive tubing intended for windshield washer systems, with a compatible inner diameter and suitable resistance to washer fluid, temperature changes, and normal under-hood conditions.
Compatible hose connector
A correctly sized straight or angled connector can join two sound hose ends when the original damaged section is removed.
Cutting tool
Use sharp scissors or a suitable hose cutter to make clean, square cuts without crushing the tubing.
Pliers and trim tools
These may help release suitable clips or remove access panels. Use plastic trim tools around painted or easily scratched surfaces.
Cloth and washer fluid
Use a clean cloth to absorb spills and the vehicle-appropriate washer fluid to refill the reservoir after the repair.
Choose a Repair Method That Matches the Damage
A disconnected hose usually needs to be pushed fully back onto an undamaged fitting. If a hose end is stretched, split, or no longer grips securely, cut off the damaged portion only if enough length remains for a safe, unstressed connection.
For a cracked section in the middle of the hose, replacing the damaged length is generally more dependable than wrapping it with tape. If the hose is brittle in several places, replacement of the affected run is preferable to repeatedly repairing new leaks.
Loose but undamaged connection
Reconnect the hose and restore the original clip or retainer if it is serviceable.
Localized split
Replace the damaged section with compatible tubing and an appropriate connector.
Multiple cracks or heat damage
Replace the affected hose run and investigate the cause of the damage before routing the new tubing.
How to Repair a Windshield Washer Hose Step by Step
The most reliable repair starts with identifying the damaged section, removing only what is necessary, and checking the completed connection for leaks. Follow vehicle-specific service instructions if access requires removing the cowl, hood trim, or other components.
Source: i.ytimg.com
Step 1: Park and prepare the vehicle
Park on a level surface, switch off the ignition, remove the key or secure the vehicle against unexpected operation, and allow hot engine components to cool. Keep washer fluid away from your eyes and clean up spills.
Step 2: Find the leak or disconnection
Check the reservoir outlet, pump connections, hose joints, hood hinges, nozzle fittings, and accessible tubing. Use a brief washer activation only if the area is safe and the engine compartment is clear of hazards.
Step 3: Expose the damaged section
Release any hose clips or trim that obstruct access. Photograph the original routing before moving the tubing so you can reinstall it without creating kinks or rubbing points.
Step 4: Disconnect the hose carefully
With the washer system switched off, gently release the tubing from the fitting. Avoid pulling hard on brittle plastic nipples or electrical connectors. If a fitting is damaged, replace the appropriate component rather than forcing the hose onto it.
Step 5: Reconnect or cut out the damaged portion
If the hose is intact and merely disconnected, reinstall it fully on the correct fitting. For a damaged section, cut away the split material with clean, square cuts. Make sure the remaining ends are sound and long enough to connect without tension.
Step 6: Install compatible replacement tubing
Use tubing that matches the original application and diameter. Join the ends with a properly sized washer-hose connector, seating both ends securely. If a replacement hose is available in the correct length, replacing the entire damaged run may eliminate unnecessary joints.
Step 7: Secure the hose along its original route
Reinstall clips and retainers, leaving enough slack for normal hood movement where applicable. Keep the hose away from sharp edges, hot surfaces, belts, fans, and other moving parts.
Step 8: Refill and test the system
Top up the reservoir with suitable washer fluid, activate the system briefly, and inspect every repaired connection. Confirm that fluid reaches the windshield and that the spray pattern is normal. Correct any leaks before reinstalling all trim.
How to Reconnect a Hose That Has Come Loose
A loose hose near a washer nozzle or connector may not require cutting. Inspect the hose end and the fitting for cracks, deformation, or missing retainers. If both parts are intact, push the hose fully onto the correct connection and reinstall its clip where fitted.
If the hose slips off again during testing, do not rely on tape to hold it in place. The tubing may be stretched, the fitting may be damaged, or the connection may require a retaining clip or a replacement connector.
Check the fit
The tubing should seat securely without excessive force, visible splitting, or looseness.
Restore the retainer
Replace a missing or damaged clip with a suitable part when the original design uses one.
How to Join a Cut or Split Washer Hose
For a localized split, remove enough tubing to eliminate the entire damaged area. Slide each sound hose end onto the appropriate sides of a compatible connector, following the connector manufacturer’s instructions. Ensure the joint does not reduce the internal passage or place the tubing under tension.
Avoid using household adhesive, general-purpose tape, or sealants as the primary repair for a pressurized or pump-fed hose connection. These materials may not tolerate fluid exposure, temperature changes, or repeated flexing. If no suitable connector can be installed securely, replace the hose run.
Make clean cuts
Angled, crushed, or ragged cuts can prevent a consistent seal around the connector.
Do not stretch undersized tubing
Tubing that is too small may split or fail to seat correctly; choose a properly sized replacement.
How to Fix a Washer Hose That Keeps Leaking
A washer hose that leaks again after repair usually has an unresolved connection, fit, routing, or material problem. Before installing another connector, determine whether the leak originates at the joint or through the tubing itself.
Run the washer briefly while observing the repaired area from a safe position. Switch the system off before touching or adjusting the hose. If fluid emerges from a connector, check that both ends are seated correctly and that the connector matches the tubing. If fluid escapes through the hose wall, replace the damaged section.
Source: i.ytimg.com
Connector is the wrong size
Replace it with a connector specified for the tubing’s diameter and application. An overly loose joint may leak or separate.
Hose end is damaged
Remove the damaged end if sufficient length remains, or replace the hose if the tubing cannot make a secure connection.
Hose is kinked
Reroute the tubing with a gradual bend. A sharp bend can restrict fluid flow even if the hose does not leak.
Hose rubs against another component
Restore the factory routing and clips, or use an appropriate protective retainer to prevent repeated abrasion.
Tubing has become brittle
Replace the affected run instead of patching several deteriorated areas individually.
Can You Repair a Washer Hose With Tape?
Tape is not a dependable permanent repair for a split windshield washer hose. Washer fluid can work into the joint, while heat, vibration, and repeated flexing can loosen the wrap. Tape also does not restore a damaged hose’s original structural integrity.
For a temporary measure, avoid relying on tape to keep a leaking hose functional during driving. Replace the damaged section or install a suitable connector before depending on the washer system, particularly when road spray, dirt, or weather can reduce visibility.
Preferred repair
Use compatible replacement hose and a properly sized connector, or replace the complete damaged hose run.
When to stop
If the hose cannot be routed securely or a plastic fitting is cracked, obtain the correct replacement component rather than forcing a temporary patch.
What to Do if the Washer Hose Is Not the Problem
If the hose is intact and no fluid leaks from its connections, check the washer-fluid supply, nozzles, and pump before replacing additional tubing. A blockage or electrical fault can cause symptoms that resemble a damaged hose.
Troubleshoot from the simplest checks to the more involved ones. Avoid running the pump repeatedly when no fluid is flowing, because operating it without adequate fluid can cause unnecessary wear or damage depending on the system.
Source: i.ytimg.com
Check the reservoir
Verify that the washer-fluid level is adequate and inspect the reservoir for visible leaks. Use fluid appropriate for the vehicle and expected temperatures.
Inspect the nozzles
A clogged nozzle may produce a weak or uneven spray even when the hose delivers fluid. Clean it using the vehicle manufacturer’s recommended method rather than forcing a hard object into the opening.
Listen for the pump
If the pump makes no sound, check the relevant fuse and electrical connections using the vehicle service information. A silent pump does not prove that the hose has failed.
Check for a restricted hose
Look for sharp bends, crushed tubing, or obstructions. If the line is clear and properly routed but flow remains weak, further testing may be needed.
Inspect the pump and fittings
A leaking pump seal, damaged reservoir outlet, or broken plastic nipple can release fluid even when the hose itself is sound.
When Professional Diagnosis Makes Sense
Seek qualified automotive help if the hose runs through difficult-to-access trim, the pump has an electrical fault, the reservoir or pump fitting is cracked, or repeated repairs do not restore flow. Some vehicles use heated washer nozzles, multiple spray circuits, or integrated components that require model-specific procedures.
If removing trim could damage airbag-related components, wiring, or fragile clips, consult the service manual before proceeding. A professional can also confirm whether a replacement hose, connector, pump, or nozzle is required.
Electrical problems
Have the pump circuit diagnosed if the fuse repeatedly fails, wiring is damaged, or the pump does not operate despite correct fluid levels.
Hidden or inaccessible tubing
Use vehicle-specific service instructions or a repair shop when the hose cannot be accessed without substantial disassembly.
How Much Does Windshield Washer Hose Repair Cost?
The cost depends on the damaged section, the vehicle’s hose routing, and whether the repair requires only a connector or a larger assembly. A simple accessible connection is generally less involved than replacing tubing hidden under a cowl or inside the hood.
A DIY repair may require only a short length of compatible hose and a connector. Professional repairs can cost more because labor depends on access, disassembly, diagnosis, and the availability of vehicle-specific components. Exact pricing varies by vehicle, location, and repair shop, so obtain an estimate before authorizing work.
Source: i.pinimg.com
Loose hose connection
Usually the simplest situation when the hose and fitting remain undamaged and accessible.
Small damaged section
May require replacement tubing and a compatible connector, with the cost depending on material and access.
Complete hose assembly
Can cost more if the vehicle requires a model-specific assembly or extensive trim removal.
Pump, reservoir, or nozzle damage
Adds parts and labor beyond a hose-only repair and should be diagnosed separately.
Should You Repair the Hose or Replace the Entire Line?
Repairing a single damaged section is reasonable when the remaining hose is flexible, undamaged, and securely routed. Replacing a longer section is preferable when the tubing has multiple cracks, has hardened with age, or cannot be joined securely without excessive tension.
Compare the total repair effort rather than the price of tubing alone. If accessing one damaged spot requires substantial disassembly and other sections are deteriorating, replacing the affected run may reduce the chance of another repair soon afterward.
Choose a localized repair
When the damage is isolated, the surrounding tubing is sound, and the connection can be secured properly.
Choose hose replacement
When damage is widespread, the hose repeatedly leaks, or a secure joint cannot be made.
Frequently Asked Questions
Q
Can I splice a broken windshield washer hose?
Yes. You can splice a broken washer hose when the damage is localized, the remaining tubing is in good condition, and a compatible connector fits securely. Cut away the damaged section, make clean cuts, and seat both ends fully on the connector. Replace the affected hose run if the tubing is brittle, stretched, or damaged in several places.
Q
What size hose do I need for windshield washer repair?
The correct size depends on the vehicle and washer system. Compare the replacement tubing with the original hose or check the manufacturer’s parts information for the specified diameter and type. Do not assume that tubing for fuel, vacuum, or general plumbing is suitable for washer-fluid service.
Q
Why does my windshield washer hose keep coming off?
The hose may be stretched, the fitting may be cracked, a retaining clip may be missing, or the tubing may not match the connector size. Inspect both parts and replace any damaged component. Ensure the hose is routed without tension and restore the original retainers before testing.
Q
Can a leaking washer hose cause the washer pump to fail?
A leaking hose does not automatically damage the pump, but it can prevent fluid from reaching the nozzles. Repeatedly operating a system with an empty reservoir or inadequate fluid supply can place unnecessary strain on some pumps. Repair the leak, refill the reservoir, and avoid prolonged pump operation when no fluid is flowing.
Q
How do I know whether the washer nozzle or hose is clogged?
Inspect the hose for kinks, leaks, and disconnections, then determine whether fluid reaches the hose end near the nozzle. If fluid flows adequately from the line but the nozzle does not spray correctly, the nozzle may be blocked or defective. If fluid does not reach the nozzle, investigate the hose, reservoir outlet, pump, and other upstream connections.
Q
Is it safe to drive with a broken windshield washer hose?
A broken hose can leave the windshield without adequate washer fluid, making it harder to maintain visibility when dirt, road spray, or insects accumulate. Repair the system before driving in conditions where washer fluid may be needed. Do not rely on the wipers alone to clear heavy grime, and stop in a safe location if visibility becomes inadequate.
Q
How long does it take to repair a windshield washer hose?
An accessible loose connection or isolated split may take only a short time to repair, while hidden tubing can require significantly more work. The actual time depends on the vehicle, the location of the damage, and whether trim or other components must be removed. Confirm that the repair is leak-free and the spray pattern is restored before considering the job complete.
✦ Wrapping Up
Conclusion
Repairing a windshield washer hose usually involves locating the leak, reconnecting a loose fitting, or replacing a damaged section with compatible automotive tubing. Careful inspection helps distinguish a simple hose problem from a blocked nozzle, faulty pump, or damaged reservoir connection.
After making the repair, restore the original hose routing, secure all clips, refill the reservoir, and test the system for leaks and proper spray. If the tubing is brittle in multiple places or a fitting is cracked, replacing the affected assembly is more dependable than relying on tape or an improvised patch.
💡 Key Takeaway
Start by tracing the hose from the washer reservoir to the nozzles and locating the exact fault. Reconnect sound tubing or replace the damaged section with a correctly sized washer-fluid hose and compatible connector, then verify leak-free operation before driving.
Learn how to fold a pop up windshield sun shade safely and quickly. Follow simple steps, avoid common mistakes, and store your car sun shade without damaging its frame.