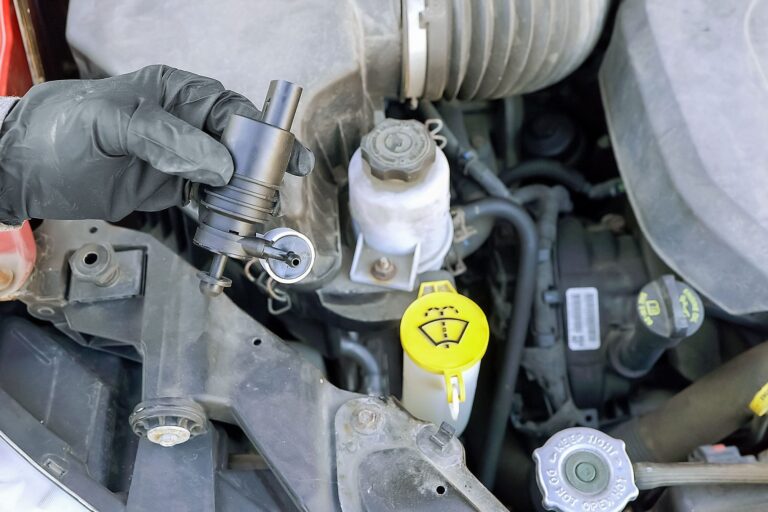
To install a windshield washer nozzle, remove the old nozzle, disconnect its washer hose, fit the replacement into the hood or cowl opening, reconnect the hose, and test the spray pattern. The exact attachment method varies by vehicle, so check the owner’s manual or service information before forcing a clip or fitting.
For drivers in the United States, a windshield washer nozzle is a small but important part of the vehicle’s visibility system. The nozzle directs washer fluid onto the windshield so the wipers can clear dirt, dust, bugs, road film, and other debris. Ford describes a washer nozzle as an atomizer for washer fluid and identifies replacement as appropriate when a nozzle is broken, cannot be cleared, or will not remain correctly aimed.
Many washer nozzles are retained with plastic clips and connect to a small fluid hose, but designs differ substantially between makes and models. A replacement nozzle should therefore be matched to the vehicle rather than selected by appearance alone. Before beginning, verify the correct part and determine whether the nozzle is mounted through the hood, cowl, or another panel.
What You Need Before Installing a Windshield Washer Nozzle
Gather the replacement nozzle, the vehicle owner’s manual or service information, a clean cloth, and basic hand tools appropriate for the vehicle. Some nozzles can be released by hand while others require a small screwdriver, trim tool, or pliers. Do not assume a tool is required until you can see how the original nozzle is retained.
Park on a level surface, switch the vehicle off, and allow hot components to cool before working around the engine compartment. If the nozzle is mounted in the hood, support the hood securely according to the vehicle manufacturer’s instructions.
The replacement part is the most important prerequisite. Washer nozzles can differ in connector size, mounting shape, spray design, heating function, and hose connection. A nozzle that physically fits the opening may still produce an incorrect spray pattern or fail to connect to the existing hose.
Source: youtube.com
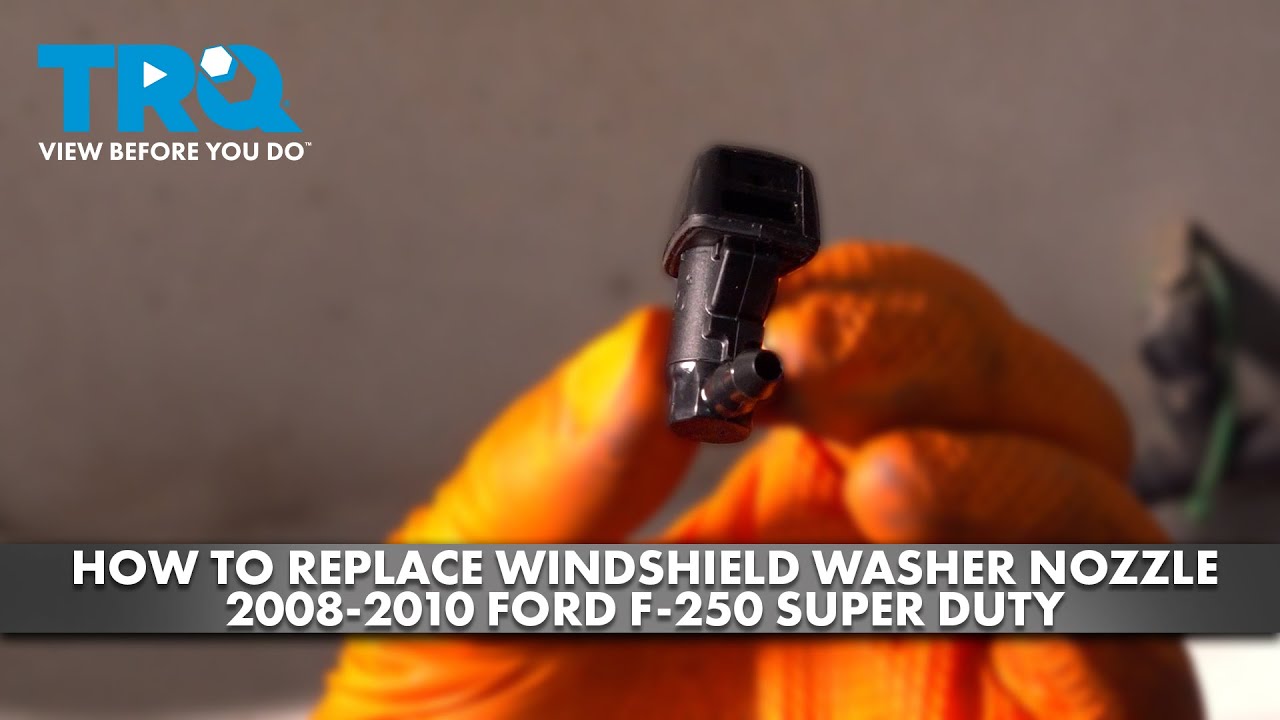
Replacement nozzle
Use a nozzle confirmed for the vehicle’s year, make, model, trim, and applicable mounting position.
Basic tools
Depending on the vehicle, you may need a small flat screwdriver, plastic trim tool, needle-nose pliers, or another tool specified by the service information.
Washer fluid
Keep suitable windshield washer fluid available for the final test. Seasonal formulas may be appropriate where freezing temperatures occur.
Clean work area
A clean cloth helps prevent dirt from entering the hose or scratching nearby painted surfaces.
Check the Nozzle Design First
Look closely at the new and old nozzles before removing anything. Identify the retaining tabs, hose connection, spray openings, and any electrical connector if the vehicle uses heated washer nozzles. Take a quick photo of the original routing if the hose or connector could be difficult to remember.
Do not pry against painted bodywork with a metal tool unless the manufacturer’s procedure specifically calls for it. A plastic trim tool can reduce the chance of damaging the surrounding finish.
Clip-retained nozzle
The nozzle is held in the panel by molded tabs or a separate retaining clip and is usually released from one side of the panel.
Heated nozzle
A heated nozzle may have an electrical connector in addition to the washer-fluid hose. Disconnect it only as directed by the vehicle-specific procedure.
How to Install a Windshield Washer Nozzle
The general installation process is straightforward, but the release mechanism differs by vehicle. Work slowly and compare each step with the replacement part and vehicle-specific instructions.
If your vehicle uses a cowl-mounted nozzle or requires removal of trim panels, the access procedure can be different from the hood-mounted method below. Do not pull on a hose or plastic panel when a hidden clip or fastener may still be holding it.
Source: youtube.com
1. Turn the vehicle off
Park securely, switch off the ignition, and open or access the panel containing the washer nozzle.
2. Locate the washer hose
Find the small hose attached to the underside of the nozzle. Check how it is routed before disconnecting it.
3. Disconnect the hose
Gently pull or release the hose from the nozzle connection. If a locking fitting is present, release the fitting according to the vehicle’s design.
4. Release the old nozzle
Press the retaining tabs or remove the retaining hardware specified for your vehicle. Avoid bending plastic tabs farther than necessary.
5. Remove the old nozzle
Lift or push the nozzle out of the panel once the retaining mechanism has been released. Keep the old part nearby for comparison.
6. Install the replacement
Position the new nozzle in the same orientation as the original and press it into place until its retaining tabs engage.
7. Reconnect the hose
Push the washer hose fully onto the nozzle connection. Make sure it is not kinked, loose, or routed against a sharp edge.
8. Reconnect any electrical connector
If the vehicle has a heated washer nozzle or another electrical connection, reconnect it securely using the vehicle-specific procedure.
Do Not Force the Nozzle Into Place
A replacement nozzle should seat naturally when its mounting tabs and opening are correctly aligned. If it does not fit, stop and compare the part numbers, orientation, and mounting design. Excessive force can break plastic retaining tabs or damage the surrounding hood or cowl panel.
Correct fit
The nozzle sits securely without excessive movement and its retaining mechanism is visibly or audibly engaged.
Correct hose connection
The hose is fully seated and does not pull off easily when gently checked.
How to Test and Adjust the New Washer Nozzle
After installation, test the washer system before closing everything up. The spray should reach the intended area of the windshield and provide enough coverage for the wipers to clear the glass effectively.
If the nozzle sprays but the stream lands too high, too low, or to one side, check whether your specific nozzle is adjustable. Some washer jets can be aimed with a small tool, while other modern designs have a fixed spray pattern and should not be forced or modified.
Source: youtube.com
Start the vehicle if required
Follow the owner’s manual procedure for operating the washer system.
Activate the washers briefly
Check that fluid reaches the windshield without leaking around the nozzle or hose.
Check spray coverage
The spray should reach the windshield area intended by the vehicle manufacturer.
Check for leaks
Inspect the underside of the nozzle and nearby hose connection after spraying.
Adjust only if permitted
If the vehicle uses an adjustable jet, make small changes and retest rather than forcing the nozzle.
What a Successful Installation Looks Like
The replacement nozzle should remain firmly seated, the hose should stay connected, and washer fluid should reach the windshield without leaking from the connection. The spray should also be positioned so the wipers can use the fluid effectively. A properly installed nozzle is not necessarily one that produces an identical pattern to every other vehicle because spray designs vary by model.
Secure
The nozzle does not wobble, lift, or move excessively when lightly checked.
Leak-free
No washer fluid escapes around the nozzle or hose connection during operation.
Correct aim
The spray reaches the intended windshield area without consistently missing the glass.
Windshield Washer Nozzle Troubleshooting
If the new nozzle does not work correctly, do not immediately assume the replacement part is defective. Washer performance depends on the reservoir, fluid, pump, hose, electrical system, and nozzle. Checking these components in a sensible order can prevent unnecessary parts replacement.
A completely dry nozzle with no pump sound points toward a different problem than a nozzle that sprays weakly. Start with the simplest checks and move toward the more involved components only when the symptoms support them.
Source: youtube.com
No fluid comes out
Check the washer-fluid level, listen for pump operation, inspect the hose connection, and check for a disconnected or damaged hose.
Weak spray
Inspect the nozzle for blockage and check the hose for kinks or restrictions. If the pump is operating but flow remains weak, the pump or another restriction may require further diagnosis.
Fluid leaks under the hood
Inspect the hose-to-nozzle connection and nearby hose for cracks, loose fittings, or disconnection.
Spray points in the wrong direction
Determine whether the nozzle is designed to be adjusted. If it is fixed, verify that the replacement is the correct part and installed in the correct orientation.
Only one nozzle works
Compare the affected nozzle and hose with the working side. A localized blockage, loose hose, damaged nozzle, or restricted fitting can cause uneven operation.
When the Nozzle Is Not the Real Problem
Replacing a nozzle will not correct every washer-system problem. A weak or absent spray can originate at the reservoir, pump, hose, electrical supply, or another component. GM service information, for example, identifies weak flow at the nozzles and a pump that does not engage as symptoms that can point toward pump-related faults.
Also check the washer fluid itself. Automotive maintenance guidance from AAA warns that plain water can contribute to algae growth or mineral deposits that clog spray nozzles and can freeze in cold weather. Use washer fluid appropriate for the conditions instead.
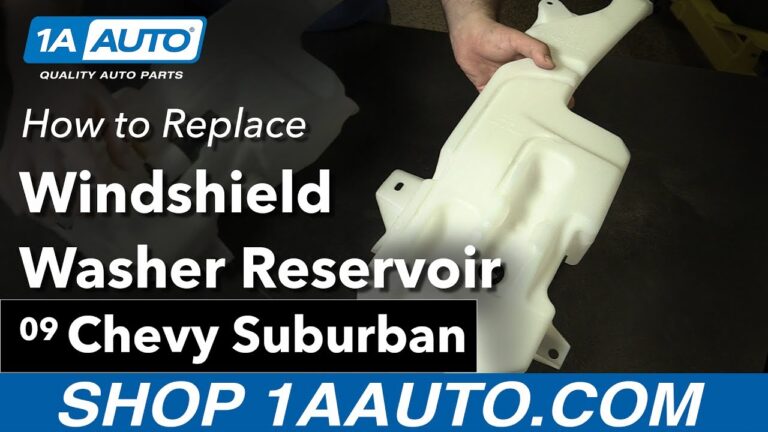
Check the reservoir
Make sure there is sufficient washer fluid before diagnosing a component failure.
Check the hose
Look for disconnection, cracking, pinching, or blockage between the pump and nozzle.
Check the pump
If the pump does not operate or flow is consistently weak, further pump and electrical diagnosis may be necessary.
Common Mistakes to Avoid
Most washer-nozzle installation problems come from using the wrong replacement part, damaging a retaining clip, failing to reconnect the hose completely, or skipping the final spray test. Taking a few extra minutes to compare the old and new parts can prevent these issues.
Do not use a sharp metal object to enlarge the nozzle opening or aggressively clear a blockage unless the vehicle manufacturer specifically permits that procedure. Modifying the spray opening can change the designed spray pattern and may damage the nozzle.
Source: youtube.com
Buying by appearance only
Two nozzles can look similar while using different mounting systems, hose connections, or spray patterns.
Pulling on the hose
Excessive force can damage or stretch a small washer hose and create a leak.
Forcing retaining tabs
Plastic clips can become brittle with age and may break if pried too aggressively.
Skipping the leak check
A hose can appear connected but still leak when the pump builds pressure.
Testing with an empty reservoir
Do not operate a washer pump with an empty reservoir when the vehicle manufacturer warns against doing so.
When to Stop and Get Vehicle-Specific Help
Stop the installation if the replacement part does not match the original mounting or hose connection, if access requires removing components you cannot safely reinstall, or if the vehicle uses a heated or electrically controlled washer assembly that you cannot identify. A service manual or qualified technician can provide the correct procedure for the specific vehicle.
If the windshield washer system still has no flow after confirming fluid level, hose connection, nozzle installation, and normal pump operation, the fault may be outside the nozzle itself.
Use service information
Follow the exact removal and installation instructions for your vehicle whenever they differ from the general procedure.
Protect visibility
Do not drive if the washer system or windshield condition prevents you from maintaining adequate visibility.
How Long Does Windshield Washer Nozzle Installation Take?
A straightforward nozzle replacement can be a short DIY maintenance task when the nozzle is readily accessible and retained by simple clips. The actual time depends on the vehicle design, access to the nozzle, whether trim must be removed, and whether the hose or retaining hardware is difficult to release.
Do not use a generic time estimate as a reason to rush the job. The safest approach is to allow enough time to inspect the replacement part, remove the original without damaging the panel, reconnect the hose, and complete a leak and spray test.
Source: storage.googleapis.com
Simple hood-mounted design
Usually involves direct access to the nozzle, hose, retaining tabs, and replacement part.
Cowl-mounted design
May require additional access or trim removal before the nozzle can be reached.
Heated or specialized nozzle
May require extra care because the assembly can include electrical connections in addition to the washer hose.
A Practical Final Checklist
Before finishing the job, compare the checklist against the actual vehicle. The nozzle should be firmly retained, the washer hose should be fully seated, any electrical connector should be secure, and the spray should reach the windshield correctly. Confirm that no fluid leaks after repeated washer activation.
Part matched
The replacement nozzle is correct for the vehicle and mounting position.
Nozzle secured
All retaining tabs or fasteners are properly engaged.
Hose secured
The hose is fully seated and remains attached during testing.
Spray tested
Washer fluid reaches the intended windshield area.
Leaks checked
No fluid leaks from the nozzle, hose, or nearby connections.
Frequently Asked Questions
Q
Can I replace a windshield washer nozzle myself?
Yes, many washer nozzles are suitable for a basic DIY replacement because they use simple clips and a washer-fluid hose. The exact procedure depends on the vehicle. Check the owner’s manual or service information before removing panels or forcing retaining clips.
Q
How do I know if my washer nozzle needs replacement?
Replacement may be appropriate when the nozzle is physically damaged, remains incorrectly aimed, or stays clogged despite appropriate cleaning. If the washer system has no flow or very weak flow, diagnose the fluid level, hose, pump, and other components before assuming the nozzle is the cause.
Q
Why does my new windshield washer nozzle spray poorly?
Possible causes include an incorrect nozzle, a partially blocked nozzle, a kinked or disconnected hose, low washer-fluid level, restricted fluid flow, or a pump problem. Verify the part and hose connection first, then investigate the rest of the washer system if the problem remains.
Q
Can I adjust a windshield washer nozzle with a pin?
Some older or adjustable washer jets can be aimed with a small tool, but not every nozzle is designed for adjustment. Follow the vehicle-specific instructions and do not force or enlarge the spray openings. A fixed-pattern nozzle should generally be replaced or repositioned rather than modified.
Q
Should I use water instead of windshield washer fluid?
Windshield washer fluid is the appropriate choice for the washer reservoir. AAA notes that plain water can contribute to algae growth or mineral deposits that clog nozzles and can freeze in cold weather. Choose a washer-fluid formula suitable for the conditions in which the vehicle is operated.
✦ Wrapping Up
Conclusion
Installing a windshield washer nozzle is often a manageable maintenance job when the correct replacement part is used and the vehicle’s mounting design is understood. The basic process is to disconnect the washer hose, release the old nozzle, install the replacement, reconnect the hose, and test the spray pattern.
The final test is just as important as the installation itself. Confirm that the nozzle is secure, fluid does not leak, and the spray reaches the intended area of the windshield. If the washer system still has weak or absent flow, investigate the reservoir, hose, pump, and other components rather than repeatedly replacing the nozzle.
💡 Key Takeaway
Before starting, verify the exact replacement nozzle for your U.S.-market vehicle, follow the vehicle-specific removal method, and always perform a leak and spray test before driving.