You can usually replace a windshield washer nozzle by opening the hood, disconnecting the washer hose, releasing the nozzle’s retaining clips, fitting the new nozzle into the mounting hole, reconnecting the hose, and testing the spray pattern.
For drivers in the United States, replacing a windshield washer nozzle is often a straightforward maintenance job, but the exact removal method depends on the vehicle. Many U.S.-market cars, SUVs, and trucks use a nozzle clipped into the hood or cowl area, while some use screws, different retaining tabs, electrical connectors, or nozzles integrated into the wiper arm.
Before replacing the part, confirm that the nozzle itself is the problem. A weak or uneven spray can also come from a clogged nozzle, blocked washer hose, low washer-fluid level, a leaking hose, or a problem with the washer pump. Vehicle service procedures commonly call for disconnecting the hose, releasing the retaining mechanism, installing the replacement, reconnecting the hose, and checking the spray afterward.
This guide covers the general procedure for replacing a windshield washer nozzle. Because mounting designs vary by year, make, and model, use the vehicle-specific repair information when the nozzle has unusual clips, wiring, a heater, or a difficult-to-access mounting arrangement.
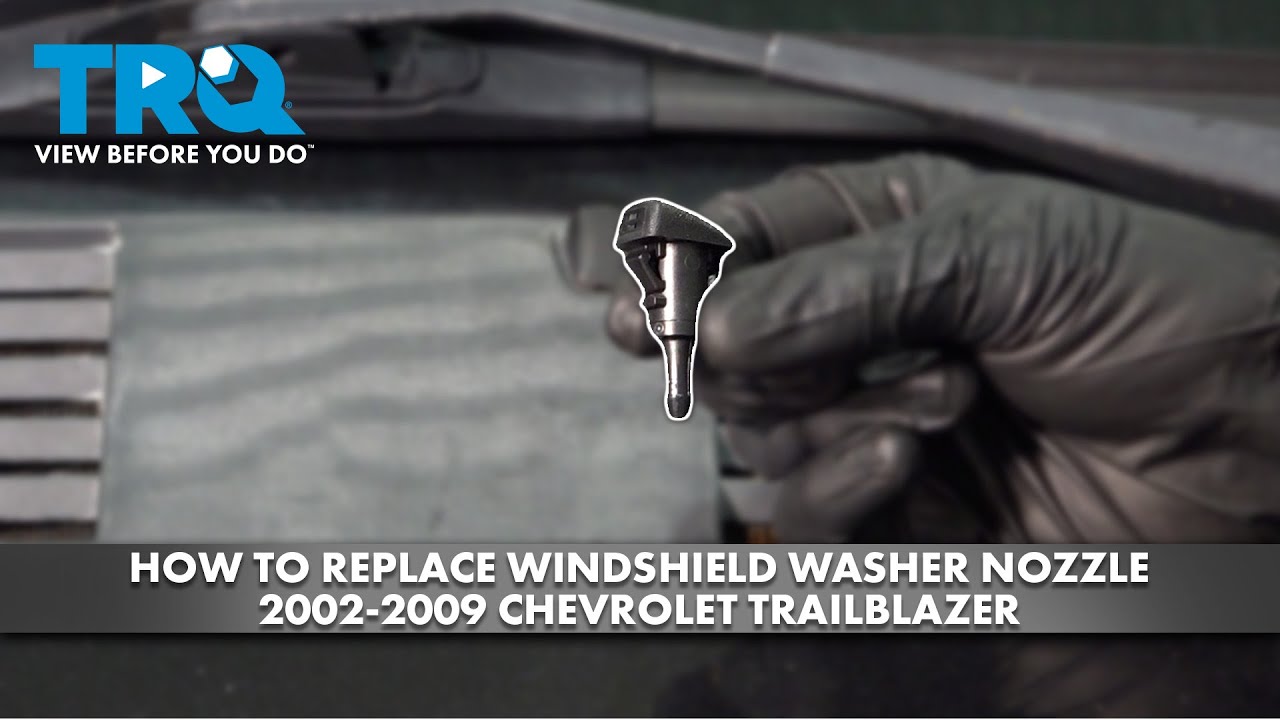
A windshield washer nozzle, also called a washer jet or spray nozzle, directs washer fluid onto the windshield so the wiper blades can clear dirt and debris. Depending on the vehicle, the nozzle may be mounted on the hood, cowl panel, body, or wiper arm.
The nozzle is connected to the washer-fluid system by a small hose. When you activate the windshield washer, a pump sends fluid through the hose and out through the nozzle opening. Some vehicles also use electrically heated washer nozzles, which add a wiring connector to the normal fluid connection.
A replacement nozzle is normally a vehicle-specific part rather than a universal component. The mounting shape, retaining tabs, hose connection, spray pattern, and electrical connection can vary significantly between vehicles.
Source: youtube.com
Typical signs of a failed nozzle
The nozzle may produce an unusually weak stream, spray unevenly, leak around its body, or fail to direct fluid onto the windshield even though the washer pump is operating.
Signs of another problem
No spray from every nozzle, a pump that cannot be heard, an empty reservoir, or a visibly damaged hose can indicate a problem elsewhere in the washer system.
Washer Nozzle vs. Washer Pump
The nozzle controls where the fluid exits, while the washer pump supplies the pressure that moves fluid from the reservoir through the hoses. Replacing the nozzle will not correct a failed pump or an empty reservoir.
If one nozzle sprays normally and another does not, the affected nozzle or its local hose is a more likely starting point. If none of the nozzles spray, check the reservoir, pump, electrical supply, and main hose before buying replacement nozzles.
What You Need Before Replacing the Nozzle
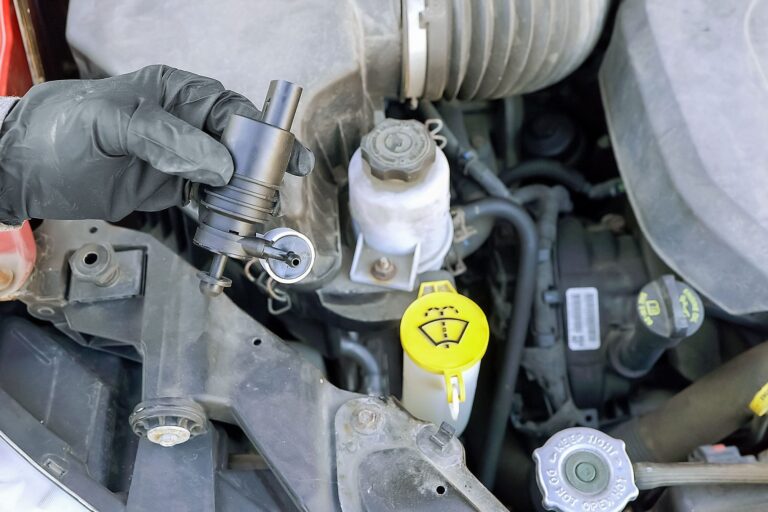
Gather the replacement nozzle and a few basic tools before starting. The exact tool list depends on the vehicle, so avoid assuming that every nozzle uses the same fastener or clip.
Park on a level surface, switch the vehicle off, and allow hot engine components to cool before working under the hood. Keep the hood securely supported according to the vehicle manufacturer’s instructions.
If the replacement nozzle has an electrical connector, identify the connector before pulling on the part. Heated washer nozzles and other powered designs may have wiring that must be disconnected separately from the washer hose.
Source: storage.googleapis.com
Replacement nozzle
Use a nozzle specifically listed for the vehicle’s year, make, model, and configuration. Compare the new part with the old one before installation.
Basic hand tools
A small flat-blade screwdriver or trim tool may be useful for releasing clips. Needle-nose pliers can help with hose clamps or retaining clips when the vehicle design calls for them.
Protection
Use a clean cloth to protect nearby painted surfaces and catch small amounts of spilled washer fluid.
Vehicle-specific instructions
Check the owner’s manual or repair information if the nozzle is difficult to access or has an unusual mounting or electrical arrangement.
Confirm the Replacement Part Fits
Compare the new nozzle’s mounting tabs, body shape, hose nipple, and electrical connector with the original. A nozzle that looks similar can still have different retaining clips or a different connection.
Do not modify the mounting tabs or force a replacement into the hood. A correct part should seat using the intended retaining mechanism.
How to Replace a Windshield Washer Nozzle
The general replacement process is to access the nozzle, disconnect the washer hose, release the retaining mechanism, remove the old nozzle, install the new one, reconnect any wiring and the hose, and test the spray. Some vehicles require access from underneath the hood, while others allow the nozzle to be removed from above.
Do not assume the removal direction from another vehicle. Depending on the design, the nozzle may be pushed out through the hood, released from the underside, rotated, or secured with a screw.
Source: youtube.com
1. Open and secure the hood
Open the hood and secure it using the vehicle’s normal hood support method. Locate the washer nozzle and identify how the washer hose connects to it.
2. Expose the nozzle connection
If a hood insulation pad, trim panel, or other cover blocks access, remove only the retainers necessary to reach the nozzle. Keep the retainers organized for reinstallation.
3. Disconnect the washer hose
Pull the washer hose carefully from the nozzle connection. If a clamp or retaining clip is used, release it without cutting or damaging the hose unless the vehicle-specific procedure explicitly requires another method.
4. Disconnect electrical wiring if fitted
For a heated or electrically equipped nozzle, disconnect the electrical connector using its locking tab. Do not pull on the wires.
5. Release the nozzle
Press or release the nozzle’s retaining tabs as specified by its design. Some nozzles are removed by compressing clips from underneath and pushing the nozzle through the mounting hole.
6. Remove the old nozzle
Lift or push the released nozzle out without twisting it against the painted panel. Inspect the mounting hole and surrounding area for broken plastic, dirt, or damage.
7. Install the new nozzle
Orient the replacement nozzle correctly and engage its retaining tabs with the mounting hole. Press it into place until it is fully seated rather than forcing it beyond its normal stop.
8. Reconnect the hose
Push the washer hose fully onto the nozzle’s hose connection. Reinstall any clamp or retaining clip that was removed.
9. Reconnect electrical wiring
If the nozzle has an electrical connector, reconnect it until the locking mechanism is engaged. Keep the wiring routed as it was originally so it does not rub or become pinched.
10. Reinstall removed trim
Replace any hood insulation, trim pieces, clips, or covers that were removed for access. Confirm that nothing is loose before closing the hood.
11. Test the washer
With the hood closed, activate the windshield washer briefly and check the spray pattern. Look for leaks around the hose connection and confirm that fluid reaches the intended area of the windshield.
How to Remove a Clip-In Washer Nozzle
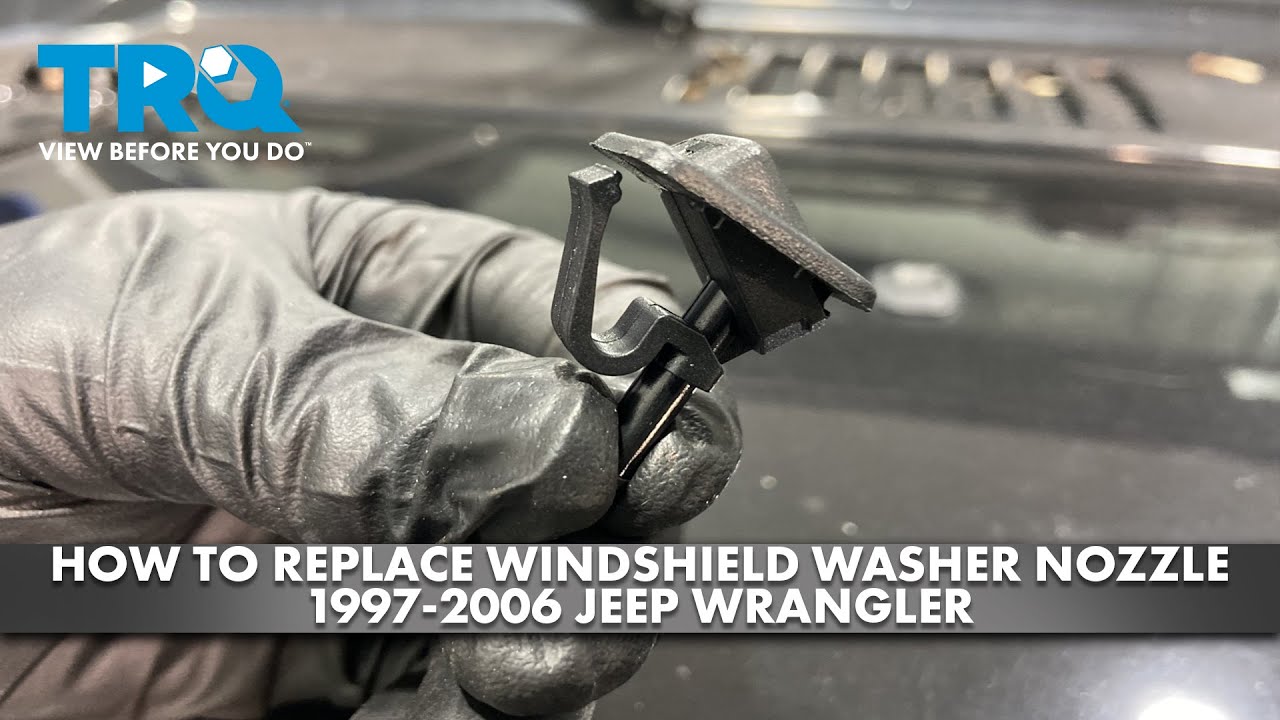
Many hood-mounted nozzles use spring-like retaining tabs. The usual process is to access the underside of the hood, disconnect the hose, compress or release the retaining tabs, and push the nozzle out through the mounting opening.
Use only enough force to release the clips. If the nozzle will not move, stop and determine whether a screw, secondary clip, electrical connector, or different removal direction is involved.
How to Replace a Screw-Mounted Nozzle
Some vehicles secure a washer nozzle with a screw or another mechanical fastener. Remove the fastener with the correct tool, disconnect the hose, and lift the nozzle out. Install the replacement in the same orientation and reinstall the fastener without overtightening it.
How to Test and Adjust the New Washer Nozzle
The replacement is successful when the nozzle is firmly seated, the hose connection does not leak, and washer fluid reaches the intended windshield area. Test the washer after all removed components are back in place.
Some washer nozzles are factory preset and are not designed for adjustment. Other designs allow the spray direction to be adjusted. Follow the vehicle-specific procedure instead of inserting a pin or sharp object into the nozzle opening unless the manufacturer specifically identifies that as an adjustment method.
If the spray is aimed incorrectly after installation, first confirm that the nozzle is the correct part and is seated in the correct orientation. A nozzle installed backward, at the wrong angle, or in the wrong position can produce a poor spray pattern even when the washer system itself is working.
Source: youtube.com
Check spray coverage
Fluid should reach the windshield area intended by the vehicle’s design rather than spraying onto the hood, roof, or far outside the wiping path.
Check for leaks
Inspect the hose-to-nozzle connection after testing. Fluid dripping from the connection can indicate an incompletely seated hose, damaged hose end, or incompatible nozzle connection.
Check the retaining fit
The nozzle should remain secure when the washer system operates. Movement can indicate that a retaining tab is not engaged or that the replacement part is incorrect.
What a Good Spray Pattern Looks Like
A good spray pattern depends on the vehicle. Some nozzles produce a concentrated stream, while others create multiple jets or a fan-shaped spray. The important check is whether the fluid lands in the intended windshield area and supports normal wiper cleaning.
Troubleshooting After Replacing the Nozzle
If the new nozzle still does not spray correctly, do not immediately replace another part. Work backward through the washer system, starting with the simplest checks. A clogged hose, disconnected line, low fluid level, or pump problem can produce symptoms that look like a defective nozzle.
When only one nozzle has a problem, inspect the local hose and nozzle connection first. When every nozzle is affected, check the washer-fluid level and pump operation before focusing on individual nozzles.
Source: youtube.com
No fluid from any nozzle
Check the washer-fluid reservoir, pump operation, electrical supply, and main washer hose. A replacement nozzle is unlikely to fix a system-wide loss of fluid delivery.
One nozzle does not spray
Check that the hose is connected, the nozzle is seated correctly, and the nozzle opening is not blocked. Inspect the local hose for kinks or damage.
Weak spray from one nozzle
A partially blocked nozzle or hose can restrict flow. If cleaning does not restore normal operation and the nozzle is known to be defective, replacement may be appropriate.
Fluid leaks under the hood
Inspect the hose connection and hose itself. A loose connection, damaged hose end, or incorrectly sized nozzle nipple can allow fluid to escape.
Spray points in the wrong direction
Verify that the nozzle is the correct part and is fully seated in the mounting hole. If the vehicle provides an adjustment procedure, follow it rather than forcing the nozzle.
New nozzle does not fit
Stop rather than enlarging the mounting hole or bending the retaining tabs. Recheck the vehicle application and compare the old and new nozzle.
When to Stop the DIY Repair
Consider professional service when the nozzle requires removal of extensive body trim, the wiring is damaged, the hood or cowl must be disassembled beyond your experience, or the washer system has an electrical fault that you cannot safely diagnose.
If a retaining clip breaks inside the hood or the mounting hole is damaged, replacing the nozzle alone may not restore a secure fit. The damaged mounting hardware or panel may also need repair.
Common Mistakes to Avoid
Most washer-nozzle replacement problems come from using the wrong part, forcing retaining clips, damaging the hose, or skipping the final leak and spray test. Taking a few minutes to compare the old and new parts can prevent unnecessary damage.
Avoid using excessive force on plastic components, especially in cold weather when some plastics can be more brittle. If a clip will not release, identify its locking direction instead of prying harder.
Source: youtube.com
Replacing the nozzle before diagnosing the problem
A clogged nozzle or blocked hose can mimic a failed nozzle. Check fluid level, pump operation, hose condition, and the affected nozzle before purchasing a replacement.
Pulling on the washer hose
Pull the hose straight from the fitting when the design allows. Excessive bending or twisting can damage an aging hose.
Prying against painted metal
If a tool is necessary, protect the surrounding surface with a clean cloth or use an appropriate trim tool. Do not use the painted panel as a hard fulcrum.
Forcing an incompatible nozzle
A nozzle that does not match the mounting hole or hose connection should not be modified simply to make it fit.
Skipping the final test
Always check spray coverage and inspect for leaks after installation. A nozzle can appear securely installed while still having a loose hose connection.
Safety Boundaries
Keep hands, tools, and loose clothing away from moving belts, fans, and other engine components. If testing requires the engine to run, follow the vehicle manufacturer’s safety precautions and keep clear of moving parts.
Do not work under an unsupported hood or remove components that could affect hood retention without following the vehicle-specific procedure. If electrical wiring is damaged or the washer system repeatedly blows a fuse, stop and diagnose the electrical fault before continuing.
Frequently Asked Questions
Q
How do I know if my washer nozzle needs replacement?
A nozzle may need replacement if it is physically damaged, leaks, remains blocked after appropriate cleaning, or produces an abnormal spray while the washer hose and pump are working correctly. If no nozzle sprays, investigate the fluid supply and pump before replacing individual nozzles.
Q
Can I replace a windshield washer nozzle myself?
Many nozzle replacements are suitable for a careful DIY repair because the job often involves a hose connection and retaining clips. The difficulty depends on the vehicle. Some designs require removal of hood insulation or other trim, while heated nozzles can add electrical connections.
Q
Why is my new washer nozzle spraying in the wrong direction?
First verify that the replacement is the correct part and that it is seated in the correct orientation. Some nozzles are factory preset, while others have an adjustment procedure. Do not assume that every nozzle can be adjusted with a pin or needle.
Q
Why does my windshield washer still not work after replacing the nozzle?
Check the washer-fluid level, hose connection, hose condition, nozzle opening, and pump operation. If all nozzles are affected, the problem is more likely to be upstream of the individual nozzle. A failed pump, blocked line, electrical fault, or empty reservoir can prevent normal spraying.
Q
Do windshield washer nozzles need adjustment after replacement?
It depends on the vehicle and nozzle design. Some replacement nozzles are factory preset and should simply be installed in the specified orientation. Other vehicles provide a procedure for adjusting spray direction. Use the vehicle-specific instructions rather than forcing the nozzle.
✦ Wrapping Up
Conclusion
Replacing a windshield washer nozzle is usually a manageable maintenance task when the correct replacement part and vehicle-specific removal method are known. The basic process is to access the nozzle, disconnect the washer hose, release the retaining mechanism, install the new nozzle, reconnect the hose and any electrical connector, and test the spray.
If the new nozzle does not work, diagnose the complete washer system instead of repeatedly replacing parts. Low fluid, blocked hoses, damaged connections, and pump or electrical problems can all cause poor washer performance.
Because nozzle designs vary across U.S.-market vehicles, the most reliable final check is always the vehicle-specific installation procedure combined with a leak and spray-pattern test.
💡 Key Takeaway
Before starting, compare the replacement nozzle with the original, identify how its retaining mechanism releases, and confirm that the washer hose and any electrical connector match. After installation, test both spray coverage and the hose connection before considering the repair complete.
Learn how to fold a round windshield sun shade correctly without bending the frame. Follow these simple steps, avoid common mistakes, and store it neatly.