MIG Welder Drive Rolls: Types, Sizes, and Setup
MIG welder drive rolls grip welding wire and push it through the gun at a steady rate. Match the roll groove to your wire type and diameter, then use just enough tension to feed wire without crushing it.
Does your wire keep slipping, bird-nesting at the feeder, or leaving a weld that looks inconsistent? The trouble may be the drive rolls, but wire tension and the liner can cause similar headaches.
I once cranked the drive-roll tension way up because wire kept slipping during a setup. The wire moved, but it came out flattened and started feeding poorly through the gun. That’s a common mistake, not a dumb one.
I wrote this to help you choose the right rolls, set them up safely, and spot the difference between a roll problem and another wire-feed issue. You don’t need a fancy feeder or a mechanic’s vocabulary to get a clean feed.
Get the setup right and you’re less likely to waste wire, stop mid-weld, or fight a bird’s nest inside the machine. Skip the match between roll and wire, and even a good spool can feed like it’s dragging an anchor.
This should take about 9 minutes to read. By the end, you’ll know how to:
- Match a roll groove to solid, flux-cored, or aluminum wire.
- Choose a roll marked for your wire diameter.
- Set roll pressure without crushing or slipping the wire.
- Check common causes of poor feeding before replacing parts.
MIG Welder Drive Rolls: Types, Sizes, and Setup
MIG welder drive rolls are grooved rollers that push wire from the spool, through the gun liner, and toward the contact tip. Choose a groove that fits the wire’s material and diameter, then set pressure just high enough to keep the wire moving steadily.
The drive roll is part of the wire feeder. In many machines, a motor turns one or more rolls while a pressure arm holds the wire in the groove. A wrong groove or poor fit can lead to slipping, flattened wire, or irregular feed.
To get the basic setup right:
- Turn off the welder before opening the feed compartment or changing rolls.
- Check the wire spool or wire packaging for the wire type and diameter.
- Read the markings on the drive roll and match both its groove type and size to the wire.
- Set the correct roll in position, following the machine’s instructions for groove direction.
- Close the pressure arm and adjust its tension gradually while checking for steady feed.
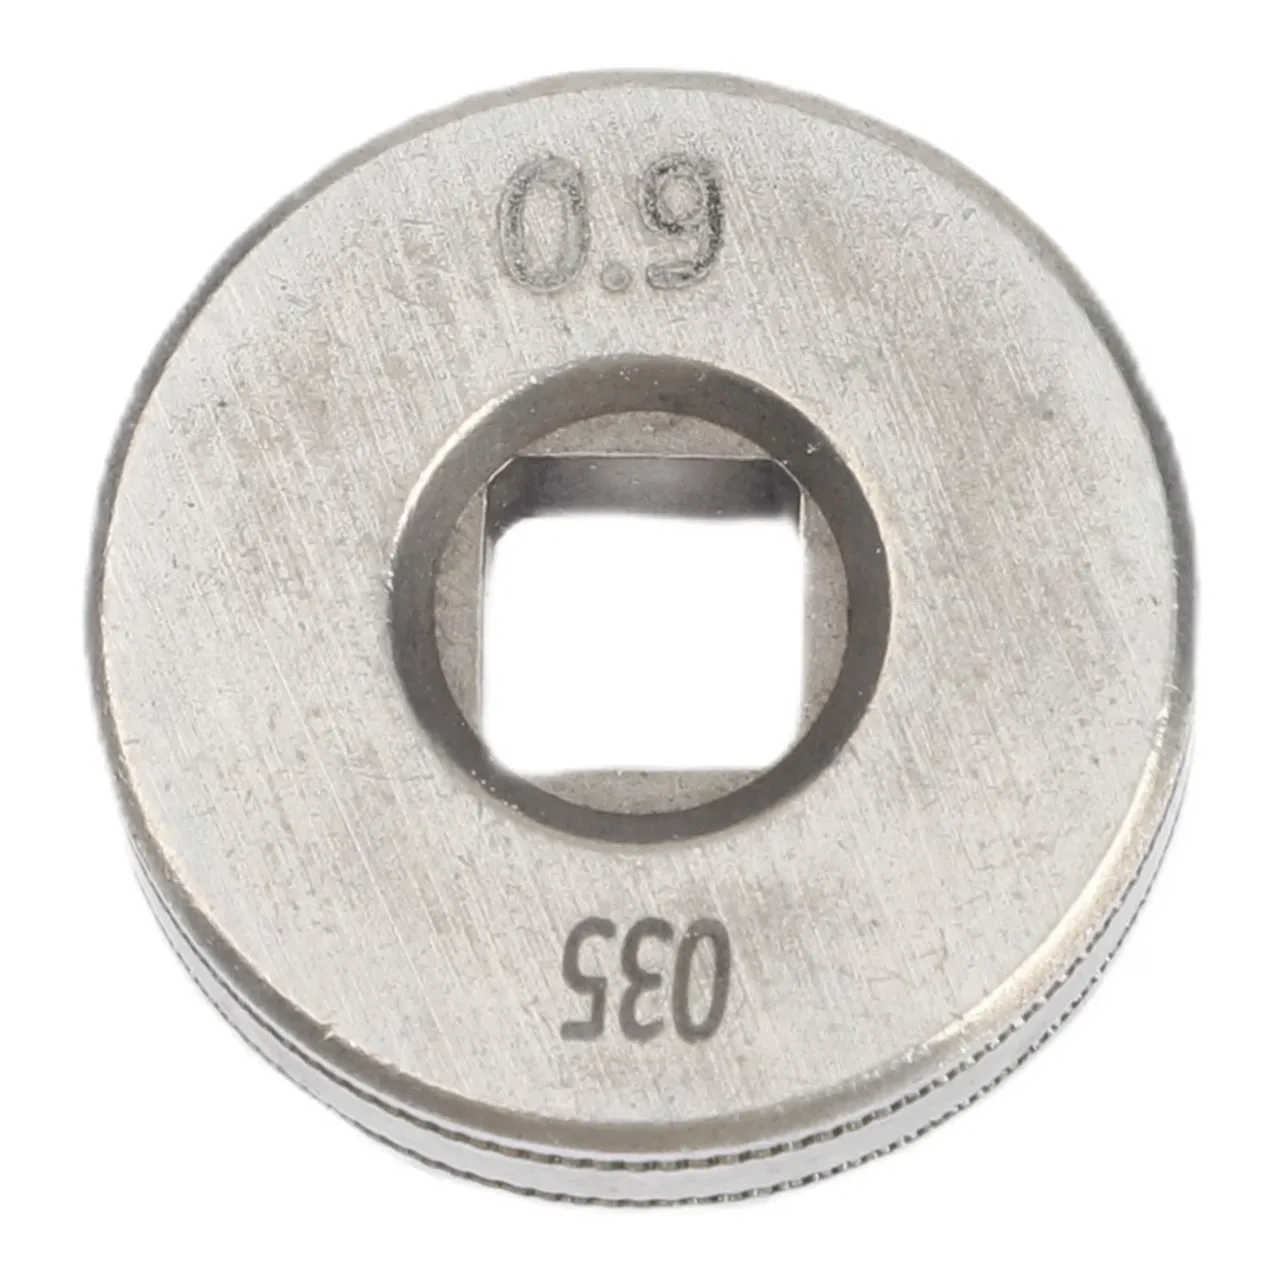
Drive rolls often carry two grooves, which can suit different wire sizes or types. The stamped size and groove shape tell you which groove to use, so don’t rely on a quick glance at the roller’s overall size.
Wire diameter matters because the groove needs to hold the wire securely without squeezing it out of shape. Common solid-wire sizes include .023, .030, .035, and .045 inch, though your feeder may not support every size.
A roll marked .030/.035 may have two separate grooves, one for each size. Check the markings and machine manual rather than guessing which side lines up with the wire path.
Pick the Right Drive Roll Groove for Your Wire
The right drive-roll groove depends on the wire’s stiffness and surface. Smooth V-groove rolls suit most solid steel wire, knurled V-groove rolls grip many flux-cored wires, and U-groove rolls help feed soft aluminum wire without flattening it.
| Drive-roll groove | Common use | What to watch for |
|---|---|---|
| Smooth V-groove | Solid steel wire | A loose fit can slip; excessive tension can mark the wire. |
| Knurled V-groove | Many flux-cored wires | Knurls grip the wire, but excess pressure can shed particles. |
| U-groove | Soft aluminum wire | Correct sizing and a clean feed path matter. |
| Smooth U-groove | Some softer wires, depending on the feeder | Use only if the roll and machine instructions allow it. |
Solid steel wire is fairly firm, so a smooth V-groove can hold it without aggressive teeth. With too little pressure, the roll may spin against the wire; too much pressure can leave marks or deform the wire.
Many flux-cored wires are softer or have a less solid shape than steel wire. A knurled groove can help the roll grip the wire, though some wire types call for a different roll. Check the wire maker’s guidance and the welder manual when the recommendation isn’t clear.
Aluminum wire is soft, so a roll that bites too hard can distort it before it reaches the gun. A U-groove cradles the wire more gently, but the liner, contact tip, and feeder setup still need to suit aluminum.
Do you need the knurled roll just because the wire is flux-cored? Not automatically. Flux-cored wires vary, so use the roll type recommended for that wire and feeder instead of assuming every spool needs the same groove.
Pro Tip: Brush metal dust and debris from the rolls during regular feeder cleaning. Grit in a groove can interfere with grip and mark wire as it passes.
Match Roll Size to Wire Diameter and Feeder
A drive roll’s size marking should match the wire diameter, and the roll itself must fit your feeder. Check both details before buying; a correct groove won’t help if the roll doesn’t fit the machine’s shaft or mounting system.
Wire diameter is normally marked on the spool or packaging. If you’re changing wire size, check whether your existing roll has a matching groove before assuming you need a new roll.
| Wire diameter | Typical availability | Check before setup |
|---|---|---|
| .023 inch | Common on smaller solid-wire jobs | Confirm the roll has a .023 groove. |
| .030 inch | Widely used for solid wire | Match groove size and profile to the wire. |
| .035 inch | Common for solid and some other wires | Don’t use a .030 groove because it looks close. |
| .045 inch | Used by some machines and wire types | Confirm the feeder accepts this wire size. |
The roll’s mounting style also varies between feeders. Some use a keyed or grooved shaft; others use a different retention method. Compare the old roll and the machine’s parts information before ordering, especially if the welder has a less common feeder.
When you inspect a used roll, check for a groove packed with dirt, a worn or damaged surface, and markings that don’t match your wire. If you replace it, keep the old roll nearby until the new one is installed so you can compare its size and fit.
Drive rolls are just one part of the feeding path. If the roll looks right but wire still drags, the liner may be dirty, bent, or the wrong size for the wire. A spool that’s too tight on its hub can also make the feeder work harder.
Important Tip: Don’t file, grind, or reshape a roll to make it fit another wire. That can ruin the groove and create poor feeding rather than fixing it.
Set Drive-Roll Pressure Without Damaging Wire
Drive-roll pressure should be high enough to feed wire steadily but low enough to avoid crushing it. Start with modest tension, then increase it in small steps if the wire slips during feeding.
Before testing, point the gun away from people and loose items, keep hands clear of the rolls, and follow the welder manual’s instructions for inching wire. Moving rolls can pinch fingers, and a wire tip can be sharp.
- With the welder off, open the feeder and confirm that the correct groove lines up with the wire.
- Thread the wire according to the machine’s instructions, then close the pressure arm.
- Start with low pressure and use the feeder’s wire-inching control as directed.
- If the wire slips, add a small amount of pressure and test again.
- Stop once the wire feeds consistently; don’t keep tightening after the slipping stops.
If you’re watching the wire while inching, stand clear of the wire’s path and keep the gun aimed safely. Don’t use your hand to block the wire to test grip unless the welder manufacturer specifically describes that test and its safety steps.
I’ve found that tiny tension changes can make a bigger difference than expected. When I stopped treating the pressure knob like a clamp and adjusted it gradually, the wire fed better without coming out flattened.
A bird’s nest forms when wire bunches up near the drive rolls instead of moving through the liner. That can happen when the wire stalls at the gun, the roll tension is too high, or the liner or contact tip is obstructed. Turn off the welder before clearing a tangle or reaching into the feeder.
Troubleshoot Wire-Feed Problems Before Replacing Parts
Wire-feed trouble can come from the drive rolls, wire spool, liner, contact tip, or feeder controls. Check the simple mechanical causes first; replacing a roll won’t fix a clogged liner or a spool that can’t turn freely.
| Symptom | Likely causes | First check |
|---|---|---|
| Roll spins but wire slips | Wrong groove, low pressure, or dirty roll | Confirm roll type and size; adjust pressure gradually. |
| Wire looks flattened or marked | Too much pressure or wrong groove | Reduce tension and confirm the groove fits the wire. |
| Wire bunches near the feeder | Wire stuck at the gun or excess roll pressure | Turn off the welder and check the feed path safely. |
| Feed starts and stops | Spool drag, liner trouble, or a loose connection | Check spool movement and inspect the gun assembly. |
| Wire feeds smoothly but weld quality is poor | Settings, gas flow, or another welding issue | Check the welding setup instead of changing roll tension. |
If feed problems continue after you check the roll and wire path, inspect the gun liner and contact tip for wear, damage, or a poor fit. Check the wire spool for a loose wrap or tangles, and confirm that the spool brake or hub setting isn’t stopping it from turning freely.
A wire-feed problem can be mistaken for a gas-flow problem, but the two aren’t the same. If wire feeds normally yet shielding gas seems absent, the gas solenoid valve is one part that may need checking; follow the machine manual or ask a qualified repair person if you’re not sure.
Likewise, a welder that overheats or shuts down may have an issue unrelated to the drive rolls. The welder cooling fan helps move air through the machine, so blocked airflow or fan trouble deserves attention on its own.
Rolls, liners, contact tips, and feeder components are all welder replacement parts, but they don’t all solve the same symptom. I’d replace a roll only after checking its groove, wear, and fit against the wire and feeder.
Pro Tip: If the feeder has more than one roll pair or pressure arm, confirm that all parts are seated as the manual shows. A roll that sits out of line can push wire sideways and make a good groove seem like the wrong one.
- Match groove type and marked size to the wire.
- Use only enough pressure for steady feeding.
- Check the liner, contact tip, and spool before blaming the rolls.
FAQs About MIG Welder Drive Rolls
How tight should MIG welder drive rolls be?
MIG welder drive rolls should hold the wire firmly enough to feed without slipping, but not so tightly that they flatten or deeply mark it. Start with light pressure and increase it gradually. If the wire is deformed, back off and check that the groove matches the wire.
Can I use the same drive rolls for solid and flux-cored wire?
Sometimes, but not always. Solid steel wire often uses smooth V-groove rolls, while many flux-cored wires feed better with knurled rolls. Check the wire and welder instructions, since wire construction and feeder design can change the right choice.
What happens if I use the wrong drive-roll size?
A groove that’s too large may not grip the wire reliably, while one that’s too small can pinch or deform it. Either mismatch can cause slipping or uneven feeding. Read the roll markings and compare them with the wire diameter on the spool.
Do drive rolls wear out?
Yes, drive rolls can wear, become damaged, or collect debris in the groove. A worn roll may grip wire less reliably, even with correct pressure. Clean the roll during feeder maintenance and replace it if its groove is damaged or it no longer feeds the correct wire consistently.
Why does my wire bird-nest even with the right drive rolls?
A bird’s nest can form when wire stops moving through the gun while the feeder keeps pushing. A blocked tip, damaged or dirty liner, excessive pressure, or a feed-path snag can cause that stall. Turn off the machine before clearing the wire, then inspect the path.
Make the Feed Path Work as a Team
Good wire feeding starts with a roll that suits both the wire and the feeder, followed by pressure that grips without crushing. If the wire still slips, binds, or bunches, check the whole path before buying parts; a roll can’t compensate for a spool that won’t turn or a liner that’s blocked.
My preference is to make one adjustment at a time and test the feed before changing anything else. That keeps the cause-and-effect clear and makes it easier to undo a bad change. Your next step is simple: read the wire diameter, match the roll groove, and check the pressure with the welder manual close by.