Welding Guns, Torches, and Electrode Holders Explained
A welding gun feeds wire, a torch directs heat or shielding gas, and an electrode holder grips a stick electrode while carrying welding current. The right tool depends on your welding process, machine, amperage, and how long you’ll weld before taking a break.
Have you ever tried to match a replacement gun or holder to a welder and found a jumble of connector styles and ratings? Or wondered why one person calls a tool a torch while another calls a nearly similar-looking tool a gun?
I once rushed to set up a repair and grabbed a torch that looked close enough to the one I needed. The connector and the job didn’t agree, so I lost time sorting it out before I could make a bead. That kind of mix-up is common, not a dumb mistake.
I wrote this to help you sort out the names, jobs, parts, and fit of the equipment without needing to decode a catalog first. You’ll get a clearer idea of what belongs with MIG, TIG, stick, and gas work.
Get the match right and you’ll have fewer setup delays, better control, and less risk of a damaged cable or overheated handle. Get it wrong and you may end up with poor shielding, unstable welding, or gear that can’t safely handle the work.
This takes about 12 minutes to read. By the end, you’ll be able to:
- Tell a welding gun from a TIG torch or stick electrode holder.
- Match a tool’s rating and connector to your welding machine.
- Spot worn parts before they spoil a weld or create a safety hazard.
- Choose practical maintenance steps for the gear you own.
Welding Guns Torches and Electrode Holders: Choose the Right Tool
A welding gun usually feeds consumable wire, a welding torch directs heat and may deliver shielding gas, and an electrode holder grips a stick electrode. In everyday shop talk, “torch” can also mean a MIG gun, so check the process and machine connection instead of relying on the name alone.
Here’s the quick match: a MIG or flux-core wire welder needs a compatible gun, TIG needs a TIG torch, and stick welding needs an electrode holder. Oxy-fuel cutting and heating use gas torches, which are a different kind of equipment from an electrically powered welding torch.
| Tool | Common process | What the tool does | What to check first |
|---|---|---|---|
| MIG gun | MIG or gas metal arc welding | Feeds wire through a contact tip toward the weld | Wire size, machine connection, amperage rating, and duty cycle |
| Flux-core gun | Flux-cored arc welding | Feeds tubular wire, usually without shielding gas for self-shielded wire | Polarity requirements, wire size, and machine compatibility |
| TIG torch | TIG or gas tungsten arc welding | Holds the tungsten electrode and directs shielding gas | Torch amperage, cooling type, connector, and gas setup |
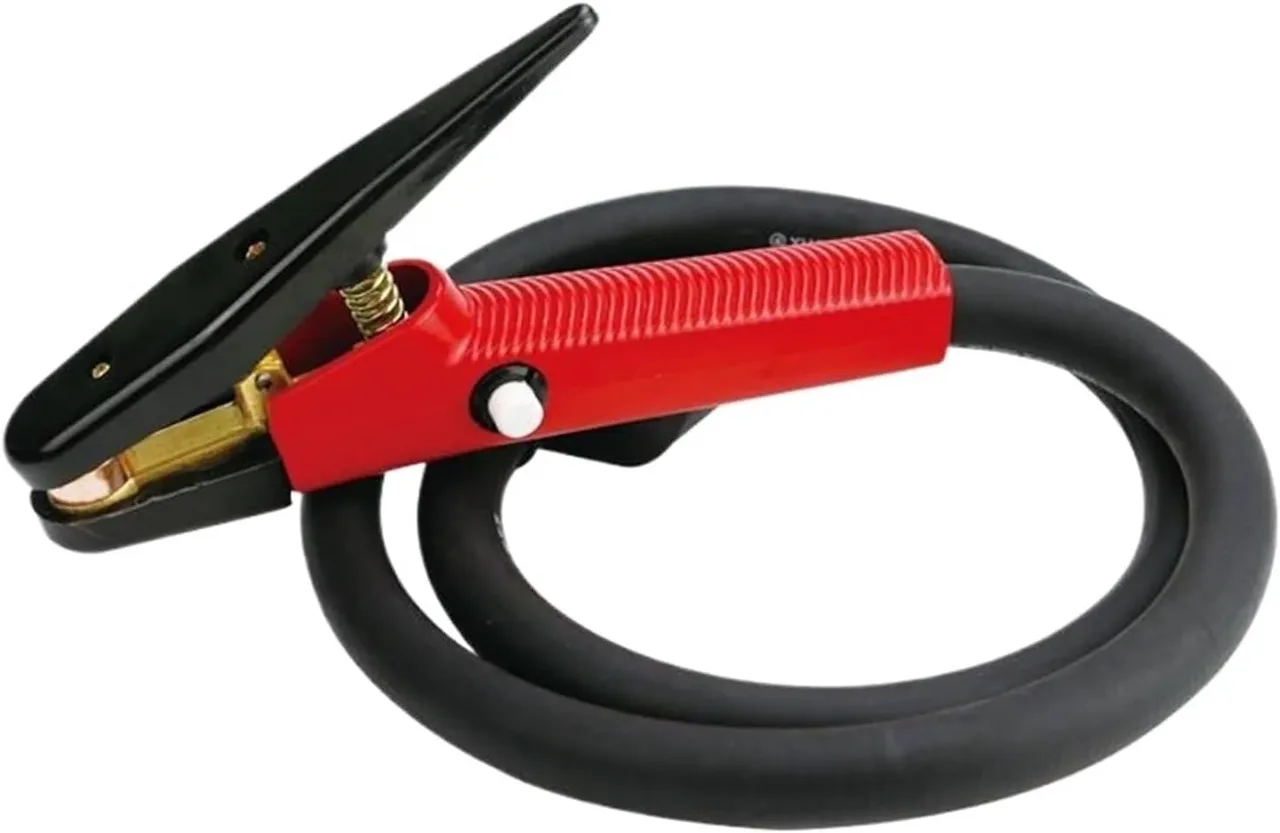
| Stick electrode holder | Stick or shielded metal arc welding | Clamps the coated electrode and carries current | Amperage rating, cable fit, jaw condition, and electrode range |
| Oxy-fuel torch | Gas welding, heating, or cutting | Mixes fuel gas and oxygen to create a flame | Fuel type, approved hoses, regulators, and tip condition |
A MIG gun has a trigger and a path for wire, welding current, and often shielding gas. A contact tip transfers current to the wire as the wire passes through it, while a nozzle helps direct shielding gas around the weld.
A TIG torch holds a non-consumable tungsten electrode, which makes the arc but doesn’t feed filler metal automatically. The welder adds filler by hand when the joint needs it, much like feeding a narrow rod into a small, controlled pool of molten metal.
A stick holder doesn’t feed the electrode. Its insulated handle and jaws hold the electrode at a useful angle, while the attached cable carries current from the welding machine.
The word “torch” can cause real confusion. A TIG torch carries electrical current and usually directs shielding gas; an oxy-fuel torch mixes gases to create a flame. They don’t use the same power source, hose arrangement, or safety checks.
If you’re comparing the full setup, start with the process before shopping for a handle. welding machine accessories and parts can include several related items, but that doesn’t mean a part from one machine fits another.
Pro Tip: Check the machine manual and the tool label before buying a replacement. Connector shape alone isn’t proof of compatibility, even when two tools look like twins.
Match Parts, Ratings, and Connections Before You Weld
A tool is a good match only when its parts, current rating, cooling method, and connector work with the machine and the job. A high amperage number on a package doesn’t make an incompatible torch safe or useful.
Start with the duty cycle, the share of a 10-minute period a machine or tool can weld at a stated output before it needs to cool. A 30% duty cycle at a given amperage means about three minutes of welding followed by about seven minutes of cooling at that rating. The rating changes with amperage, so compare the actual figures on the equipment label rather than treating duty cycle as one fixed number.
A long, high-current weld can heat a gun, torch, holder, and cable much faster than a series of short tack welds. If you’re working overhead or on thick steel, a tool with too little capacity may become uncomfortably hot well before the job is done.
MIG guns have several parts that wear or affect feeding. A bent liner, dirty contact tip, or loose connection can make the wire stutter, bird-nest, or burn back at the tip. If you’re narrowing down a feed problem, MIG welding gun parts covers the parts that guide and transfer current to the wire.
TIG torch parts serve another purpose. A collet grips the tungsten, and a ceramic or gas-lens cup directs shielding gas around the weld area. A gas lens spreads the gas more evenly than a basic collet body, which can help with gas coverage in some setups.
For part names and fit, TIG torch parts is a useful companion when you’re sorting out cups, collets, and gas lenses.
A stick holder has jaws that grip the electrode, an insulated body, and a connection point for the welding cable. Loose jaws can let an electrode shift or make poor electrical contact, while damaged insulation can expose parts that should stay protected. The design and connection details are easier to compare in a guide to stick welding electrode holder parts.
I once chased an erratic arc by changing my technique before checking a loose connection at the holder. The fix was less dramatic than the troubleshooting session, which is a good reminder to inspect the simple stuff before blaming your hands.
Check these details before buying or swapping tools:
- Process: Confirm MIG, flux-core, TIG, stick, or gas work.
- Machine rating: Match the tool’s amperage capacity to the output and expected duty cycle.
- Connection: Verify the electrical connector, cable terminal, gas fitting, and wire-feed connection where applicable.
- Consumables: Check wire diameter, contact-tip size, tungsten size, electrode range, or torch tip as needed.
- Cooling: Confirm whether the torch or gun is air-cooled or water-cooled, and use the required cooling setup.
- Polarity and setup: Follow the wire or electrode instructions and machine manual, especially when changing process or consumables.
A Euro-style connector is a common type of MIG gun connection that brings several functions together at the front of the machine. Other machines use brand-specific or simpler connectors, so don’t assume a gun will fit because it has the same wire capacity.
Air-cooled TIG torches shed heat through the torch body and surrounding air. Water-cooled torches use a cooling system to carry heat away, which is useful for some higher-current or longer welding work but adds hoses and cooling equipment to the setup. Never run a water-cooled torch without its required coolant flow.
For stick holders, cable size and cable condition matter as much as the clamp itself. A small cable on a high-output job can heat up, and a damaged cable jacket can leave copper exposed. Use the machine and cable maker’s rating guidance; don’t judge capacity by how thick the handle looks.
Important Tip: Turn off the welding machine and follow its instructions before changing a gun, torch, holder, or cable connection. Disconnecting the power source doesn’t replace any lockout steps required at your workplace.
Use and Maintain Welding Tools Without Creating New Problems
Good care is simple: inspect the tool before use, keep its electrical and gas paths in working order, and replace worn parts before they fail mid-weld. A few minutes of checking can save you from a bad bead, a hot handle, or an avoidable stoppage.
Before starting, look over the cable or hose for cuts, crushed spots, exposed wire, and loose fittings. Check that the handle, trigger, insulation, and strain relief are secure, and confirm the gas line and fittings are appropriate for the process.
For a MIG gun, make sure wire feeds smoothly and the contact tip matches the wire diameter. A tip with a worn or irregular opening can lead to inconsistent contact, while a clogged nozzle can interfere with shielding gas. Clean spatter with the proper tool and replace damaged consumables rather than forcing them to work one more day.
For a TIG torch, inspect the tungsten and the parts that hold it. A loose collet or damaged cup can make setup frustrating and gas coverage unreliable. Keep the torch components clean, and follow the tungsten and gas recommendations for the material and current in use.
For a stick holder, inspect the jaw surfaces and insulation before clamping in an electrode. A jaw that won’t grip securely can make the electrode wobble, while a cracked handle can expose the user to electrical contact or heat. If you find damaged insulation or cable, stop and replace or repair the equipment through a qualified person.
Oxy-fuel gear needs its own inspection routine because it uses fuel gas and oxygen under pressure. Check hoses, regulators, connections, and torch tips for damage or leaks using the method specified by the equipment maker. Don’t use oil or grease on oxygen equipment, and don’t light or operate a torch with an unknown leak.
A tidy cable route helps prevent snagging and reduces strain on the connector. Keep leads out of sharp bends, hot metal, water, and places where carts or boots can crush them. A cable stretched tight across a walkway is an invitation for trouble, even before you strike an arc.
Watch the tool as you work. Stop if a handle becomes unusually hot, the wire feed changes, gas flow seems wrong, a connector crackles, or the arc becomes erratic. Those signs can point to a worn part or poor connection, and pressing on can turn a small repair into a bigger one.
| Symptom | Possible cause | Sensible first check |
|---|---|---|
| MIG wire feeds unevenly | Dirty or kinked liner, worn tip, or poor wire drive setup | Check the wire path and consumables with the machine off |
| MIG weld has poor shielding | Blocked nozzle, gas leak, or incorrect gas flow | Inspect the nozzle and fittings; follow the gas setup instructions |
| TIG arc wanders | Contaminated or damaged tungsten, loose collet, or poor setup | Inspect the tungsten and torch parts |
| Stick electrode shifts in holder | Worn jaws or poor clamping position | Check the jaw condition and clamp the electrode securely |
| Cable or handle gets hot | Loose connection, damaged cable, or load beyond the tool rating | Stop welding and inspect the rated connections and cable |
Troubleshooting should follow a safe order. Stop welding first, place the tool where it can’t touch conductive metal, and follow the machine’s shutdown instructions before inspecting electrical parts. For gas equipment, shut off cylinders and follow the maker’s directions before checking fittings.
A tool problem doesn’t always mean the tool itself is faulty. Poor ground connection, wrong consumable size, incorrect machine settings, or an unsuitable wire can create similar symptoms. Change one thing at a time, or you’ll end up with a fresh problem and no idea which fix worked.
Pro Tip: Keep a small set of the correct replacement consumables for the process you use most. A spare contact tip or properly sized tungsten can save a trip to the store, but only if it matches the wire or torch setup.
Key Takeaways:
- Choose equipment by welding process and machine compatibility, not by the label “torch” or “gun” alone.
- Compare amperage and duty-cycle ratings against the work you actually do.
- Inspect handles, cables, fittings, and wear parts before welding.
- Stop and investigate if a tool overheats, loses a secure grip, or behaves unpredictably.
FAQs About Welding Guns Torches and Electrode Holders
Is a welding gun the same as a welding torch?
No, the names usually point to different tools, but shop language varies. A MIG gun feeds wire, while a TIG torch holds tungsten and directs shielding gas. Some welders casually call a MIG gun a torch, so identify the welding process and connector before ordering parts.
Can I use any MIG gun with my welding machine?
No, a MIG gun must match the machine’s connection, wire-feed setup, current rating, and intended wire size. Some guns use common connectors, while others fit only certain machines. Check the machine manual and gun specifications before buying, especially if the machine has a built-in wire feeder.
What does an electrode holder do in stick welding?
An electrode holder clamps a coated stick electrode and carries welding current through the attached cable. The holder must grip the electrode securely and have a rating suited to the current and work period. Damaged insulation, loose jaws, or a poor cable connection are reasons to stop and inspect the setup.
How do I know if a welding torch is air-cooled or water-cooled?
Check the torch model, hoses, and maker’s instructions. An air-cooled torch doesn’t need a coolant circuit, while a water-cooled torch has lines for coolant flow and needs the specified cooling system. Don’t operate a water-cooled torch without coolant circulation, because heat can damage the torch.
Why does my MIG gun get hot while welding?
A MIG gun can get hot when the current or welding time exceeds its rating, when a connection is loose, or when a cable or internal part is damaged. Let the gun cool, then check its duty-cycle guidance and inspect connections with the machine shut down. Replace damaged parts before welding again.
Choose the Tool That Fits the Job
The right tool is the one designed for your process and rated for the work, not the one with the most impressive-looking handle. A MIG gun, TIG torch, stick holder, and gas torch each do a different job, even if everyday shop talk blurs the names.
My preference is to verify the model and connection before replacing any tool. That small pause beats wrestling with a fitting that won’t seat or pushing worn parts through one more weld.
Your next step is straightforward: identify your welding process, check the machine manual and tool label, then compare the connector and rating before you buy or start work. If a cable, hose, handle, or insulation looks damaged, leave it out of service until it’s properly repaired or replaced.