To replace a windshield washer hose, locate the damaged section, disconnect it from the washer pump or fittings, install compatible replacement tubing, secure the connections, and test the spray pattern. Most accessible hose repairs require basic hand tools, but some vehicles need additional trim or cowl panel removal.
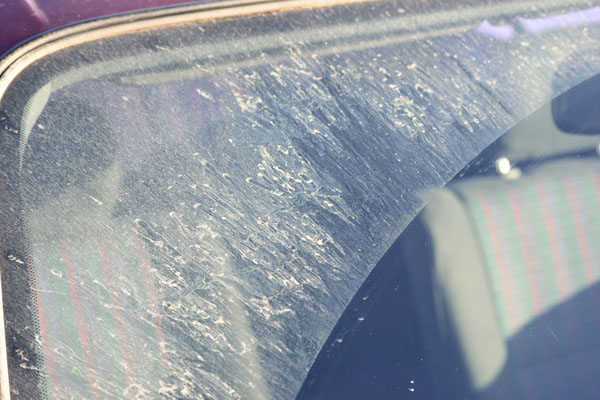
In the United States, a working windshield washer system is an important part of everyday vehicle maintenance. Road salt, dust, pollen, insects, and traffic grime can quickly reduce visibility, especially during winter driving and on busy highways. If pressing the washer control produces a puddle under the vehicle, weak spray, or no fluid at the windshield despite a working pump, a damaged or disconnected hose may be responsible.
Replacing a windshield washer hose is often a manageable do-it-yourself repair. The main challenge is finding the leak and identifying the correct tubing route. Washer hoses differ in diameter, material, connector design, and routing between vehicles, so use the manufacturer’s service information when available. Confirm that the pump, reservoir, nozzles, and electrical connections work before assuming the hose is the only problem.
How to Tell If Your Windshield Washer Hose Needs Replacement
A leaking or damaged washer hose commonly causes weak windshield spray, fluid leaking beneath the vehicle, or washer fluid appearing inside the engine compartment. The pump may still make its usual humming sound because it can operate normally even when fluid escapes through a damaged line.
Before buying replacement tubing, inspect the entire accessible hose route from the reservoir or pump to the windshield washer nozzles. On some vehicles, a hose also passes through the hood, firewall, or a connector near the windshield cowl. A visible leak or disconnected fitting provides stronger evidence of hose damage than weak spray alone.
Source: topcarwashcost.com
Fluid leaking under the hood
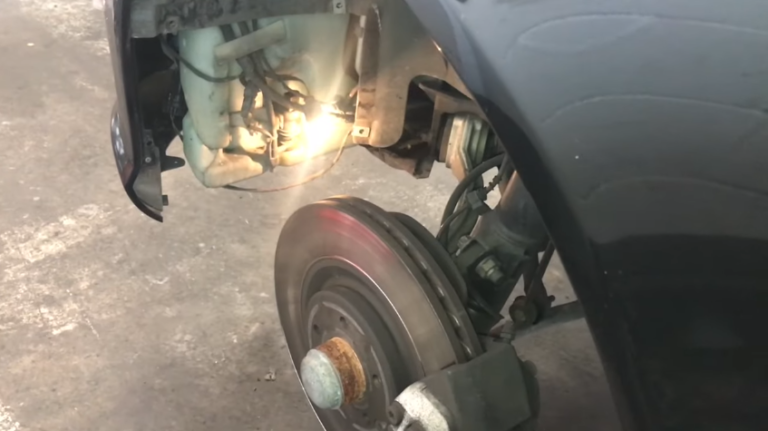
Look for wet tubing, dripping connectors, or washer fluid collecting around the reservoir, pump, hood hinges, and cowl area while checking the system.
Little or no washer fluid reaches the windshield
A split hose or disconnected line may release fluid before it reaches the nozzles. A clogged nozzle, empty reservoir, failed pump, or electrical fault can produce similar symptoms.
Visible cracks or hardened tubing
A hose that has split, become brittle, or suffered abrasion may no longer seal properly. Replace damaged sections rather than relying on temporary tape or adhesive.
Washer pump runs but spray is weak
Inspect for leaks and obstructions first. If the tubing is intact, investigate the pump output, nozzle condition, and any check valves or connectors in the circuit.
Rule Out Other Washer System Problems
Fill the reservoir with the washer fluid specified for the vehicle and check the fluid level. Listen for the pump when you activate the washer control, following the vehicle’s operating instructions. If the pump is silent, a fuse, wiring, switch, or failed motor may be responsible rather than the hose.
If the pump operates and no fluid reaches the windshield, inspect accessible connections and look for leaks. If the hose remains dry and intact, a blocked nozzle, clogged filter, faulty check valve, or weak pump may be preventing delivery. Avoid repeatedly running a pump that may be dry or damaged.
Pump runs and fluid leaks from the hose
Repair or replace the damaged tubing or connector.
Pump runs but no leak is visible
Check for a blockage, disconnected concealed line, faulty valve, or pump problem.
Pump does not run
Check the vehicle-specific electrical circuit and pump before replacing the hose.
Tools and Materials Needed to Replace a Washer Hose
Gather the replacement tubing, compatible connectors if required, and basic tools before removing the old line. The exact requirements depend on whether the damaged section sits beside the reservoir, beneath the hood, or inside a panel. Many accessible repairs need only a small amount of tubing and simple hand tools.
The replacement hose must tolerate automotive washer fluid and the temperatures expected in the vehicle’s location. Do not assume that any generic plastic tube will work. Compare the original hose diameter, flexibility, connector fit, and material, and consult the parts catalog or service manual if the specification is unclear.
Source: i.ytimg.com
Replacement washer hose
Choose automotive washer tubing with the correct inside and outside dimensions, material compatibility, and routing characteristics.
Compatible connectors or couplers
Obtain the correct straight, angled, or model-specific connectors if the original fittings are damaged or the replacement hose requires them.
Basic hand tools
A trim removal tool, pliers, flashlight, and suitable screwdriver may help with access. Use only the tools required for the particular vehicle.
Cleaning and protection supplies
Keep a small container or absorbent cloth available for spilled washer fluid, and wear protective gloves and eye protection when appropriate.
How to Choose the Correct Replacement Tubing
Measure the original hose or compare it with the vehicle manufacturer’s specified replacement. A hose that is too narrow may not fit the connector or deliver the intended flow, while a hose that is too large may slip off the fitting. Do not stretch tubing over a connector or force a mismatched part into place.
Check whether the vehicle uses molded hose sections, integrated connectors, heated washer lines, or a special nozzle assembly. These designs may require a complete preformed section instead of universal tubing. Keep the original routing and protective sleeves where possible.
Match the dimensions
Use the specified hose size and compatible connectors rather than estimating from appearance alone.
Check fluid and temperature compatibility
Select tubing intended for automotive washer systems and the temperatures the vehicle will experience.
Preserve the original routing
Make sure the replacement reaches every connection without being stretched, sharply bent, or exposed to excessive heat.
How to Replace Windshield Washer Hose Step by Step
The general replacement process is to make the vehicle safe, locate the damaged section, remove the old hose, install compatible tubing, restore the original routing, and test the system. The exact access points and clips vary by make, model, and year, so use vehicle-specific service instructions when components must be removed.
Do not begin by pulling the hose out of a concealed route. First identify where it connects and how it is retained. A hose may share clips with wiring or pass through a protective sleeve, and pulling too hard can damage nearby components.
Source: i.ytimg.com
Step 1: Park and prepare the vehicle
Park on a level surface, switch off the engine and ignition, remove the key or secure the vehicle according to its operating instructions, and allow hot components to cool. Keep the parking brake engaged.
Step 2: Locate the damaged section
Trace the hose from the washer reservoir or pump toward the windshield nozzles. Inspect exposed lines, joints, connectors, hood routing, and the cowl area for splits or disconnections.
Step 3: Access the hose
Open the hood and remove only the covers, clips, or trim necessary to reach the damaged area. Follow the service manual for any vehicle-specific disassembly.
Step 4: Disconnect the old hose
Place a cloth or container beneath the connection to catch residual fluid. Release the hose gently from the fitting or connector without breaking the plastic nipple or pulling on adjacent wiring.
Step 5: Compare and prepare the replacement
Compare the old and new hose diameters, lengths, connector types, and flexibility. Cut replacement tubing squarely to the required length if the design permits a cut-to-fit repair.
Step 6: Install the new hose
Push the replacement tubing fully onto compatible fittings and install the required couplers or retainers. If the vehicle uses a molded hose assembly, replace it with the specified assembly rather than improvising a connection.
Step 7: Secure the hose along its route
Restore the original clips, sleeves, and routing. Keep the line away from exhaust components, sharp edges, moving linkages, hinges that could pinch it, and other heat sources.
Step 8: Reassemble and test
Reinstall removed covers and clips, refill the reservoir if necessary, and operate the washer briefly according to the owner’s manual. Inspect all repaired connections for leaks and confirm that fluid reaches the windshield.
Replacing a Short Damaged Section
If the damage is confined to an accessible section of ordinary flexible hose, replacing only that section may be practical. Remove the compromised tubing and connect the new piece using a properly sized automotive-compatible coupler, provided the original system design permits a splice.
The splice must remain secure during normal washer operation and temperature changes. Avoid makeshift connections that can loosen, leak, or restrict flow. If the original hose has molded ends, integrated valves, or special connectors, replacing the complete hose assembly is usually the more appropriate repair.
Use a compatible coupler
Confirm that the coupler matches the hose dimensions and is suitable for washer fluid and the expected operating conditions.
Avoid excessive hose tension
Leave enough length for the intended routing without creating loose loops that can snag or become pinched.
Replacing a Hose Routed Through the Hood or Cowl
Some vehicles route the washer line through the hood or beneath the windshield cowl. These repairs may require removing trim panels, releasing clips, or disconnecting a nozzle assembly. Take a photo of the original hose route before removing it so you can restore the same arrangement.
Work carefully around painted surfaces, electrical connectors, wiper linkages, and fragile plastic retainers. If the line passes through a difficult-to-access area or requires removal of a complex assembly, consult the service manual or use a qualified technician rather than forcing components apart.
Protect the clips
Use an appropriate trim tool and release retainers as designed instead of prying against the windshield or painted hood.
Check moving clearances
Make sure the hose cannot interfere with hood hinges, wiper arms, or other moving parts when panels are closed.
How to Test the New Windshield Washer Hose
A successful repair delivers washer fluid to the windshield without visible leaks, disconnected fittings, or a distorted spray caused by a pinched hose. Testing also helps identify problems that were present before the replacement, such as a clogged nozzle or a weak pump.
Refill the reservoir with the correct washer fluid before testing. Keep the test brief and follow the vehicle owner’s manual. If the pump does not operate normally, stop and diagnose the electrical circuit or pump rather than repeatedly activating the control.
Source: i.ytimg.com
Check for leaks
Inspect the repaired section, couplers, pump connection, and accessible nozzle connections while the washer system operates.
Confirm spray delivery
Verify that fluid reaches the intended windshield areas and that the spray pattern is consistent with the vehicle’s normal operation.
Inspect hose position
Check that the hose has not slipped from its clips, kinked behind a panel, or become pinched when the hood is closed.
Check for delayed leaks
After testing, inspect the surrounding area again for dampness or fluid accumulation and correct any loose connections before driving.
What to Do If the Washer Still Does Not Work
If the new hose remains dry and the pump runs, check whether fluid reaches the line at the pump outlet. If there is no output, the pump, reservoir filter, fluid supply, or an upstream obstruction may be responsible. If fluid exits the pump but does not reach the nozzle, inspect downstream connections, check valves, and concealed hose sections.
If fluid reaches the nozzle but the windshield spray remains weak or absent, the nozzle may be blocked or misaligned. Follow the manufacturer’s cleaning procedure and avoid pushing metal wire into a nozzle unless the service instructions specifically permit it, because the opening can be damaged. A pump that remains silent requires electrical and motor diagnosis.
New hose leaks at a joint
Check the hose size, fitting condition, insertion depth, and coupler compatibility. Replace damaged connectors rather than overtightening or forcing them.
Fluid does not reach the hose outlet
Investigate the pump, reservoir supply, and possible blockage upstream of the replacement section.
Fluid reaches the nozzle but spray is weak
Inspect the nozzle for obstruction and check for a restriction or kink elsewhere in the line.
The pump does not activate
Check the applicable fuse, wiring, switch, and pump using the vehicle’s wiring diagram and service procedures.
Windshield Washer Hose Replacement Cost and Time
The cost of replacing a windshield washer hose depends on the vehicle, the length and type of tubing, connector requirements, and how difficult the damaged section is to reach. An accessible split in a simple hose is generally less involved than a repair requiring hood trim, cowl panels, or a model-specific hose assembly to be removed.
A straightforward repair may take roughly 20 to 60 minutes for someone familiar with the layout, but this is a planning estimate rather than a guaranteed labor time. Concealed routing, brittle plastic clips, difficult access, or additional pump and nozzle problems can extend the job. Check local parts and labor prices for an accurate estimate.
Source: i.ytimg.com
Simple hose repair
Usually involves a short accessible section of compatible tubing or a loose connection, with limited disassembly.
Complete hose replacement
May require more tubing, model-specific connectors, or a preformed assembly, depending on the vehicle.
Difficult-access repair
Can cost more in labor when trim, cowl components, or other assemblies must be removed and reinstalled.
Additional washer system faults
A failed pump, blocked nozzle, broken reservoir fitting, or electrical fault may require separate diagnosis and repair.
Should You Replace the Hose Yourself or Visit a Mechanic?
A do-it-yourself repair is reasonable when the damaged section is easy to reach, the replacement specification is clear, and the connections can be restored without disturbing complex components. Before starting, compare the likely parts cost with the tools, access requirements, and time involved.
Professional service is advisable when the hose is routed through difficult-to-access panels, the reservoir or pump must be removed, specialized connectors are involved, or previous repairs have damaged the fittings. If you cannot verify that the system is leak-free and working correctly, have it inspected before relying on it in traffic.
DIY is more suitable
The leak is visible, the hose is accessible, and compatible replacement parts are available.
Professional repair is more suitable
Access is complicated, connectors are fragile or integrated, or the fault may involve the pump or electrical system.
Common Mistakes to Avoid During Hose Replacement
The most common mistakes are replacing the hose before confirming the fault, installing tubing with the wrong dimensions, leaving a loose connection, and routing the new line where heat or movement can damage it. A repair that initially sprays correctly can still fail later if the hose is stretched or pinched when the hood closes.
Avoid using household adhesive, ordinary electrical tape, or an unverified sealant as a permanent solution for a split hose. Such materials may not tolerate washer fluid, temperature changes, or the movement experienced by the line. Use compatible tubing and fittings designed for the application.
Source: nissankaengine.com
Replacing parts without diagnosis
Confirm that the hose is damaged before buying parts, because a clogged nozzle or failed pump can produce similar symptoms.
Forcing mismatched tubing onto fittings
Use the specified hose dimensions and connector type to avoid loose joints, cracked fittings, or restricted flow.
Ignoring original hose routing
Restore clips and protective sleeves so the line stays clear of hot surfaces, sharp edges, and moving parts.
Skipping the final leak test
Test the system and inspect all repaired connections before driving.
Using unsuitable fluid or materials
Follow the owner’s manual for washer fluid and replacement components, especially in freezing conditions.
Safety Precautions Before and After the Repair
Keep the engine off while locating and replacing the hose. Allow hot components to cool, and never reach near a running engine’s belts, fans, or other moving parts to check for leaks. Some electric cooling fans can start unexpectedly, even when the engine is not running, so follow the manufacturer’s safety instructions.
Washer fluid can irritate the eyes or skin and may contain substances that are harmful if swallowed. Avoid contact, clean up spills promptly, and keep the fluid away from children and pets. Never substitute engine coolant or another automotive fluid for windshield washer fluid.
A functioning washer system helps maintain visibility, but it does not replace keeping the windshield and wiper blades in good condition. If the washer system fails while driving and dirt or road spray impairs visibility, pull over safely rather than continuing with an obstructed view.
Wear suitable eye protection and gloves when handling fluid or working around sharp edges.
Protect vehicle components
Do not pry against the windshield, force plastic fittings, or route tubing near heat and moving parts.
Verify safe operation
Do not consider the job complete until the hose is secure, there are no leaks, and washer fluid reaches the windshield.
Frequently Asked Questions
Q
Can I replace a windshield washer hose myself?
Yes. Many windshield washer hose repairs are suitable for DIY work when the damaged section is accessible and the correct tubing and connectors are available. Turn off the vehicle, allow hot components to cool, follow the original routing, and test the system for leaks afterward. If the hose is concealed behind complex trim or uses an integrated assembly, consult the service manual or a qualified mechanic.
Q
Can I repair a broken windshield washer hose instead of replacing it?
A short damaged section may be repairable with compatible replacement tubing and a correctly sized automotive washer hose coupler if the original system design permits a splice. Replacing the complete hose is preferable when the tubing is brittle along its length, a molded section is damaged, or the line contains integrated valves or specialized connectors. Avoid relying on tape or household glue as a permanent repair.
Q
What size hose do I need for my windshield washer system?
The correct size depends on the vehicle’s original hose and connector specifications. Check the service manual, vehicle parts catalog, or dimensions of the original tubing before purchasing a replacement. The hose must fit securely without being stretched over a fitting or slipping off during operation.
Q
Why does my windshield washer pump work but no fluid comes out?
A working pump with no spray may indicate a split or disconnected hose, an empty reservoir, a blocked line, a clogged nozzle, a faulty check valve, or a pump that runs but cannot produce sufficient output. Inspect the fluid level and accessible hoses first. If the hose is intact, check the pump output and nozzle according to the vehicle’s service instructions.
Q
How long does it take to replace a windshield washer hose?
A simple, accessible hose replacement may take approximately 20 to 60 minutes, although the actual time varies by vehicle and repair complexity. Removing trim, accessing a concealed line, replacing specialized connectors, or diagnosing an additional pump problem can take longer. Consult vehicle-specific labor information for a more reliable estimate.
Q
Do I need to drain the windshield washer reservoir before replacing the hose?
Not always. If the damaged hose is accessible and its connections can be safely disconnected, you may be able to replace it without draining the entire reservoir. However, fluid can spill from the disconnected line, especially if the connection is low on the reservoir or pump. Follow the service procedure for your vehicle and use a suitable container to collect fluid.
Q
Can I use ordinary plastic tubing as a replacement washer hose?
Do not use ordinary plastic tubing unless its material, dimensions, and operating characteristics are confirmed suitable for automotive windshield washer systems. The replacement must tolerate the washer fluid and expected temperatures while remaining flexible enough for the original routing. Automotive washer hose or a manufacturer-specified assembly is the more reliable option.
✦ Wrapping Up
Conclusion
Replacing a windshield washer hose is often a straightforward repair when the damaged section is accessible and the correct replacement tubing is available. Start by confirming that the hose is actually leaking or disconnected, then match the original dimensions, install the new line securely, and restore all clips and protective sleeves.
A final operating test is essential. Check for leaks, verify that fluid reaches the windshield, and investigate the pump or nozzles if spray remains weak. Because the washer system supports driver visibility, correct any remaining faults before relying on the vehicle in traffic.
💡 Key Takeaway
Inspect the washer hose from the reservoir to the nozzles, identify the exact damaged section, obtain compatible replacement tubing, and test the repaired system for leaks and proper spray before driving.