Welding Work Clamps: Types, Placement, and Maintenance
Welding work clamps complete the welding circuit by carrying current from the workpiece back to the welding machine. Choose a clamp that fits the job, attach it to clean metal near the weld, and keep its cable connection in good shape.
Have you had an arc sputter or a weld start inconsistently, even though your settings seemed right? Are you trying to figure out whether the clamp belongs on the workpiece, the table, or somewhere else?
I once clamped onto a painted edge because it was the quickest spot I could reach. The arc acted rough, and I spent time chasing a machine problem that was really a poor connection. It’s a common mistake, not a dumb one.
I wrote this to help you choose and use clamps without turning a simple shop task into a troubleshooting session. Whether you’re welding at home or setting up a small fabrication job, a few practical habits make the work steadier.
Get the clamp right and you’ll have a more reliable circuit, less time spent correcting avoidable arc trouble, and fewer damaged parts from a clamp that slips. Skip the basics, and heat, spatter, or an unstable connection can make a manageable job frustrating.
This takes about 9 minutes to read. By the end, you’ll know how to:
- Pick a clamp style that suits your machine and work.
- Place the clamp for a dependable electrical path.
- Spot cable, jaw, and contact problems before they waste time.
- Clean and store clamps so they’re ready for the next job.
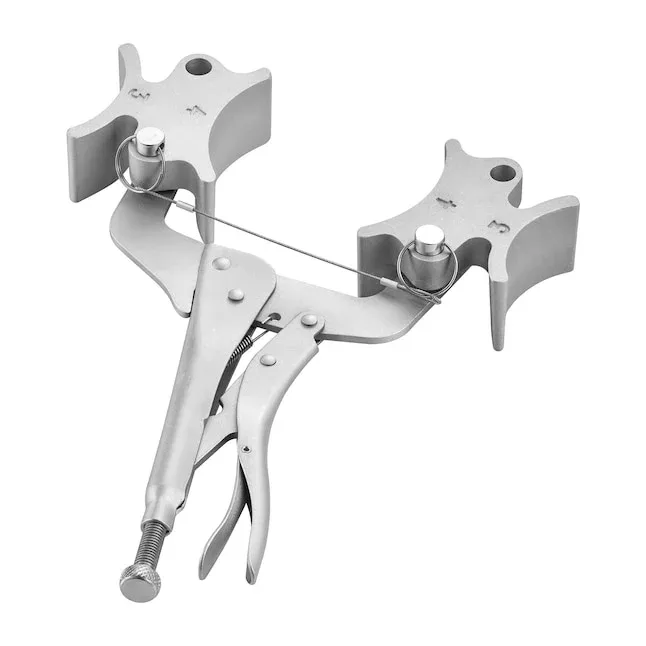
Welding Work Clamps: Choose, Place, and Maintain Them
A welding work clamp should grip clean, conductive metal firmly and provide a low-resistance return path to the welding machine. For a small steel repair, a spring clamp may be handy; for heavier work, a substantial C-style clamp or a purpose-built work clamp usually holds more securely.
The clamp connects to the machine’s work lead, the cable that completes the welding circuit through the workpiece. People often call the clamp a “ground clamp,” but in ordinary arc welding it serves as the current-return connection, not necessarily a connection to earth ground.
Start by matching the clamp to the process, machine output, cable, and size of the work. A clamp with weak spring pressure or small contact faces can struggle to maintain a steady connection when the job gets hot or the cable pulls against it.
| Clamp style | Useful for | Watch for |
|---|---|---|
| Spring clamp | Light work and quick repositioning | Limited grip and contact area |
| C-clamp style | Flat stock, fit-up, and firm holding | Can be awkward on irregular shapes |
| Heavy-duty work clamp | Higher-current work and longer welds | Must match the lead and machine |
| Magnetic work clamp | Temporary placement on suitable steel | Spatter, heat, and uneven surfaces can weaken contact |
These styles don’t all serve the same purpose. A work clamp makes the electrical connection, while a fixture clamp holds parts in position; a fixture clamp should not be treated as the current-return connection unless it’s designed and connected for that job.
Clamp labels and manufacturer instructions matter more than appearance. Check the rated current, duty cycle where listed, cable size compatibility, and how the cable attaches; a chunky-looking clamp isn’t automatically a better match for your setup.
Pro Tip: Choose a jaw shape that can sit flat against your usual material. A broad, stable contact often works better than a larger clamp that only touches at one corner.
The work lead and its connectors also affect the circuit. If you’re sorting out how the clamp fits into the complete setup, welding cables and connectors are part of the same electrical path, not separate details to ignore.
Place the Clamp for a Steady Welding Circuit
Place the work clamp on clean, bare metal, as close to the weld as practical, with the jaws gripping securely. A short, direct current path generally helps avoid problems caused by loose connections, poor contact, or current passing through unintended parts of the setup.
Before you strike an arc, check the planned route from the clamp through the workpiece and back to the machine. Current can follow any available conductive path, so don’t let the welding circuit depend on hinges, bearings, chains, lifting gear, or electrical components.
- Switch off or follow the machine’s setup procedure before moving leads or changing connections.
- Choose a stable spot on the workpiece, near the weld and clear of paint, rust, oil, scale, or heavy mill coating.
- Expose clean metal where needed, using a suitable hand tool while wearing eye protection.
- Attach the clamp firmly so both jaws or contact faces grip metal rather than slipping onto an edge.
- Route the lead safely, away from sharp corners, hot surfaces, moving parts, and places where it can be crushed.
- Check the connection and nearby path before welding; stop if the clamp, cable, or workpiece becomes unusually hot.
Would clamping to the table be good enough? Sometimes, if the table makes a solid electrical connection to the workpiece and the setup is intended for it, but a direct clamp to the workpiece is usually the clearer choice. Paint, rust, bolts, and loose fixture connections can interrupt the path between the table and the part.
A clamp close to the joint can help keep current from taking a long detour through fixtures or other equipment. Still, avoid putting it where spatter will weld it in place, where the torch or electrode holder can strike it, or where it blocks your access.
I once used a convenient fixture point instead of checking whether the part had clean electrical contact with it. The arc behaved inconsistently until I moved the work clamp directly to the workpiece, a quick reminder that a solid-looking setup can still have a weak connection.
Important Tip: Don’t clamp onto a sealed container, fuel tank, or any item that may hold flammable material unless a qualified person has confirmed a safe procedure. Welding on containers can cause fires or explosions, even when they seem empty.
Cable size and length also influence how well the setup performs, especially as current and cable run increase. If you’re choosing a lead for a longer reach or heavier work, check welding cable size and length against the machine maker’s guidance rather than relying on a clamp upgrade to solve every issue.
Maintain Clamps and Fix Common Contact Problems
Inspect the clamp and work lead before use, then clean and repair them when wear affects the grip or electrical contact. Dirt on the jaws, a loose cable lug, or damaged insulation can turn an otherwise sound setup into an unreliable or unsafe one.
Check the clamp for jaw wear, cracked insulation, weak spring pressure, loose hardware, and heat discoloration. Look along the cable for cuts, crushed sections, exposed conductor, and stiff or brittle spots.
| What you notice | Possible cause | Practical response |
|---|---|---|
| Arc starts inconsistently | Dirty contact or weak grip | Clean the contact area and reposition the clamp |
| Clamp or cable gets hot | Loose connection, poor contact, or overloaded lead | Stop welding and inspect the connection and cable rating |
| Clamp slips off | Worn jaws, poor placement, or cable pulling | Reposition, support the cable, or replace the worn clamp |
| Marks or pitting on jaws | Arcing or spatter damage | Clean the jaws; replace the clamp if contact remains poor |
| Cable feels stiff or shows damage | Heat, crushing, abrasion, or age | Take it out of service for proper repair or replacement |
Before cleaning or repairing a lead, follow the welding machine maker’s shutdown instructions and disconnect the machine from power when required. Don’t work on energized connections, and don’t use a clamp with exposed conductor or damaged insulation; have a qualified repair person handle cable repairs if you’re not equipped to do them safely.
For routine cleaning, remove spatter and surface contamination without grinding away useful metal or damaging the jaw faces. Keep the cable lug and clamp connection tight, but don’t overtighten hardware in a way that strips threads or cracks the clamp body.
Cable connections deserve close attention because a sound clamp can still perform poorly when the lead connection is loose or mismatched. Check that the connector fits the cable and machine, and use welding cable connectors that match the connection type rather than forcing a near-fit.
When storing a work clamp, coil the cable loosely and keep the jaws away from moisture, metal dust, and direct heat. A tight kink at the clamp end can stress the cable where it’s already bending most often.
Pro Tip: If an arc problem appears suddenly, check the clamp contact and lead connections before changing several machine settings. A quick inspection can save you from chasing the wrong cause.
- Clean metal and firm jaw pressure make a dependable connection.
- Clamp to the workpiece when possible, close to the weld.
- Stop and inspect any clamp or cable that gets hot, slips, or shows damage.
FAQs About Welding Work Clamps
Can I use a regular C-clamp as a welding work clamp?
No, a regular C-clamp shouldn’t be assumed safe or suitable as a welding current-return clamp. A fixture clamp may hold the parts, but the electrical connection should come from a purpose-built work clamp with a suitable cable connection and rating. Using an unapproved clamp can create poor contact, overheating, or damage.
How close should the work clamp be to the weld?
Place the work clamp as close to the weld as practical while keeping it out of the torch path, spatter zone, and hot area. A shorter path through the workpiece can reduce the chance that current travels through fixtures or other components. The best spot depends on access and the part’s shape.
Does the work clamp go on positive or negative?
The work clamp connects to the machine terminal specified by the selected process and polarity setup. The correct terminal can vary with the welding process, electrode or wire, and machine instructions, so follow the setup chart instead of guessing. The clamp’s job is to complete the circuit, not to set polarity by itself.
Why does my welding work clamp get hot?
A hot work clamp often points to poor contact, a loose cable connection, an undersized or damaged lead, or a load beyond the clamp’s rating. Stop welding and let the parts cool before inspecting them. Don’t keep working through the heat, since excessive temperature can damage insulation and the clamp.
Can a magnetic clamp replace a regular work clamp?
Sometimes, but only when the magnetic clamp is made for welding current and provides a secure electrical connection on the material being welded. Spatter, heat, paint, and an uneven surface can weaken magnetic contact. Check the clamp’s rating and instructions, and use a conventional clamp if the magnetic connection feels unstable.
Make the Next Connection a Reliable One
A welding work clamp doesn’t need to be fancy, but it does need to grip clean metal and match the rest of the circuit. In my view, a reliable, purpose-built clamp is a better buy than a cheap one that slips or needs constant adjustment, especially if you weld often.
Before your next weld, take a moment to check the contact spot, clamp pressure, cable condition, and lead connection. That small pause can spare you a rough arc, a hot cable, or a frustrating round of machine adjustments.
If you’re unsure whether a clamp or cable is rated for your setup, check the machine and clamp instructions or ask a qualified welding supplier. Start with a clean, direct connection to the workpiece, and you’ll have a much better shot at a steady weld.