To replace a windshield washer pump, locate the washer reservoir, gain access to the pump, disconnect its electrical connector and fluid hose, pull the old pump from its sealing grommet, install the replacement, refill the reservoir, and test the washers for proper spray and leaks.
For drivers in the United States, a working windshield washer system is more than a convenience. Road salt, dust, pollen, insects, mud, winter grime, and highway spray can quickly reduce windshield visibility. If the washer reservoir contains fluid but nothing sprays when you operate the washer control, a failed pump is one possible cause. Before buying a replacement, however, check the fluid level, fuse, hoses, nozzles, electrical connector, and freezing conditions because several faults can produce nearly identical symptoms.
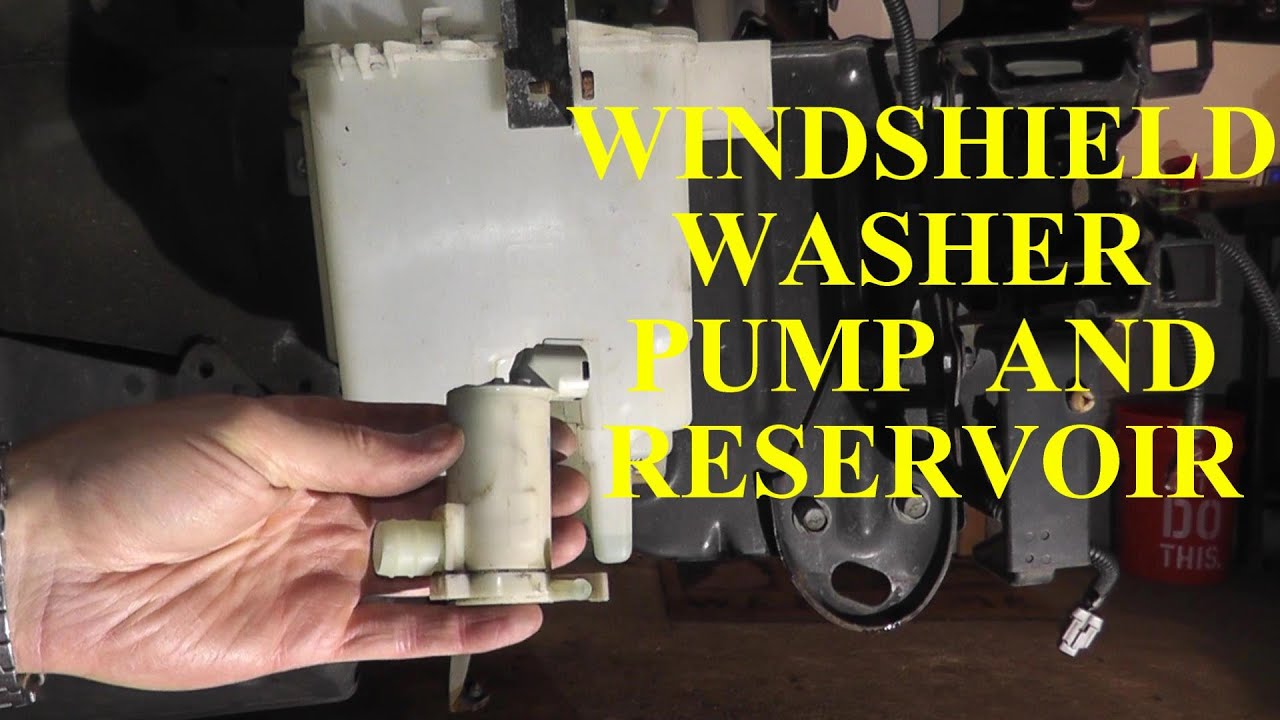
The actual replacement is usually straightforward once you can reach the pump. On many U.S.-market cars, trucks, and SUVs, the small electric pump fits directly into a rubber grommet near the bottom of the windshield washer reservoir. The difficult part is often access. Depending on the vehicle, you may reach the pump from the engine compartment, through a front wheel well, behind a splash shield, beneath a battery tray, or after partially lowering the reservoir. This guide explains how to diagnose the problem, replace the pump without damaging the reservoir, and verify that the repair worked.
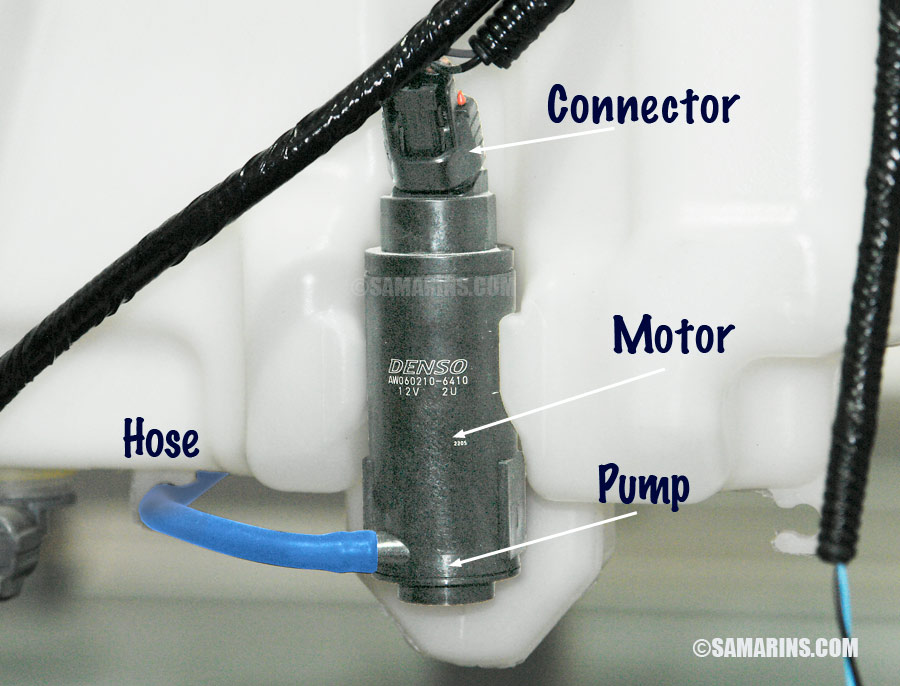
The windshield washer pump is a small electric motor and fluid pump that moves washer fluid from the reservoir through hoses to the spray nozzles. When the driver operates the washer control, the vehicle supplies power to the pump either directly or through an electronic control system, depending on the vehicle design.
The pump is commonly installed in the lower portion of the plastic washer reservoir. Mounting it low allows fluid to reach the pump inlet naturally. The pump outlet connects to a small hose that carries fluid toward the windshield nozzles.
Some vehicles have more than one pump. An SUV, hatchback, or crossover may have separate circuits for the windshield and rear window. Other designs use one reversible pump that changes fluid direction depending on electrical polarity. Verify which configuration your vehicle uses before ordering parts.
Source: 2carpros.com
Reservoir
Stores windshield washer fluid and normally has a cap marked with the windshield washer symbol.
Pump
Pressurizes the washer fluid and pushes it through the delivery hose.
Hoses
Carry washer fluid from the pump toward the spray nozzles.
Nozzles
Direct washer fluid onto the windshield in a controlled spray pattern.
Electrical circuit
Supplies power and ground to the pump when the washer control is activated.
Make Sure the Washer Pump Is Bad Before Replacing It
Do not replace the pump simply because washer fluid does not reach the windshield. A clogged nozzle, disconnected hose, frozen fluid, blown fuse, damaged connector, wiring problem, or empty reservoir can produce the same basic symptom.
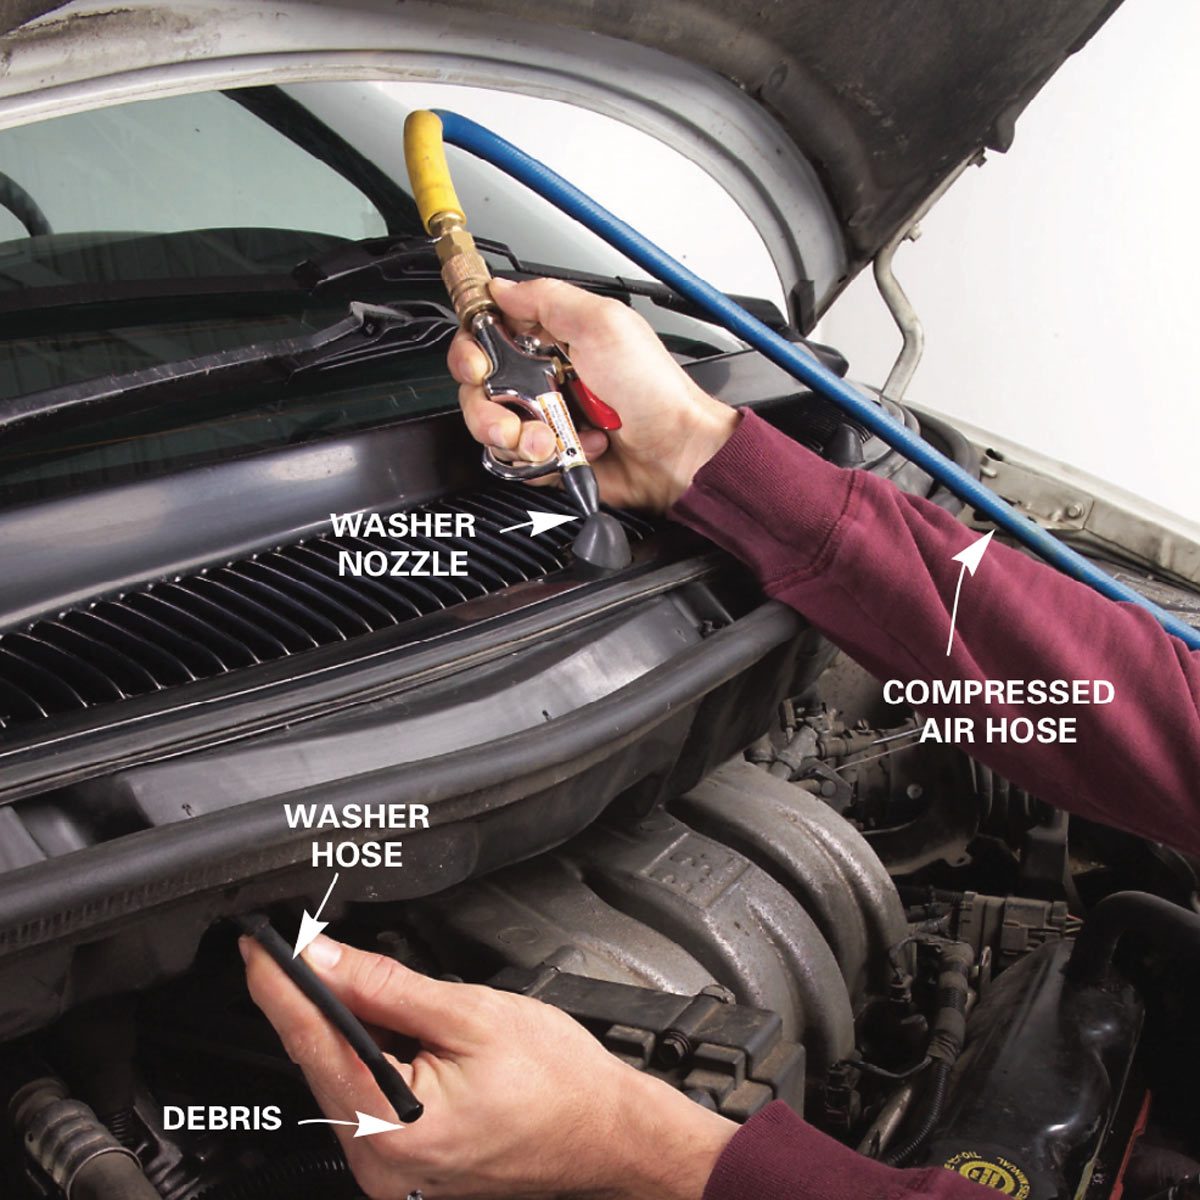
Start with the easiest checks. Confirm that the reservoir contains washer fluid and look underneath the vehicle for obvious leakage. Activate the washers and listen near the reservoir. If you hear a clear electric humming sound but no fluid sprays, the pump motor may still be operating. In that situation, look for a blocked nozzle, restricted hose, detached hose, cracked reservoir, poor pump seal, or damaged pump impeller.
If the pump is completely silent, inspect the appropriate fuse using the owner’s manual or vehicle service information. Also inspect the pump connector for moisture, corrosion, loose terminals, or broken wires. On vehicles exposed to road salt and winter weather, connectors near the wheel well deserve especially careful inspection.
Electrical testing can distinguish a failed pump from a control-circuit problem. If the correct power and ground are present at the pump while the washer command is active but the pump does not operate, pump failure becomes much more likely. If power is missing, replacing the pump may not solve anything because the fault can be elsewhere in the circuit.
Source: youtube.com
Pump is silent
Check the fuse, connector, wiring, power supply, ground, switch command, and pump before replacing parts.
Pump hums but nothing sprays
Check the fluid level, hoses, nozzles, pump outlet, reservoir, and frozen fluid.
Fluid leaks underneath the vehicle
Inspect the reservoir, pump grommet, pump body, and hose connections.
Problem appears only during freezing weather
Allow frozen fluid to thaw and refill with washer fluid suitable for the expected temperature before condemning the pump.
A Quick Electrical Test
A digital multimeter can help confirm whether voltage reaches the pump. Because electrical designs differ, consult service information for the correct terminals and expected operation. If you are uncomfortable probing an automotive electrical circuit, have the diagnosis performed professionally rather than risking connector or module damage.
Tools and Supplies Needed to Replace a Windshield Washer Pump
The tools required depend mainly on how the manufacturer positioned the washer reservoir. A pump visible from the engine compartment may take only a few basic hand tools. A pump hidden behind a fender liner can require wheel removal and additional trim fasteners.
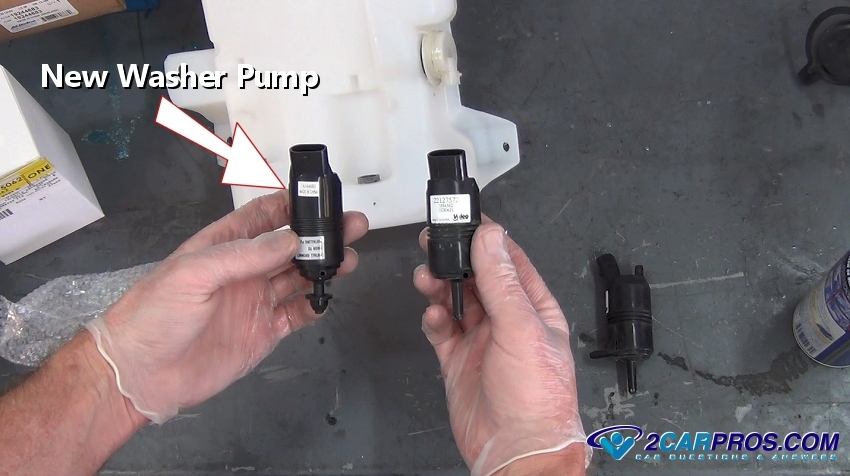
Buy the replacement pump using the vehicle’s year, make, model, engine, and applicable production information. Compare the electrical connector, inlet design, outlet orientation, and mounting dimensions with the original pump. If a new sealing grommet is supplied, use it unless the manufacturer specifies otherwise.
Source: storage.googleapis.com
Replacement washer pump
Use a part confirmed for the exact vehicle and front or rear washer circuit as applicable.
Pump grommet or seal
Recommended when the existing seal is hard, cracked, swollen, loose, or leaking.
Basic socket and ratchet set
May be required for reservoir brackets, battery trays, wheels, or splash shields.
Screwdrivers and trim tools
Useful for clips, splash shields, wheel-well liners, and hose retainers.
Drain pan
Catches washer fluid when the hose or pump is removed.
Pliers
Can help with certain hose clamps, but avoid crushing plastic fittings.
Fresh washer fluid
Use automotive windshield washer fluid appropriate for the expected U.S. climate and seasonal temperatures.
Jack and jack stands when required
Use properly rated equipment if wheel-well access requires lifting the vehicle.
How to Replace Windshield Washer Pump Step by Step
The following procedure covers the common reservoir-mounted washer pump design. The exact order can vary, so use vehicle-specific service information when removing a wheel, bumper component, battery, air intake, reservoir, or other part.
Work on a parked vehicle with the transmission in Park or in gear as appropriate, the parking brake applied, and the ignition switched off. Allow hot engine components to cool before reaching into the engine compartment.
Source: youtube.com
Step 1: Locate the washer reservoir
Open the hood and find the washer-fluid filler cap. Follow the reservoir downward to determine where the pump sits and whether it is accessible from above.
Step 2: Determine the safest access route
Check whether the pump can be reached directly, through the wheel well, behind a splash shield, below a battery tray, or only after loosening the reservoir.
Step 3: Prepare for fluid drainage
Place a drain pan below the pump. Fluid normally escapes as soon as the hose or pump is removed from a reservoir containing fluid.
Step 4: Disconnect the electrical connector
Release the locking tab and pull on the connector housing rather than the wires. Examine the terminals for corrosion, moisture, overheating, or damaged pins.
Step 5: Disconnect the washer hose
Carefully twist and pull the hose from the pump outlet if the design permits. Avoid excessive force on an old plastic fitting because it can snap.
Step 6: Remove the old pump
On a common push-in design, gently pull or rock the pump out of the rubber grommet. Some designs use clips or additional retainers, so do not force a pump that does not release normally.
Step 7: Inspect the reservoir and grommet
Check the pump opening for cracks, debris, hardened rubber, deformation, and residue. Replace a questionable grommet because reusing a damaged seal can cause a leak immediately after the repair.
Step 8: Install the new pump
Seat the grommet properly and press the new pump straight into position without damaging the seal. Make sure the pump reaches the same installed depth and orientation as the original.
Step 9: Reconnect the hose and electrical connector
Push the hose fully onto the outlet and reconnect the electrical plug until its lock engages. Reinstall any retaining clips.
Step 10: Reassemble removed components
Reinstall the reservoir, splash shield, wheel-well liner, battery tray, wheel, or other components according to the correct service procedure and specified fastener torque.
Step 11: Refill the washer reservoir
Add fresh washer fluid while watching the pump seal and hose connection for leakage.
Step 12: Test the system
Operate the washers briefly. Confirm that the pump runs, fluid reaches the windshield, the spray pattern is normal, and no fluid leaks around the reservoir, grommet, pump, or hose.
If Wheel-Well Access Is Required
Many vehicles place the lower portion of the washer reservoir behind a front fender liner. If the wheel must be removed, use a level surface, follow the manufacturer’s lifting points, support the vehicle with properly rated jack stands, and never work under or beside a vehicle supported only by a jack.
Remove only the liner fasteners needed for access when possible. Keep track of clips and screws because missing fasteners can allow the liner to contact the tire later.
If the Battery Must Be Removed
Some vehicles position the washer reservoir beneath or beside the battery tray. Follow vehicle-specific battery disconnection procedures. Modern vehicles can have memory settings, electronic initialization procedures, security systems, battery-monitoring equipment, or other requirements that make casual battery disconnection inappropriate.
How to Install the Pump Grommet Without Creating a Leak
The small rubber grommet between the pump and reservoir is easy to overlook, but it is critical because the pump sits near the bottom of a container filled with liquid. A poor seal can drain the reservoir even when the new pump works perfectly.
Remove debris from the opening before installing the seal. Do not gouge the plastic reservoir with a screwdriver or other sharp tool. If the original grommet is brittle, cracked, stretched, swollen, or permanently distorted, replace it.
Lightly wetting the sealing surface with compatible washer fluid can make assembly easier on many conventional designs. Avoid using petroleum grease or an unknown chemical on the rubber because some materials can swell or deteriorate. If the vehicle or replacement-pump manufacturer specifies a particular assembly lubricant, follow that instruction.
After installation, add only enough washer fluid to cover the pump area first. Wait and inspect for seepage before completely filling the reservoir. This simple check can save significant cleanup if the grommet was not seated correctly.
Source: docs.cholonautas.edu.pe
Clean seating surface
Dirt trapped around the grommet can prevent an even seal.
Correct grommet
A seal that is too loose or incompatible with the pump can leak.
Straight pump installation
Pushing the pump in at an angle can roll or displace the grommet.
Leak test before full refill
A partial refill makes a sealing problem easier and less messy to correct.
How to Tell Whether the Replacement Was Successful
A successful washer pump replacement should restore reliable fluid delivery without leakage. Do not judge the repair solely by hearing the motor. The complete system must move fluid from the reservoir to the windshield at a useful spray pattern.
The hoses may contain air after the system has been opened. Several short washer activations may be needed to move fluid back through the lines. Avoid holding the pump on continuously for an extended period if fluid is not moving.
Source: youtube.com
Pump operates
The pump should produce a normal electric operating sound when commanded.
Fluid reaches the windshield
Both expected nozzles should deliver fluid unless the vehicle uses a different nozzle arrangement.
Spray is reasonably strong
A weak dribble can indicate a restriction, leaking hose, poor connection, blocked nozzle, or unsuitable replacement pump.
Reservoir remains dry externally
Look closely around the pump grommet and reservoir seam for seepage.
Hoses remain connected
Check visible hose joints while someone briefly operates the washer control.
What to Do If the New Washer Pump Still Does Not Work
If a new pump does not restore washer operation, stop replacing parts and return to diagnosis. The original problem may have been electrical, hydraulic, or caused by freezing rather than by the pump itself.
First determine whether the new pump runs. If it is silent, verify the fuse, electrical connector, power, ground, wiring, control command, and any relevant relay or electronic control function. Vehicle wiring diagrams are particularly useful at this stage because modern washer circuits are not identical.
If the pump runs but no fluid reaches the windshield, inspect the outlet hose for a kink, loose connection, blockage, or incorrect routing. Then check the washer nozzles. A hose that disconnects beneath the hood can dump fluid inside the engine compartment rather than onto the windshield.
If the pump works but fluid leaks from the reservoir, inspect the grommet and pump seating. A cracked reservoir can also leak in the same area and may become obvious only after it is refilled.
New pump is completely silent
Verify the electrical supply and ground rather than immediately assuming the new pump is defective.
Pump runs with no spray
Inspect for blocked nozzles, disconnected hoses, restrictions, frozen fluid, or an improperly connected pump outlet.
Only one nozzle sprays
A pump failure is less likely when another nozzle on the same circuit still receives good flow. Inspect the branch hose and affected nozzle.
Fluid leaks immediately
Recheck the pump grommet, reservoir opening, hose connection, and reservoir for cracks.
Fuse blows again
Stop operating the system and diagnose the circuit for excessive current draw or a short instead of repeatedly installing new fuses.
Common Windshield Washer Pump Replacement Mistakes
Most problems after a DIY replacement come from incorrect diagnosis, damaged connectors, leaking seals, poor access procedures, or ordering the wrong pump. A few checks before and during the repair can prevent repeat work.
Replacing the pump before testing the system
No spray does not automatically mean the pump has failed.
Ordering by appearance alone
Similar-looking pumps can have different connectors, flow arrangements, outlets, or vehicle applications.
Reusing a damaged grommet
An old seal can leak as soon as the reservoir is refilled.
Pulling the connector by its wires
This can damage terminals or wiring and create a new electrical fault.
Forcing brittle plastic fittings
A broken outlet or reservoir nipple can turn a small repair into a larger replacement job.
Ignoring the second pump
Vehicles with front and rear washers may use multiple pumps, so identify the correct circuit before removing anything.
Using plain water in freezing weather
Water can freeze in the reservoir, pump, hoses, and nozzles. Use washer fluid rated appropriately for expected temperatures.
Working under a vehicle supported only by a jack
Use proper lifting points and rated jack stands whenever wheel-well access requires raising the vehicle.
Should You Replace the Pump Yourself or Use a Repair Shop
DIY replacement makes the most sense when the pump has been properly diagnosed and is easily accessible. On some vehicles, you can see the pump as soon as you open the hood. On others, substantial disassembly is required before you can even touch it.
Consider professional repair if access requires bumper removal, complicated battery procedures, extensive wheel-well disassembly, difficult electrical diagnosis, or work around components you are not comfortable removing. Professional diagnosis is also worthwhile when the pump receives no power, a fuse repeatedly fails, or the vehicle uses a more complicated electronically controlled washer system.
The central decision is not whether a washer pump is mechanically complicated. It is whether you can safely reach it, confirm the diagnosis, and reassemble everything correctly on your particular vehicle.
Good DIY candidate
Pump failure is confirmed, access is straightforward, and only ordinary hand tools are required.
Consider professional service
Electrical troubleshooting, difficult lifting, bumper removal, unfamiliar battery procedures, or extensive disassembly is required.
Frequently Asked Questions
Q
How long does it take to replace a windshield washer pump?
On a vehicle with easy pump access, the physical replacement can be relatively quick. The job can take much longer when the pump is behind a wheel-well liner, beneath a battery tray, behind bumper components, or attached to a reservoir that must be removed. Vehicle design matters more than the size of the pump itself.
Q
Can I replace a windshield washer pump without removing the reservoir?
Often, yes. Many pumps push directly into a grommet near the bottom of the reservoir and can be removed while the reservoir remains installed. Other vehicles do not provide enough space, making it necessary to loosen or remove the reservoir first.
Q
Why can I hear the washer pump but no fluid comes out?
If the pump clearly runs, check the reservoir level, frozen fluid, disconnected or damaged hoses, clogged nozzles, restrictions, leaks, and the pump’s ability to actually move fluid. Hearing the motor proves that something is turning electrically, but it does not prove that fluid is reaching the windshield.
Q
Do I need to drain the washer reservoir before changing the pump?
Not necessarily, but fluid below the pump opening will drain once the pump is removed. You can remove fluid beforehand or position a clean drain pan under the reservoir. If the drained fluid is contaminated, do not pour it back into the system.
Q
Should I replace the windshield washer pump grommet too?
Replace the grommet if it is brittle, cracked, stretched, swollen, damaged during removal, or included with the new pump as part of the intended installation. Because the grommet seals an opening near the bottom of the reservoir, its condition directly affects whether the system leaks.
Q
Can a blown fuse make it look like the washer pump is bad?
Yes. A blown fuse can prevent the pump from operating. Check the correct fuse and determine why it failed before replacing the pump. A fuse that blows repeatedly indicates an electrical problem that should be diagnosed rather than bypassed with a higher-rated fuse.
Q
Why did my windshield washers stop working during winter?
Washer fluid, hoses, or nozzles can freeze when the fluid’s freeze protection is inadequate for the temperature. Move the vehicle to a warmer location and allow the system to thaw naturally. Once operational, refill with automotive washer fluid rated for the temperatures expected in your part of the United States.
✦ Wrapping Up
Conclusion
Learning how to replace windshield washer pump components can save a trip to the repair shop when the pump has genuinely failed and access is straightforward. The core procedure is simple: confirm the diagnosis, reach the reservoir, disconnect the electrical connector and hose, remove the old pump, inspect the sealing grommet, install the replacement, refill the reservoir, and test the complete system.
Diagnosis is the part worth doing carefully. An empty reservoir, frozen fluid, clogged nozzle, disconnected hose, blown fuse, corroded connector, damaged wiring, or cracked reservoir can all prevent washer spray without requiring a new pump. Once the repair is complete, check both fluid delivery and leakage before considering the job finished.
💡 Key Takeaway
Before ordering a washer pump, fill the reservoir, listen for pump operation, inspect the fuse, hoses, nozzles, connector, and leaks, then verify vehicle-specific pump access. Replace the pump only after the evidence points to the pump itself.