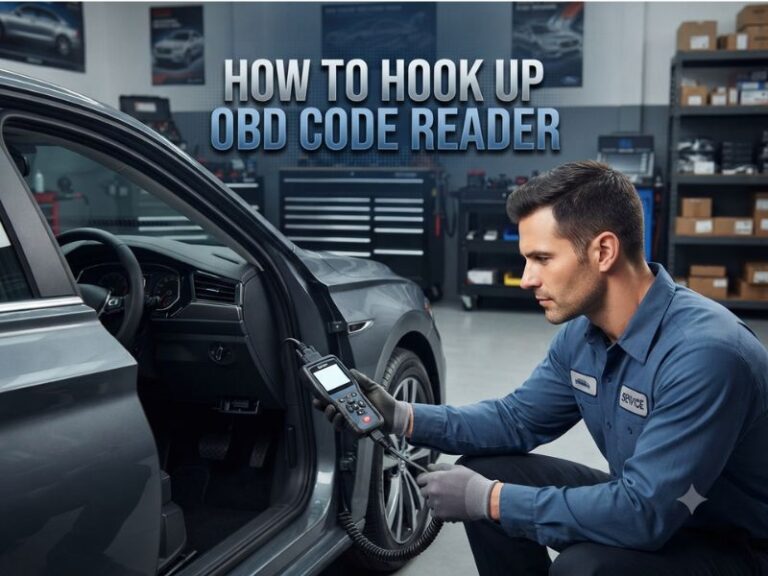
How to Read a Obd2 Scanner: Setup Steps and Troubleshooting Tips
You read an OBD2 scanner by connecting it to the vehicle’s diagnostic port, turning on the ignition, recording the stored trouble codes, and interpreting each code with the vehicle’s symptoms and service information. A code identifies a monitored system or circuit; it does not automatically prove that a particular part has failed.
The overlooked detail is that a scanner usually reports a result from the car’s computer, not a final diagnosis. A loose gas cap, damaged wire, low battery voltage, vacuum leak, or failing sensor can produce similar symptoms, so protecting the engine and avoiding unnecessary parts requires more than replacing the first component named by a code.
This article explains the setup sequence, the difference between stored, pending, and permanent codes, and the meaning of live data and readiness monitors. You will learn how to record and clear faults safely, decide when a code needs immediate attention, and recognize when testing should move beyond a basic scanner or to a qualified technician.
What an OBD2 Scanner Actually Tells You
On-board diagnostics, or OBD2, is a standardized system used by most gasoline vehicles sold in the United States from the 1996 model year onward. The vehicle’s control modules monitor emissions-related components and many operating conditions, then store diagnostic information when readings fall outside expected limits.
A scanner retrieves that information from the vehicle. It may display a diagnostic trouble code, the check-engine-light status, freeze-frame data, readiness monitors, and selected live data such as engine coolant temperature or oxygen-sensor readings.
The five-character code is useful because it narrows the investigation. The first character identifies the area involved:
- P means powertrain, including the engine, transmission, fuel, and emissions systems.
- B means body systems, such as airbags, climate controls, or power accessories.
- C means chassis systems, including some steering, braking, and suspension controls.
- U means a communication problem between control modules.
The second character generally indicates whether the code is generic or manufacturer-specific. The remaining characters identify a more specific fault category. For example, P0301 indicates a detected misfire in cylinder 1, but it does not establish whether the spark plug, ignition coil, injector, compression, or wiring caused that misfire.
Prepare Before Connecting the Scanner
Park safely on a level surface, set the parking brake, and switch off accessories such as the radio and climate control. If the engine is hot, avoid touching exhaust components, cooling fans, belts, and other parts that may start or remain hot while testing.
Find the 16-pin OBD2 connector, usually beneath the dashboard near the steering column. It may be exposed below the instrument panel or behind a small cover. Do not force the plug; the connector should align and seat with moderate pressure.
Have paper or a phone ready to record the codes before clearing anything. If the check-engine light is flashing, limit driving because an active misfire can overheat and damage the catalytic converter.
Basic code readers require only the vehicle and ignition power. More advanced scan tools may need an application, a wireless pairing process, a subscription, or vehicle-specific software. Confirm that the scanner supports the vehicle’s model year and the systems you need to access; a basic OBD2 reader may not communicate with airbag or anti-lock brake modules.
How to Connect and Read the Codes
- Turn the ignition off and plug the scanner into the OBD2 port.
- Turn the ignition to the “on” position without starting the engine. The dashboard warning lamps should illuminate.
- Allow the scanner to power up, then select the vehicle information if prompted. Some tools detect it automatically.
- Choose a menu such as “Read Codes,” “Scan,” or “Diagnostics.” Wait while the tool communicates with the control module.
- Write down every code exactly as displayed, including whether it is stored, pending, or permanent.
- Save or review freeze-frame data before starting repairs or clearing the codes.
If the scanner cannot communicate, check that the plug is fully inserted and that the ignition is on. A weak vehicle battery, blown fuse, damaged diagnostic connector, incompatible tool, or module communication fault can also prevent communication.
Read the complete code description, but treat it as a starting point. “Oxygen sensor circuit low,” for example, might result from a sensor problem, an exhaust leak, a wiring fault, a power-supply issue, or an engine condition that makes the sensor report an unexpected value.
Stored, Pending, and Permanent Codes
A stored code means the computer detected a fault strongly enough, or often enough, to save it in memory. Depending on the fault and driving conditions, it may turn on the malfunction indicator lamp, commonly called the check-engine light.
A pending code indicates that a monitor noticed a possible problem but has not yet met the conditions required to confirm it. A pending code can disappear if the condition does not recur, or it can become a stored code after additional drive cycles.
A permanent code remains in the module’s memory until the vehicle completes the relevant self-tests and confirms that the fault is no longer present. A scan tool may not be able to erase it manually. Repairing the cause and driving under the required conditions is usually necessary.
Do not assume that no stored code means no problem. A fault may be intermittent, too recent to confirm, outside the emissions system, or recorded in a module that a basic scanner cannot access.
Use Freeze-Frame and Live Data Correctly
Freeze-frame data captures operating conditions at the moment a fault was recorded. Depending on the vehicle, it may show engine speed, vehicle speed, coolant temperature, calculated load, fuel-trim values, and other readings.
This information helps reproduce the event. A code that appeared during a cold start points toward a different testing strategy than one recorded during highway acceleration, heavy load, or a fully warmed engine.
Live data shows current sensor and calculated values while the vehicle is running. It can help identify patterns, but the displayed value must be judged against engine temperature, load, fuel system type, manufacturer specifications, and the behavior of related sensors.
Common data items include:
- Engine coolant temperature, which should generally rise smoothly from near ambient temperature after a cold start.
- Short-term and long-term fuel trim, which show how much the computer is adjusting fueling from its base calculation.
- Engine speed, throttle position, calculated load, and intake-air measurements.
- Oxygen or air-fuel sensor activity, interpreted according to the sensor design and control strategy.
- Vehicle voltage, which can reveal a charging or power-supply concern when readings are abnormal.
A single unusual number is not always meaningful. Compare readings at cold start, warm idle, steady cruising, and moderate acceleration when safe, and look for values that are implausible, stuck, or inconsistent with other data.
Check Readiness Monitors Before Clearing Codes
Readiness monitors are self-tests that evaluate systems such as the catalyst, evaporative emissions system, oxygen sensors, and exhaust-gas recirculation system when the necessary driving conditions occur. They may show as ready, not ready, or incomplete.
Clearing codes or disconnecting the battery typically resets some monitors to incomplete. The vehicle may run normally while the monitors remain unfinished, but an emissions inspection can be affected because the computer has not completed its checks.
Before clearing a code, record the readiness status and freeze-frame information. If a seller, repair facility, or previous owner recently cleared the memory, an unusually high number of incomplete monitors can indicate that the vehicle has not completed a meaningful drive cycle since the reset.
Decide Whether the Problem Is Urgent
A steady check-engine light usually permits cautious driving if the vehicle runs normally, has no overheating or oil-pressure warning, and does not show dangerous symptoms. Schedule diagnosis promptly, especially if the light returns after a reset.
A flashing check-engine light generally signals an active misfire that may damage the catalytic converter. Reduce engine load, avoid high speeds, and stop driving if the vehicle shakes severely, loses power, smells strongly of fuel, overheats, or develops additional warning signs.
Stop and seek professional help for an oil-pressure warning, overheating, brake warning, severe loss of steering or braking assistance, smoke, or a fuel leak. An OBD2 scan cannot make an unsafe vehicle safe, and it cannot replace a physical inspection.
Common Code-Reading Mistakes
Replacing the named part immediately
A code often identifies a circuit, performance condition, or affected system rather than a failed component. Test power, ground, wiring, connectors, vacuum lines, fluid levels, and related components before purchasing a replacement part.
Clearing the code before recording evidence
Erasing the code can remove freeze-frame data and make an intermittent fault harder to reproduce. It also resets readiness monitors and may hide a recurring problem temporarily.
Ignoring multiple codes
Several codes may share one cause, such as low system voltage, a damaged harness, a vacuum leak, or a communication problem. Look for a common cause before treating every code as a separate failure.
Trusting a cheap scanner’s description without verification
Generic code definitions are helpful, but manufacturer-specific details and testing procedures can differ. Service information, wiring diagrams, and a repair manual provide the limits needed to interpret a reading accurately.
Scanning only the engine computer
A basic reader may retrieve powertrain codes but not faults stored in the ABS, airbag, body, or transmission modules. If a warning concerns one of those systems, use a tool that explicitly supports that module or arrange a professional scan.
What to Do After Reading a Code
Start by documenting the code, symptoms, mileage, fuel level, recent repairs, weather, and driving conditions when the warning appeared. Check simple possibilities such as a loose fuel cap, damaged connector, disconnected hose, low battery voltage, or visible wiring damage without disturbing hot or moving components.
Next, decide whether the code describes an electrical circuit, a measured performance problem, or a system condition. Circuit codes call for voltage, resistance, continuity, and connector checks; performance codes may require comparing sensor readings, checking for leaks, measuring fuel pressure, testing ignition, or verifying mechanical timing.
After the suspected cause is repaired, clear the code only if appropriate and rescan the vehicle. Confirm that the warning stays off and that the related readiness monitor completes. If the code returns, the repair did not address the root cause or another fault remains.
FAQ: Reading an OBD2 Scanner
Can I read an OBD2 scanner code with the engine
Yes, but the ignition usually needs to be switched on. Most scanners communicate when the engine is not running as long as the key or start button is in the on position. Live data that depends on engine operation will require the engine to be started.
What does a check-engine code tell me?
It identifies a detected system, circuit, or operating condition. It usually does not identify the failed part with certainty, so the code must be combined with symptoms, freeze-frame information, visual checks, and targeted tests.
How do I know whether an OBD2 code is serious?
Judge urgency by the warning-light behavior and vehicle symptoms, not the code number alone. A flashing light, severe misfire, overheating, smoke, fuel leak, major power loss, or an oil-pressure warning requires stopping or minimizing operation and getting professional assistance.
Should I clear a code after reading it?
No, not before recording the code and freeze-frame data. Clearing memory can erase useful evidence and reset readiness monitors. Clear it after diagnosis and repair when there is a practical reason, then verify that the fault does not return.
Why does my scanner show no codes when the warning
The tool may not support the relevant module or may not be communicating correctly. Check the ignition position, connector, vehicle battery, and scanner compatibility. Some warning systems store faults outside the engine computer and need a higher-level scan tool.
How do I read a OBD2 scanner if it displays
Record all codes, then look for a shared cause and address confirmed faults first. Low voltage, a common wiring problem, or one primary engine fault can trigger related codes. Do not replace multiple parts solely because several descriptions appear on the screen.
Can I drive after reading a stored code?
Sometimes, if the check-engine light is steady and the vehicle operates normally. Drive cautiously and arrange diagnosis soon. Do not continue normal driving with a flashing light, severe shaking, overheating, dangerous warning lamps, or substantial loss of power.
Conclusion: Read the Code, Then Verify the Cause
Reading an OBD2 scanner means collecting the code, its status, freeze-frame conditions, live-data clues, and readiness information before deciding what to repair. The major limitation is that a code points to a monitored fault, not necessarily a failed part; a flashing warning light or serious symptom also creates a safety issue that scanning alone cannot resolve.
Record the information, perform only safe basic checks, and use vehicle-specific testing procedures before replacing components. If communication fails, another control module is involved, or the warning returns after repair, the useful next step is a complete professional diagnosis.