Welding Machine Replacement Parts: Functions and Care
Welding machine replacement parts restore a welder when a worn, damaged, or failed component affects its arc, wire feed, gas flow, or cooling. Match each part to the machine’s make and model, then follow its manual and use a qualified repair technician for internal electrical work.
Are you dealing with wire that feeds in fits and starts, a torch that’s getting too hot, or a machine that won’t power up? The tricky part is telling a worn consumable from a fault that needs a deeper repair.
I once swapped a worn-looking torch part during a rushed repair, only to find the real trouble was a loose connection farther back in the assembly. I lost time taking the torch apart twice, and the lesson stuck: a part that looks suspect isn’t always the part causing the problem. It’s a common mistake, not a dumb one.
I wrote this to help you sort the easy-to-check parts from the ones that call for a technician, whether you’re maintaining a shop welder or a machine in your garage. You’ll get a clearer idea of what to inspect, how to choose a compatible replacement, and when to stop before a small repair turns into a risky one.
Get the match right, and you can avoid poor welds, needless purchases, and repeat breakdowns; get it wrong, and the machine may still feed badly or overheat. This guide takes about 11 minutes to read, and it’ll help you:
- Identify common wear parts by welding process and symptom.
- Match replacements to the welder instead of guessing by appearance.
- Decide which checks are safe to do yourself and which repairs need a pro.
- Set up a simple care routine that can catch trouble early.
Welding Machine Replacement Parts: What to Check First
Start by identifying the failed function, then match the replacement part to your machine’s model and welding process. A MIG welder with erratic wire feed may need a drive-roll or liner check, while a machine that overheats may have an airflow problem or a more serious internal fault.
Before ordering anything, note the welder’s process (MIG, TIG, or stick), brand, model, serial number, and any part number on the old component. Check the manual and the machine’s rating plate, since similar-looking parts can differ in dimensions, connection type, material, or electrical rating.
Use this order to narrow down the cause:
- Describe the symptom. Note when it happens, such as during startup, after several minutes, or only at a certain wire-feed setting.
- Check external items first. Inspect the torch, cable, work clamp, gas hose, wire spool, and visible connectors for damage or poor fit.
- Compare the part with the machine documentation. Confirm the exact model fit and any stated rating or size.
- Replace only the part tied to the fault. If the symptom remains, stop swapping parts and reassess the cause.
- Arrange service for internal electrical faults. Capacitors, circuit boards, and power components can hold hazardous voltage even after the machine is unplugged.
A part that fits physically isn’t automatically electrically or mechanically correct. A wire-feed roller with the wrong groove can deform the wire, and an electrical component with the wrong rating can fail or damage other parts.
| Part group | Common examples | What it affects | Typical clue to inspect |
|---|---|---|---|
| Torch and contact parts | Contact tips, nozzles, diffusers | Current transfer and shielding-gas coverage | Burnback, spatter, poor gas coverage |
| Wire-feed parts | Drive rolls, liners, guides | Smooth movement of MIG wire | Bird-nesting, slipping, uneven feed |
| Gas system | Hoses, fittings, solenoid valve | Shielding-gas delivery | Leaks, interrupted flow, porous welds |
| Electrical connections | Work clamp, connectors, cables | Current path to the workpiece | Loose fit, heat marks, inconsistent arc |
| Cooling system | Fan and air passages | Heat removal | Overheating, blocked airflow, unusual noise |
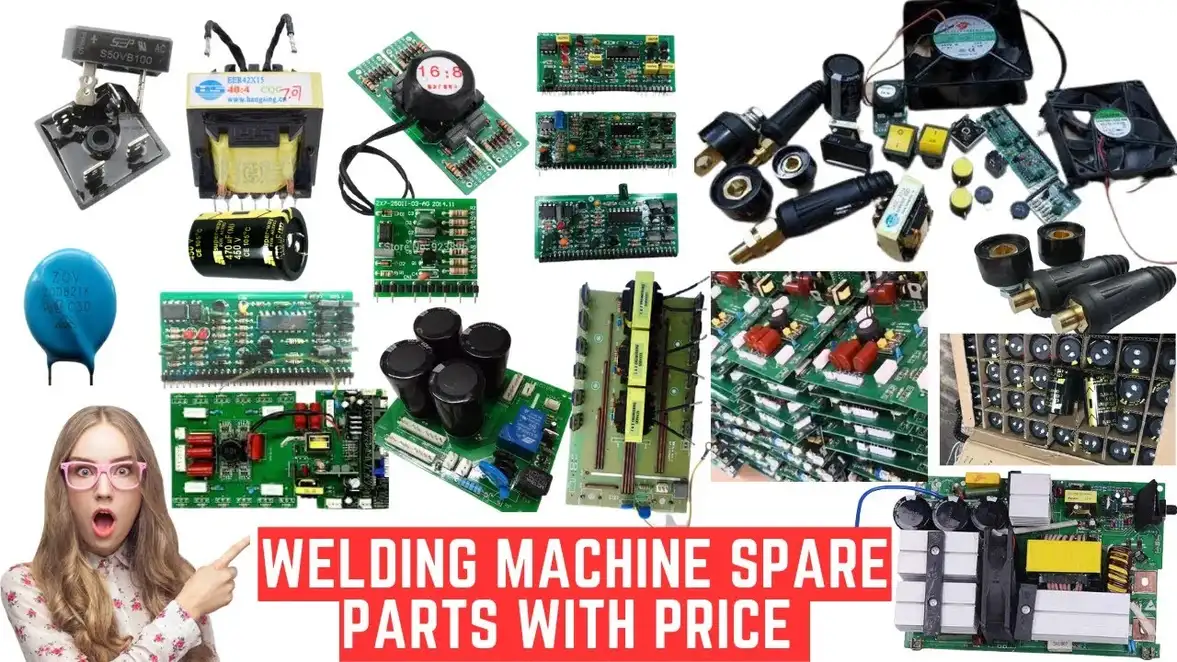
| Machine electronics | Switches, boards, power components | Control and power functions | Shutdowns, faults, no output |
Some of these are routine wear items; others aren’t sensible home repairs. The distinction matters more than the price tag, since opening a machine can expose dangerous voltage.
- Diagnose the function before buying a part.
- Use the machine’s exact model information to check fit.
- Leave internal electrical repairs to a qualified technician.
Common Wear Parts and What They Do
Wear parts sit in the path of heat, wire, gas, or electrical current, so their condition can change how a weld runs. The right inspection starts with the process and the symptom, not a one-size-fits-all parts list.
On a MIG torch, the contact tip transfers welding current to the wire as the wire passes through it. A tip that’s worn, clogged with spatter, or the wrong size can contribute to unstable feeding or poor electrical contact; replace it with the size and type specified for the torch and wire.
The nozzle directs shielding gas around the weld area, while a diffuser helps spread the gas evenly. Spatter buildup or a dent can interrupt that coverage, so clean the nozzle regularly and replace it when damage or wear prevents a clear, even gas path.
For a MIG system, the wire liner guides the wire through the torch cable. A damaged, dirty, or mismatched liner can add drag, which may show up as uneven feed or wire bunching; use the liner type and length intended for that torch.
Drive rolls grip and push the wire from the feeder toward the torch. Their groove needs to suit the wire type and diameter, so a change in wire can mean a change in roll setup too; the details of MIG welder drive rolls include groove styles and setup factors worth checking before you swap one.
The work clamp, sometimes called the ground clamp, completes the electrical circuit between the welder and the workpiece. A loose or damaged clamp, dirty contact surface, or frayed cable can make the arc inconsistent, even when the torch side looks fine.
TIG and stick setups have different wear items. A TIG torch may use a tungsten electrode, collet, collet body, and cup, while a stick holder grips the electrode and carries current through its cable. Check each part against the torch or holder design, rather than assuming a part from another setup will fit.
I once spent an awkward stretch chasing a rough MIG arc before noticing that the work clamp’s contact surface was coated with grime. Cleaning the contact and tightening its connection made the arc settle down, and it reminded me to check the current path before blaming the machine.
Pro Tip: When a consumable wears unusually fast, check for a setup issue before buying another batch. Incorrect wire diameter, excess tension, poor contact, or a torch mismatch can eat through parts and leave the original fault in place.
Diagnose Symptoms Before Replacing Parts
A symptom points toward a part group, but it rarely proves a specific component has failed. Look for a simple, visible cause first, and stop if checking the machine would mean opening its power section.
What’s the best first move when the wire feed sputters? Check the wire path from spool to torch, because a tight spool, kinked liner, poor roll fit, or loose drive tension can all interrupt feed.
With the machine unplugged, you can inspect accessible external parts for obvious wear or damage. Don’t remove covers or reach into the machine, and don’t treat unplugging as proof that internal electrical parts are safe to touch.
| Symptom | External checks to make | When to stop and get service |
|---|---|---|
| Wire feed surges or stops | Wire spool movement, liner, drive-roll fit, wire guides | Feeder motor or controls appear faulty |
| Wire bird-nests near feeder | Roll tension, wire path, liner obstruction | The feed mechanism is damaged or binding |
| MIG weld looks porous | Gas supply, hose connections, nozzle blockage, drafts | Gas flow remains poor after external checks |
| Arc feels inconsistent | Work clamp contact, cable condition, consumable fit | Loose or damaged internal electrical connection is suspected |
| Machine overheats or shuts down | Clear air openings, confirm the fan can move air | Fan is stalled, internal heat damage is suspected, or shutdown persists |
| Machine won’t power up | Outlet and supply connection, accessible power switch | Breaker trips repeatedly or internal electrical fault is suspected |
A gas solenoid valve opens and closes the shielding-gas flow in many welding machines. If gas doesn’t start or stop as expected, the trouble could be a depleted supply, kinked hose, blocked path, electrical control, or the valve itself; the welding machine gas solenoid valve has a specific job, but a symptom alone doesn’t confirm it’s bad.
If welds show porosity, check for a gas leak and make sure the nozzle isn’t blocked before ordering a valve. A small draft across the work area can also disturb shielding, so an otherwise sound gas system may still leave pores in the bead.
When the cooling fan is noisy, slow, or not moving air, clear dust from accessible vents and check the manual for safe cleaning steps. Don’t poke tools through a grille or spray liquid into the machine; a welder cooling fan may be part of a protected electrical assembly, and replacement can require service.
Important Tip: Stop using the welder if you smell burning insulation, see smoke or arcing inside the case, find melted wiring, or repeatedly trip a breaker. Disconnect power if you can do so safely, and have a qualified technician inspect it.
Choose A Compatible Replacement and Know Your Limits
A compatible replacement matches the welder’s model, part specifications, and intended process. Brand name alone isn’t enough, and a bargain part can cost more if the wrong fit damages a torch or stops work.
Use the manual, parts diagram, or machine label to confirm the part number when one is listed. If the part number has changed, ask the manufacturer or a welding-equipment supplier to confirm that the new number replaces the old one.
For a consumable, check the details that affect fit and function:
- Dimensions: Length, diameter, thread, and connection style can matter.
- Material and design: A liner or roll intended for one wire type may not suit another.
- Electrical rating: Switches, boards, and other electrical parts need the correct rating.
- Machine compatibility: A part may fit one model in a product family but not another.
- Operating conditions: Duty cycle, heat, wire type, and use frequency affect wear.
The wider group of parts and add-ons can be confusing because some are wear items and others are accessories that change how the setup works. A clear overview of welding machine accessories and parts can help separate replacement components from optional equipment.
Do you need the original manufacturer’s part every time? Not necessarily; a compatible part from a reputable supplier can be a reasonable choice when the specifications and fit are confirmed. I’d favor a known, documented match over a vague listing that only says the part works with “most welders.”
For minor external wear parts, replacement may be straightforward if the manual gives a clear procedure and the machine is disconnected from power. Torch consumables, external cables, and certain wire-path parts often allow basic maintenance, but machine design varies.
Internal repairs are a different matter. Power supplies, inverter boards, capacitors, and other internal components can present shock and fire hazards, and a repair error can turn a small failure into a costly one. If the manual doesn’t describe the repair as user-serviceable, let a qualified repair technician handle it.
Before installing a replacement, compare the old and new parts side by side without forcing either one into place. Stop if a connector, thread, or mounting point doesn’t match; forcing the fit can damage the machine or create an unsafe connection.
Care That Helps Replacement Parts Last
Regular cleaning and sensible setup can slow wear and help you spot a small fault before it interrupts a job. A few minutes after use can save the frustration of finding a clogged nozzle or damaged cable in the middle of a weld.
Follow the maintenance schedule in the manual, since machines differ in their cleaning needs and approved service steps. For user-accessible care, a practical routine looks like this:
- Turn the machine off and disconnect it from power before inspecting or cleaning external parts.
- Check torch consumables, cables, connectors, and the work clamp for visible damage or heavy buildup.
- Clear debris from accessible air openings using the method allowed by the manual.
- Check that wire spools, guides, and drive rolls suit the wire in use.
- Replace worn consumables before damage spreads to a larger assembly.
- Record the part and machine model when you order, so the next replacement is easier to match.
Keep cables loosely coiled rather than sharply bent, and avoid dragging a torch lead across hot metal or sharp edges. A crushed cable may look fine outside but can develop problems that affect performance or safety.
Store consumables clean and dry, and keep replacement parts in their packaging until you need them. Dust, moisture, and mixed-up sizes can turn a well-stocked drawer into a box of surprises, and not the fun kind.
If you switch wire type or diameter, recheck the feed setup rather than assuming the previous drive-roll and liner arrangement still fits. A small setup mismatch can cause feed trouble that looks like a failed motor or worn torch.
Pro Tip: Write the welder’s model and serial number inside your maintenance log, along with the part numbers you’ve confirmed. A quick phone photo of the rating plate can save you a second trip to the shop.
Good care doesn’t mean replacing parts on a calendar when they’re still sound. Inspect what the manufacturer says to inspect, replace parts that show damage or affect operation, and get help when a fault points inside the case.
FAQs About Welding Machine Replacement Parts
How do I know which welding machine replacement part I need?
Start with the symptom, then check the manual and machine label for the exact model and part number. Inspect accessible external components for damage or poor fit. A symptom can narrow the search, but it can’t confirm an internal electrical fault, so ask a qualified technician before opening the case.
Are welding machine replacement parts interchangeable between brands?
Some consumables may fit more than one brand, but physical fit doesn’t prove correct performance or safety. Compare the part’s dimensions, connection, material, and rating with the machine specifications. If the supplier can’t confirm compatibility for your model, choose a verified match rather than guessing.
How often should I replace welding machine consumables?
Replace consumables when inspection or welding performance shows wear, damage, blockage, or poor fit, and follow the schedule in the machine manual. Use and setup affect how quickly contact tips, nozzles, and liners wear. A fixed calendar interval won’t suit every welder or job.
Can I replace welding machine parts myself?
You can often handle user-serviceable external wear parts if the manual gives clear instructions and the machine is disconnected from power. Internal electrical repairs are different because stored voltage can remain hazardous. If a repair involves the power section, wiring, or circuit board, use a qualified technician.
Why does my welding machine keep overheating after I clean it?
A clear vent doesn’t rule out a stalled fan, blocked internal passage, control fault, or another cooling problem. Stop welding if the machine keeps overheating or shutting down, and arrange service. Don’t remove the case or reach into the cooling system unless the manufacturer specifically identifies that task as user-serviceable.
Make the Next Repair A Better Match
A good repair starts with a careful diagnosis, not a cart full of parts. Match the replacement to the welder’s exact model, check the part’s role in the process, and keep the repair within the limits the manual sets for user service.
My preference is to spend a few minutes confirming a part number before ordering, even when the old component looks familiar. That small pause can prevent a poor fit, repeat downtime, and the temptation to force a part that doesn’t belong.
Your clearest next step is to write down the machine’s model and the symptom you’re seeing, then compare both with the manual before buying anything. If the fault appears internal, stop there and call a qualified repair technician. A safe, correct repair beats a fast guess every time.