To replace a windshield washer pump on a Ford F-150, disconnect the battery if required by the service procedure, access the washer fluid reservoir, unplug the pump’s electrical connector, disconnect its fluid hose, remove the old pump, install a compatible replacement, and test the washers. The exact access method varies by model year and configuration.
In the United States, a functioning windshield washer system helps Ford F-150 drivers maintain visibility when road grime, dust, salt, and bugs accumulate on the windshield. If the washer jets stop spraying, the pump may have failed, but a blown fuse, damaged wiring, a clogged nozzle, a disconnected hose, or an empty reservoir can cause similar symptoms. Confirming the cause before replacing parts can prevent unnecessary repairs.
Many Ford F-150 models use an electric washer pump fitted to the washer fluid reservoir. Depending on the model year, engine configuration, and reservoir design, the pump may be accessible through the engine compartment or behind a wheel-well liner or other component. Check the service information for your specific truck before removing parts, and verify the replacement pump’s compatibility with the vehicle identification number (VIN).
How to Tell Whether Your F-150 Washer Pump Needs Replacement
A failed washer pump often produces no fluid spray when you activate the windshield washer control. You may hear nothing from the reservoir area, or the pump may make an unusual buzzing or grinding sound without delivering fluid. These symptoms are useful clues, but they do not prove the pump is defective.
Start with simple checks before disassembling the truck. Park on a level surface, switch off the ignition, check the washer fluid level, and inspect accessible hoses and connectors. If the reservoir is full and the system still fails, determine whether the pump receives electrical power when the washer command is activated.
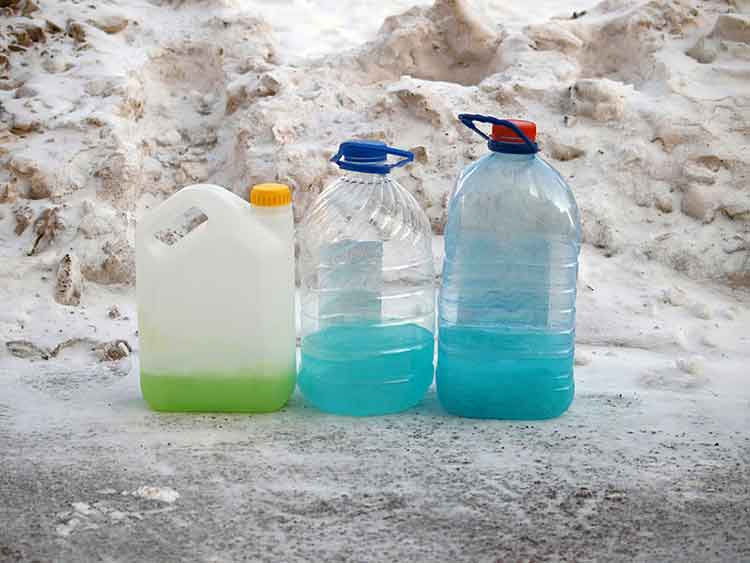
Source: storage.googleapis.com
No sound and no spray
Possible causes include a failed pump motor, a blown fuse, a loose connector, damaged wiring, a poor ground, or a problem with the washer control circuit.
Pump runs but no fluid appears
Check for a disconnected or split hose, a blocked nozzle, a frozen fluid supply, a clogged pump inlet screen if equipped, or an empty reservoir.
Fluid leaks near the reservoir
Inspect the pump seal, reservoir, hose connections, and nearby tubing. A leaking seal or cracked reservoir may need attention even if the motor still operates.
Weak or uneven spray
Blocked nozzles, pinched hoses, restricted fluid flow, or a worn pump may be responsible. Clear the obstruction and verify fluid delivery before deciding to replace the pump.
Check the Fuse and Electrical Connector First
Use the fuse diagram in the owner’s manual or the vehicle-specific service information to identify the correct washer-system fuse. Do not rely on a generic fuse number because assignments can change between model years and configurations. Replace a blown fuse only with one of the specified type and rating.
Inspect the pump connector for corrosion, moisture, loose terminals, or damaged wires. If you have a suitable multimeter and the correct wiring diagram, check for the specified voltage and ground while the washer command is active. Avoid shorting connector terminals, and do not assume a missing voltage reading means the pump itself is faulty.
A fuse blows again
Stop replacing fuses and investigate a possible short circuit, damaged wiring, or a seized electrical component.
Power reaches the pump but it does not run
If the power supply and ground are verified under the specified test conditions, a failed pump motor becomes more likely.
Tools and Supplies Needed to Replace an F-150 Washer Pump
Gather the replacement pump and basic hand tools before starting. The required tools depend on how the pump is mounted and which parts must be moved to access it. Some trucks allow relatively direct access, while others require removing a wheel-well liner or related trim.
Use the service procedure for your exact F-150 to identify any special fasteners, clips, seals, or access requirements. Keep replacement parts matched to the original configuration rather than choosing a pump solely because it is listed for an F-150.
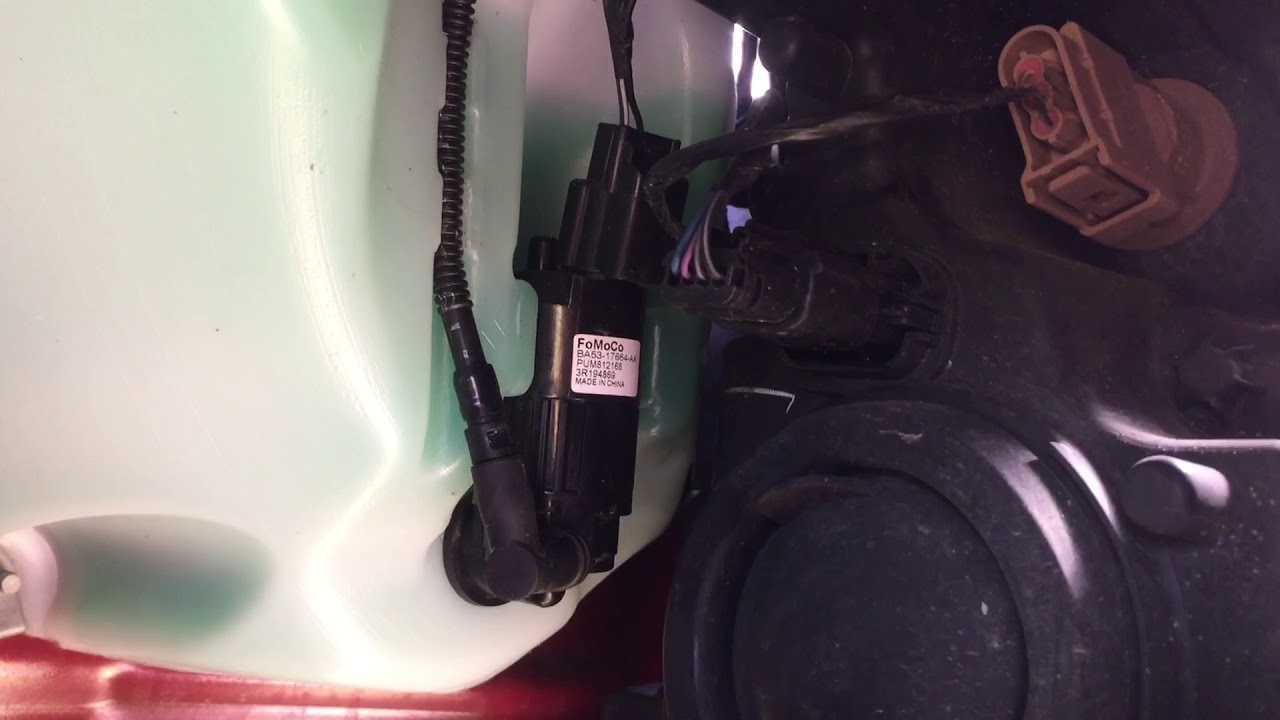
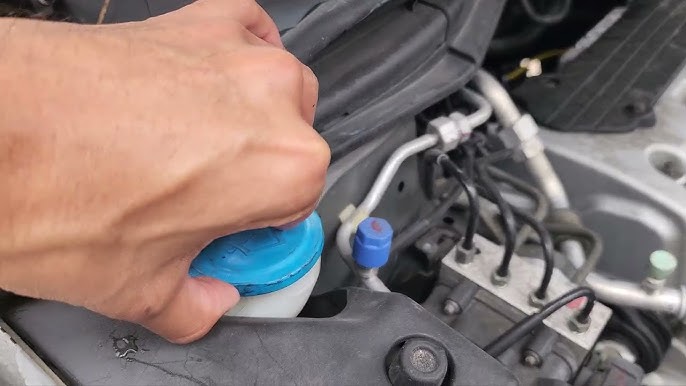
Source: www.youtube.com > PNW Car Mods & Maintenance
Replacement washer pump
Choose a pump compatible with the truck’s model year, VIN, connector, mounting arrangement, and washer-system configuration.
Hand tools
Prepare suitable sockets, screwdrivers, and trim or fastener tools for the components that need removal.
Fluid collection supplies
Use a drain pan, absorbent towels, and a suitable container to collect washer fluid and prevent spills.
Protective equipment
Wear safety glasses and chemical-resistant gloves as appropriate, and keep washer fluid away from children and pets.
Vehicle service information
Use the owner’s manual and model-specific repair information for fuse identification, access instructions, fastener requirements, and any battery-disconnection precautions.
Choose the Correct Replacement Pump
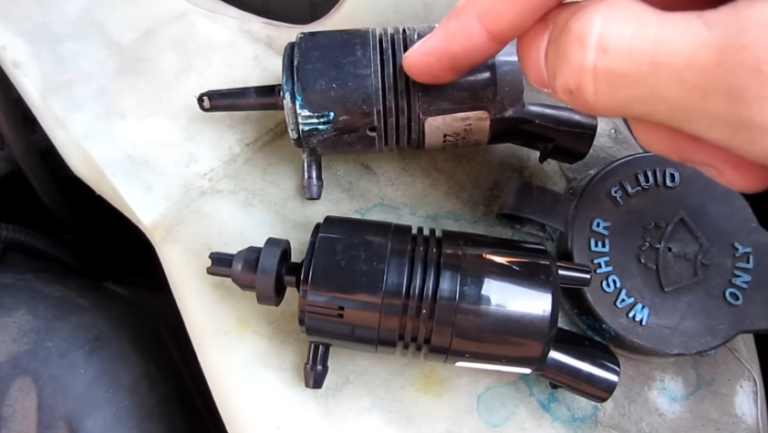
Before purchasing a pump, confirm the truck’s model year and equipment. A replacement may look similar to the original but have a different electrical connector, outlet arrangement, mounting shape, or application. If the truck has separate front and rear washer functions or other specialized equipment, verify that the replacement supports the required configuration.
Inspect the old pump and its seal after removal. Replace a damaged or hardened seal as appropriate, and use the correct replacement grommet if the service procedure calls for one. A poor seal can allow fluid to leak around the pump even when the new motor works correctly.
Verify fitment
Match the replacement using the VIN or a reliable vehicle-specific parts catalog.
Check included components
Confirm whether the replacement includes a new seal or grommet and obtain any separately required parts.
Step-by-Step: How to Replace a Windshield Washer Pump on an F-150
The general replacement process involves accessing the reservoir, disconnecting the pump, removing it from its mounting point, and fitting the new unit. The exact sequence is not identical for every F-150, so follow the vehicle-specific procedure whenever it differs from these general steps.
Work with the engine and ignition off unless a particular diagnostic test requires power. Let hot components cool, secure the vehicle on a stable surface, and never work underneath a truck supported only by a jack. If access requires lifting the truck, use appropriately rated jack stands at the specified support points.
Source: www.youtube.com > BVinAZ
Step 1: Park and prepare the truck
Park on level ground, engage the parking brake, switch off the ignition, and remove the key or keep the key fob away from the vehicle. Review the service procedure to determine whether the battery must be disconnected. If required, follow the specified battery-isolation procedure.
Step 2: Locate the washer fluid reservoir
Open the hood and identify the washer fluid reservoir by its cap and washer-system markings. Use the owner’s manual or repair information to locate the pump, which is commonly fitted low on the reservoir.
Step 3: Create the necessary access
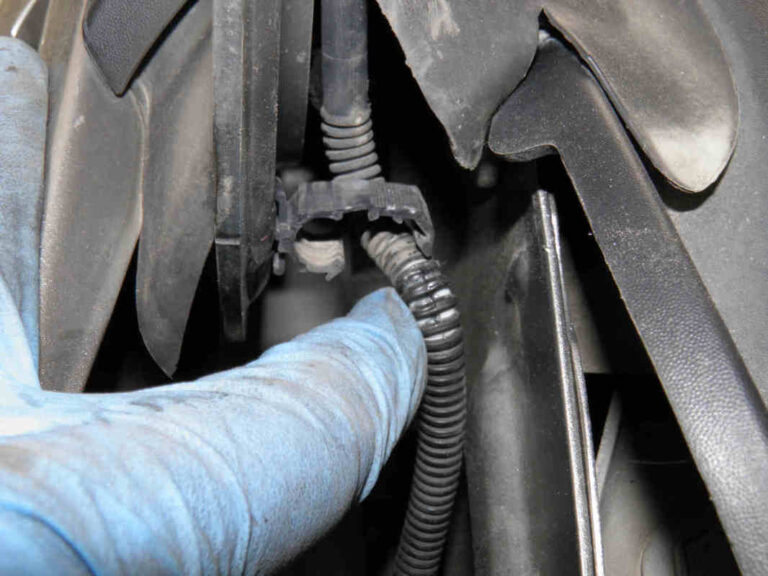
Determine whether the pump can be reached from the engine compartment or whether a wheel-well liner, splash shield, or other component must be removed. Remove only the parts required by the applicable procedure, and keep clips and fasteners organized.
Step 4: Collect the washer fluid
Place a drain pan beneath the reservoir area. If the reservoir must be drained, use a suitable method described in the service information. Be prepared for fluid to escape when the pump or its seal is removed.
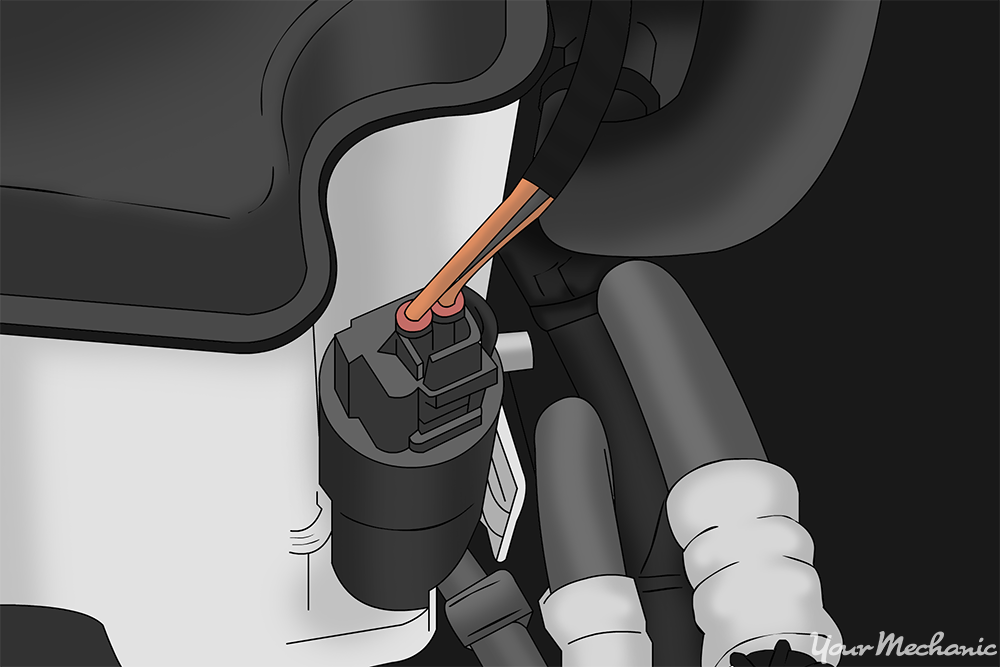
Step 5: Disconnect the electrical connector
Release the connector’s locking tab and pull the connector housing away from the pump. Do not pull on the wires, force the lock, or pry against fragile plastic components.
Step 6: Disconnect the washer hose
Note the hose routing and connection position before removing the hose from the pump outlet. Twist gently if needed to release a stuck hose, taking care not to tear the tubing or damage the fitting.
Step 7: Remove the old pump
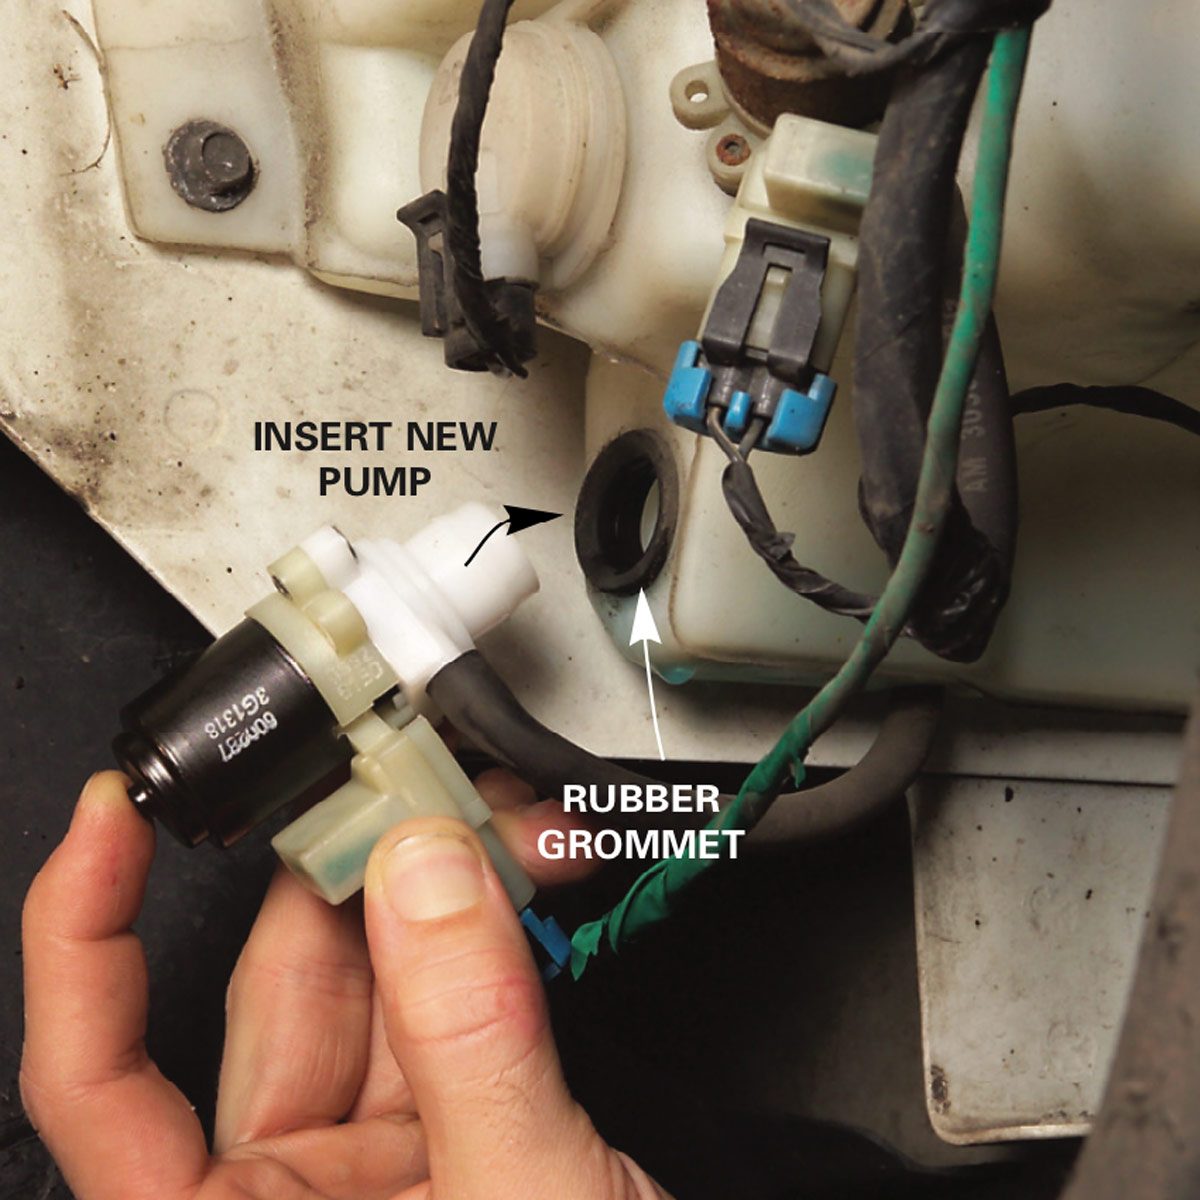
Release the pump from its reservoir mounting point using the method specified for the truck. Depending on the design, the pump may pull out of a rubber grommet or require a particular retaining arrangement. Avoid excessive force that could crack the reservoir.
Step 8: Inspect the opening and seal
Check the reservoir opening, pump inlet, and seal or grommet for debris, cracks, hardening, or damage. Clean the mounting area without allowing dirt to enter the reservoir. Replace damaged sealing components as necessary.
Step 9: Install the replacement pump
Fit the correct seal or grommet and seat the replacement pump squarely in its mounting position. Do not force a mismatched pump or use an unapproved sealant. Reconnect the washer hose and electrical connector, making sure each connection is secure.
Step 10: Reassemble and refill
Reinstall any removed shields, liners, and fasteners according to the service procedure. Reconnect the battery if it was disconnected, following the specified procedure. Fill the reservoir with washer fluid suitable for the expected temperatures.
Step 11: Test the washer system
With the vehicle safely reassembled, activate the washer control briefly and verify that the pump runs, fluid reaches the nozzles, and the spray pattern is normal. Inspect the reservoir and pump area for leaks.
Important Differences Between F-150 Model Years
The access route can vary considerably between F-150 generations. A procedure demonstrated on a 2009–2014 truck may not apply directly to a 2015 or newer model. Changes to the body, reservoir mounting, electrical connections, and nearby components can affect the work required.
Use photographs and videos for visual orientation, not as a substitute for confirming the model year and configuration. If the demonstration removes a component that your truck does not have, or shows a different pump connector, stop and consult the correct repair information before proceeding.
Older F-150 models
Confirm the reservoir and pump location and the method for releasing the pump from its mounting point.
2015 and newer F-150 models
Check the model-specific access procedure and connector arrangement before removing liners or other surrounding components.
Different equipment packages
Verify any additional washer functions or differences in the reservoir and pump assembly before ordering parts.
How to Test the New Washer Pump After Installation
A successful replacement means more than hearing the pump motor run. The system should deliver washer fluid to the intended nozzles, maintain secure electrical and hose connections, and remain leak-free. Test the system before considering the repair complete.
If the reservoir was emptied, allow the pump to draw fluid through the system with brief washer-control activations. Avoid running the pump continuously when it is not delivering fluid, because prolonged dry operation may damage the motor. Follow any activation limits specified by the vehicle manufacturer.
Source: YouTube > Doug Kite
Confirm pump operation
Listen for normal pump operation when the washer control is activated. If there is no sound, revisit the connector, fuse, power supply, ground, and control circuit.
Confirm fluid delivery
Check that fluid reaches the windshield and that the spray pattern is appropriate. If the motor runs but no fluid appears, inspect the hoses, nozzle openings, reservoir level, and pump inlet.
Check for leaks
Inspect the pump mounting point, reservoir, hose connection, and nearby surfaces for fresh fluid after testing.
Check the surrounding components
Make sure any removed liner or shield is secured and that wiring and hoses are routed away from moving parts, sharp edges, and hot surfaces.
What to Do If the New Pump Does Not Work
If the replacement pump does not operate, first verify that its connector is fully seated and that the replacement matches the original unit. A new component cannot correct a blown fuse, damaged wire, poor ground, or failed control circuit. Use the wiring diagram and appropriate test equipment to identify the fault.
If the pump runs but fluid still does not reach the windshield, check the fluid level, hose connections, nozzle restrictions, and whether the pump is correctly seated and drawing fluid. If the reservoir leaks around the pump, inspect the seal and mounting opening. Do not keep operating a pump that is running dry or forcing fluid through a suspected blockage.
Pump is silent
Check the specified fuse, connector terminals, power supply, ground, and washer command circuit.
Pump runs without spraying
Inspect for disconnected hoses, blocked nozzles, a restricted inlet, an empty reservoir, or frozen washer fluid.
Fluid leaks after installation
Recheck pump seating, the grommet or seal, the hose connection, and the reservoir for damage.
Fuse repeatedly fails
Stop testing with replacement fuses and investigate a short circuit or another electrical fault.
Common Mistakes to Avoid During Washer Pump Replacement
Most preventable problems arise from replacing the pump without confirming the fault, using an incompatible part, or damaging the reservoir and connector during removal. Careful diagnosis and controlled disassembly reduce the chance of repeating the repair.
Washer fluid can irritate eyes and may contain ingredients that are harmful if swallowed. Collect spills promptly, avoid contact with paint when possible, and follow the product label for handling and disposal. Never use your mouth to siphon washer fluid.
Source: The Family Handyman
Replacing the pump without diagnosis
A blocked nozzle, broken hose, blown fuse, or wiring fault can produce symptoms similar to a failed pump. Check these possibilities first.
Forcing the pump out
Excessive leverage can crack the reservoir or break a mounting feature. Identify the correct release method before applying force.
Reusing a damaged seal
A worn or torn grommet can cause leaks even when the replacement pump is functional. Inspect the seal and replace it if needed.
Installing the wrong pump
A pump that looks similar may have incompatible fittings or electrical connections. Verify fitment for the exact vehicle.
Ignoring a recurring fuse failure
A repeatedly blown fuse indicates an unresolved electrical problem. Do not install a higher-rated fuse or bypass the protection circuit.
Skipping the final leak test
A poorly seated pump or loose hose may leak only after the reservoir contains fluid. Check the repair area before returning the truck to service.
When Professional Repair Is the Better Option
Consider professional assistance if access requires extensive disassembly, the reservoir is cracked, the connector is damaged, or electrical testing reveals an unresolved circuit fault. A technician can also confirm whether the pump, control system, or another washer-system component is responsible.
Do not drive with a washer system that leaves the windshield difficult to see through in road conditions where spray is needed. If visibility is inadequate, clean the windshield safely before driving and arrange repair before continuing in conditions that require the washers.
Electrical faults beyond the pump
Professional diagnosis is appropriate when power or ground is missing and the wiring or control-circuit fault cannot be identified safely.
Damaged reservoir or mounting point
A cracked reservoir or broken mounting feature may require additional parts or more extensive access than a simple pump replacement.
How Much Does It Cost to Replace an F-150 Windshield Washer Pump?
The cost depends on the specific F-150, the replacement pump, local labor rates, and how difficult the pump is to access. A straightforward pump replacement may cost less than a repair that also requires a reservoir, wiring connector, hose, or damaged mounting hardware.
Because prices and labor times vary by model year and location, obtain a quote based on the truck’s VIN rather than relying on one universal estimate. Ask whether the quote includes diagnosis, the pump, any required seal or grommet, labor, fluid, and applicable taxes.
Source: YouTube > brmcbratney
DIY replacement
Your main expenses are the compatible pump, any required sealing components, washer fluid, and tools you do not already own.
Professional replacement
A repair shop generally charges for diagnosis and labor in addition to parts. Access requirements can affect the final labor charge.
Additional damage
A cracked reservoir, corroded connector, damaged hose, or electrical fault can increase the total repair cost.
How Long Does the Replacement Take?
A simple replacement can be a relatively short repair for someone familiar with the truck, but access can make the job substantially longer. Removing a wheel-well liner or other surrounding components adds time, as can diagnosing an electrical problem before replacing the pump.
Allow additional time for draining and refilling the reservoir, inspecting the seal, reinstalling removed parts, and checking the spray pattern and leaks. If the pump is difficult to reach or the correct procedure is uncertain, use the model-specific service instructions instead of rushing.
Direct access
The job is generally simpler when the pump can be reached without extensive component removal.
Restricted access
Removing shields or liners can increase labor and create additional fasteners and clips to manage.
Unconfirmed diagnosis
Electrical testing or tracing a fluid leak may take longer than the actual pump installation.
Frequently Asked Questions
Q
Where is the windshield washer pump located on a Ford F-150?
The windshield washer pump is generally mounted low on or near the washer fluid reservoir. Its exact position and the best access route depend on the F-150’s model year and configuration. Check the owner’s manual or vehicle-specific repair information before removing components.
Q
Can I replace an F-150 washer pump without removing the reservoir?
Sometimes. If the pump and its retaining arrangement are accessible, it may be possible to remove the pump without taking out the entire reservoir. Other configurations may require additional access or reservoir removal. Follow the procedure for the exact truck rather than assuming the same method works across all model years.
Q
Why does my F-150 washer pump make noise but not spray fluid?
A running pump with no spray may indicate an empty reservoir, disconnected or damaged hose, blocked nozzle, frozen fluid, restricted pump inlet, or a worn pump that cannot move enough fluid. Check the fluid level and inspect the hoses and nozzles before replacing the pump.
Q
Do I need to disconnect the battery to replace the washer pump?
Follow the battery-isolation instructions for your specific F-150. Some procedures may not require battery disconnection for a straightforward pump replacement, while the service information may call for it under particular conditions. Switch off the ignition and avoid shorting the electrical connector regardless of the procedure.
Q
How do I know if the washer pump or fuse is bad?
Check the specified fuse and inspect the pump connector first. If the fuse is intact, use the correct wiring diagram and a suitable meter to verify the electrical supply and ground under the required test conditions. If power and ground are present but the pump does not run, the pump is a stronger suspect. A missing supply or ground requires further circuit diagnosis.
Q
Can I drive my F-150 with a broken windshield washer pump?
A failed washer pump can make it difficult to maintain a clear windshield when road grime, salt, or bugs accumulate. Whether driving is appropriate depends on visibility and the conditions. Do not continue driving when you cannot maintain a clear view of the road. Repair the system before driving in conditions where washer fluid is needed to maintain safe visibility.
Q
What washer fluid should I use after replacing the pump?
Use automotive windshield washer fluid suitable for the temperatures and conditions in which the truck operates. In areas with freezing winter weather, choose fluid rated for the expected temperatures. Do not substitute engine coolant or other automotive fluids for windshield washer fluid.
✦ Wrapping Up
Conclusion
Replacing a windshield washer pump on a Ford F-150 involves confirming the fault, accessing the reservoir, disconnecting the electrical connector and hose, removing the old pump, fitting a compatible replacement, and testing the system for proper spray and leaks. The exact procedure depends on the truck’s model year and configuration, so vehicle-specific service information is essential.
Before buying a pump, rule out common causes such as a blown fuse, blocked nozzle, damaged hose, low fluid level, or wiring problem. After installation, verify that the pump operates correctly, the washer fluid reaches the windshield, and all connections remain dry. Seek professional help if the diagnosis points to a more complex electrical fault or damaged reservoir.
💡 Key Takeaway
Identify your F-150’s model year and verify the washer pump’s fitment, location, and removal procedure before starting. Diagnose the electrical and fluid-delivery system first, then replace the pump and confirm normal spray operation and leak-free connections.
Learn how to wash inside car windshield glass without streaks using microfiber towels, a suitable glass cleaner, and simple steps for a clear driving view.