Welding Machine Gas Solenoid Valves: Purpose and Symptoms
A welding machine gas solenoid valve opens and closes the path that carries shielding gas to the torch. If the valve sticks, loses power, or can’t get gas from the cylinder, your weld may turn porous or the torch may deliver no gas at all.
Has your weld suddenly started looking pitted, even though the wire and settings haven’t changed? Or do you hear the machine click when you pull the trigger but get no gas at the nozzle?
I once chased a rough MIG weld by adjusting the wire speed and voltage, only to realize the gas wasn’t reaching the torch consistently. I’d skipped the simple flow check and spent time redoing work; that’s a common mistake, not a dumb one.
I wrote this for anyone trying to sort out a gas-flow problem without guessing at machine parts. You’ll learn what the valve does, how to check the gas path safely, and when a replacement makes sense.
Get the diagnosis right, and you can avoid wasting wire, shielding gas, and a clean piece of metal. Miss the actual cause, and a good machine can still leave you with porous welds, a frustrating repair, or an electrical hazard.
This should take about 9 minutes to read. By the end, you’ll know how to:
- Tell a valve problem from a cylinder, hose, or regulator problem.
- Check whether gas flow starts and stops with the trigger.
- Spot when a valve or another part needs professional service.
Welding Machine Gas Solenoid Valve: What It Does and How to Check It
A welding machine gas solenoid valve controls shielding-gas flow by opening when the machine calls for gas and closing when it doesn’t. For a basic check, inspect the gas supply first, then confirm that gas flows at the torch when the trigger is pressed and stops when you release it.
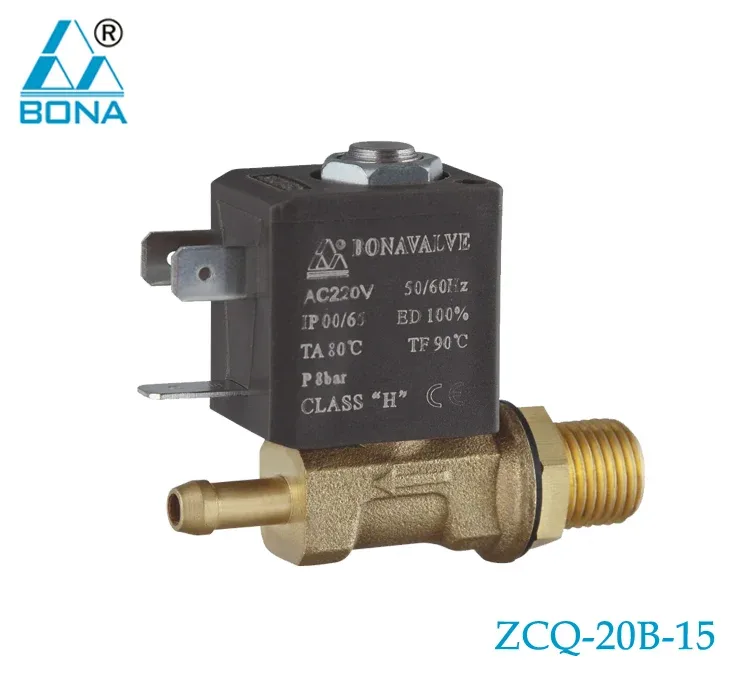
A solenoid valve is an electrically operated valve: a coil creates a magnetic pull that moves an internal part to open or close the gas passage. In many MIG welders, the machine switches the valve when you press the gun trigger, and the valve opens before or during welding.
Some welders also provide a short pre-flow or post-flow period. Pre-flow starts shielding the weld area before the arc; post-flow continues shielding after the arc stops. The timing depends on the machine and its settings.
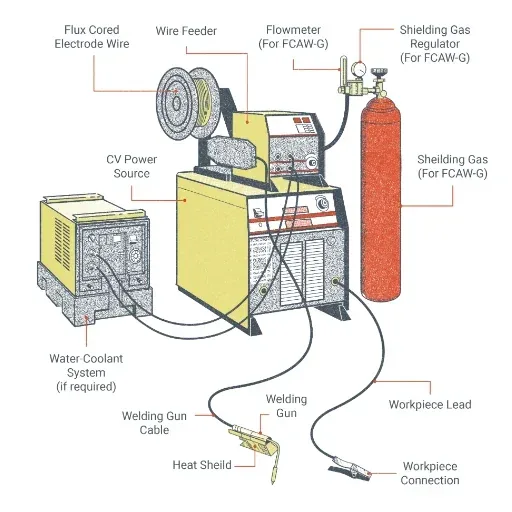
The valve sits inside the machine or in the gas path, depending on the design. Gas travels from the cylinder through a regulator and hose, then through the valve and torch to the nozzle. A blocked nozzle or leaking connection can cause the same weak shielding as a valve fault.
A straightforward check works like this:
- Check the cylinder and regulator. Confirm the cylinder valve is open and the regulator is set according to the welder’s manual and the job.
- Check the hose and connections. Look for kinks, loose fittings, cracked hose, or signs of damage.
- Listen and feel for flow. With the machine set up as directed, press the trigger and listen for the valve click; check gas flow at the nozzle using the machine’s prescribed method.
- Release the trigger. Gas should stop after any programmed post-flow period.
- Compare the result with the machine manual. A click alone doesn’t prove that gas is passing, and no click doesn’t identify which electrical part failed.
If your welding machine uses a flowmeter, read it while gas is flowing, not while the valve is closed. The right flow depends on the process, gas, nozzle, draft, and machine guidance; more flow isn’t automatically better, since excess flow can stir air into the shielding area.
Pro Tip: If the gas seems weak, check for wind or a fan blowing across the weld before turning the flow up. A draft can carry shielding gas away even when the valve and regulator work normally.
Welding Machine Gas Solenoid Valve Symptoms and Checks
A faulty valve may cause no gas, uneven flow, or gas that keeps flowing after the trigger is released. The same symptoms can come from the cylinder, regulator, hose, torch, or electrical controls, so check the full path before replacing anything.
| Symptom | Possible cause | First check |
|---|---|---|
| No gas at the torch | Closed cylinder, empty supply, blocked hose, valve fault | Confirm supply and check for kinks |
| Weak or uneven gas flow | Low or poorly set flow, leak, blockage, draft | Inspect fittings and nozzle |
| Gas continues after trigger release | Valve stuck open, control fault, or post-flow setting | Check the programmed post-flow and manual |
| No valve click | Trigger circuit, wiring, control board, or valve coil | Stop before opening the machine |
| Porous welds despite gas flow | Draft, contaminated metal, poor nozzle coverage | Check the work area and nozzle |
Does the machine click but still produce a porous weld? A click only tells you that something may be moving or switching; it doesn’t prove the gas reaches the work area at the right rate. Look for a blocked nozzle, loose fittings, drafts, and dirty base metal before blaming the valve.
Gas that continues after you release the trigger deserves a prompt check. A machine may have a normal post-flow setting, but gas that keeps running well beyond the setting can waste shielding gas and point to a valve that isn’t closing or a control problem.
For leaks, shut off the cylinder valve before inspecting fittings. Use an appropriate leak-detection solution if the equipment instructions allow it, and never use a flame to look for escaping gas. If you smell gas or suspect a significant leak, stop welding, move away from ignition sources, and follow the cylinder supplier’s safety instructions.
Important Tip: Don’t open a powered welder to test the valve coil or wiring. Internal circuits can hold hazardous voltage, and live electrical checks belong to a qualified repair person using the right procedure.
I once focused on a machine’s gas hardware while the real trouble was a poor connection farther along the supply path. The useful lesson was simple: trace the gas from cylinder to nozzle before buying parts.
If the welder feeds wire poorly, don’t assume the gas valve caused every bad weld. MIG welder drive rolls affect how evenly wire reaches the arc, while shielding gas protects the weld area; each part can create a different symptom.
Replacing or Maintaining a Welding Machine Gas Solenoid Valve
Replace a gas solenoid valve only after basic supply and flow checks point to the valve, and use a part approved for the specific welder. If the machine needs internal electrical diagnosis or you can’t confirm the correct part, a qualified technician is the safer choice.
Before any service involving the machine’s interior, turn it off, unplug it, and follow the manufacturer’s instructions. Shut off the cylinder valve before disconnecting gas fittings, and don’t loosen a pressurized regulator or hose.
- Identify the machine and valve. Use the welder’s model information and parts diagram to confirm the valve’s correct replacement and connection type.
- Isolate power and gas. Unplug the welder, close the cylinder valve, and relieve pressure from the gas line as the manual directs.
- Document the existing connections. A clear photo can help you put the gas lines and electrical connectors back in their original positions.
- Replace only as directed. Avoid bending tubing, forcing fittings, or altering the valve’s wiring.
- Reconnect and test for leaks. Restore gas supply according to the equipment instructions, check the connections with an approved method, then confirm the torch flow and shutoff behavior.
A valve that looks similar may have different electrical or gas connections, so don’t choose by appearance alone. A compatible part needs to match the welder’s requirements; welding machine replacement parts are best selected by model and the manufacturer’s parts information.
Routine care is mostly about keeping the gas path in good shape. Check hose condition, fittings, nozzle cleanliness, and cylinder handling during normal setup. Don’t pour oil or unapproved lubricant into a gas valve, and don’t try to free a stuck valve by hitting the machine.
A welder that overheats or shuts down may have a separate airflow problem. A welder cooling fan helps move heat out of the machine, but fan trouble doesn’t explain a lack of shielding gas at the torch.
- The valve controls gas flow, but weak shielding can come from several parts of the gas path.
- A click doesn’t confirm gas delivery; check flow at the torch as the manual directs.
- Shut off gas and unplug the welder before service, and leave internal electrical testing to a qualified person.
FAQs About Welding Machine Gas Solenoid Valve
What does a welding machine gas solenoid valve do?
A welding machine gas solenoid valve opens and closes the shielding-gas passage in response to an electrical signal from the welder. On many MIG machines, pressing the gun trigger starts gas flow before welding, while releasing the trigger ends flow after any programmed post-flow.
Why does my MIG welder click but have no gas?
A clicking MIG welder may have a working control signal but a blocked or empty gas supply, a kinked hose, a stuck valve, or another restriction. Check the cylinder, regulator, connections, and torch path first. A click by itself can’t confirm that gas reaches the nozzle.
Should gas flow from the torch when the trigger is released?
Gas should stop after the welder’s programmed post-flow period, if the machine has one. A brief flow after you release the trigger can be normal; continuous flow may point to a valve that isn’t closing or a control issue. Check the manual before changing settings or replacing parts.
Can a bad gas solenoid valve cause porous welds?
Yes, a faulty gas solenoid valve can reduce or interrupt shielding gas and contribute to porosity. Porosity can also come from drafts, dirty metal, a blocked nozzle, or incorrect flow. Check those causes before replacing the valve, since they can produce similar weld defects.
Can I replace a welding machine gas solenoid valve myself?
You may be able to replace the valve if the welder’s manual gives a clear procedure and you can confirm the correct part. Unplug the machine, shut off the cylinder, and relieve gas-line pressure as directed. Leave live electrical tests and unclear repairs to a qualified technician.
Make the Gas Check Before Replacing Parts
A welding machine gas solenoid valve is one link in a system that starts at the cylinder and ends at the torch nozzle. When gas flow goes wrong, checking the whole path first saves time and helps prevent a good valve from getting blamed for a bad fitting or a blocked nozzle.
My practical preference is to begin with the supply, hose, and torch, then move to internal parts only when the checks point there. That approach is calmer, cheaper, and safer than opening the welder on a hunch. Your clearest next step is to follow the machine manual’s gas-flow check, then stop and get qualified service if the fault appears electrical or internal.